Windows Server 2025: DHCP, DNS, and NAT Configuration
Overview
If you're building a self-contained Windows Server environment with one domain controller that handles
Active Directory (AD), DHCP, DNS, NAT, and Group Policy, this guide walks you through every step.
Whether you're setting up a test domain or a lightweight production backbone, this configuration gives
you centralized identity, network services, and policy control — all from a single box.
What This Guide Covers
- Installing and configuring Active Directory Domain Services (AD DS)
- Setting up DNS for internal name resolution and forwarding
- Deploying DHCP to assign IPs and network settings to clients
- Enabling NAT to route internet access to internal devices
- Verifying connectivity and client integration
Prerequisites
- A hypervisor (e.g., Proxmox, Hyper-V, VMware)
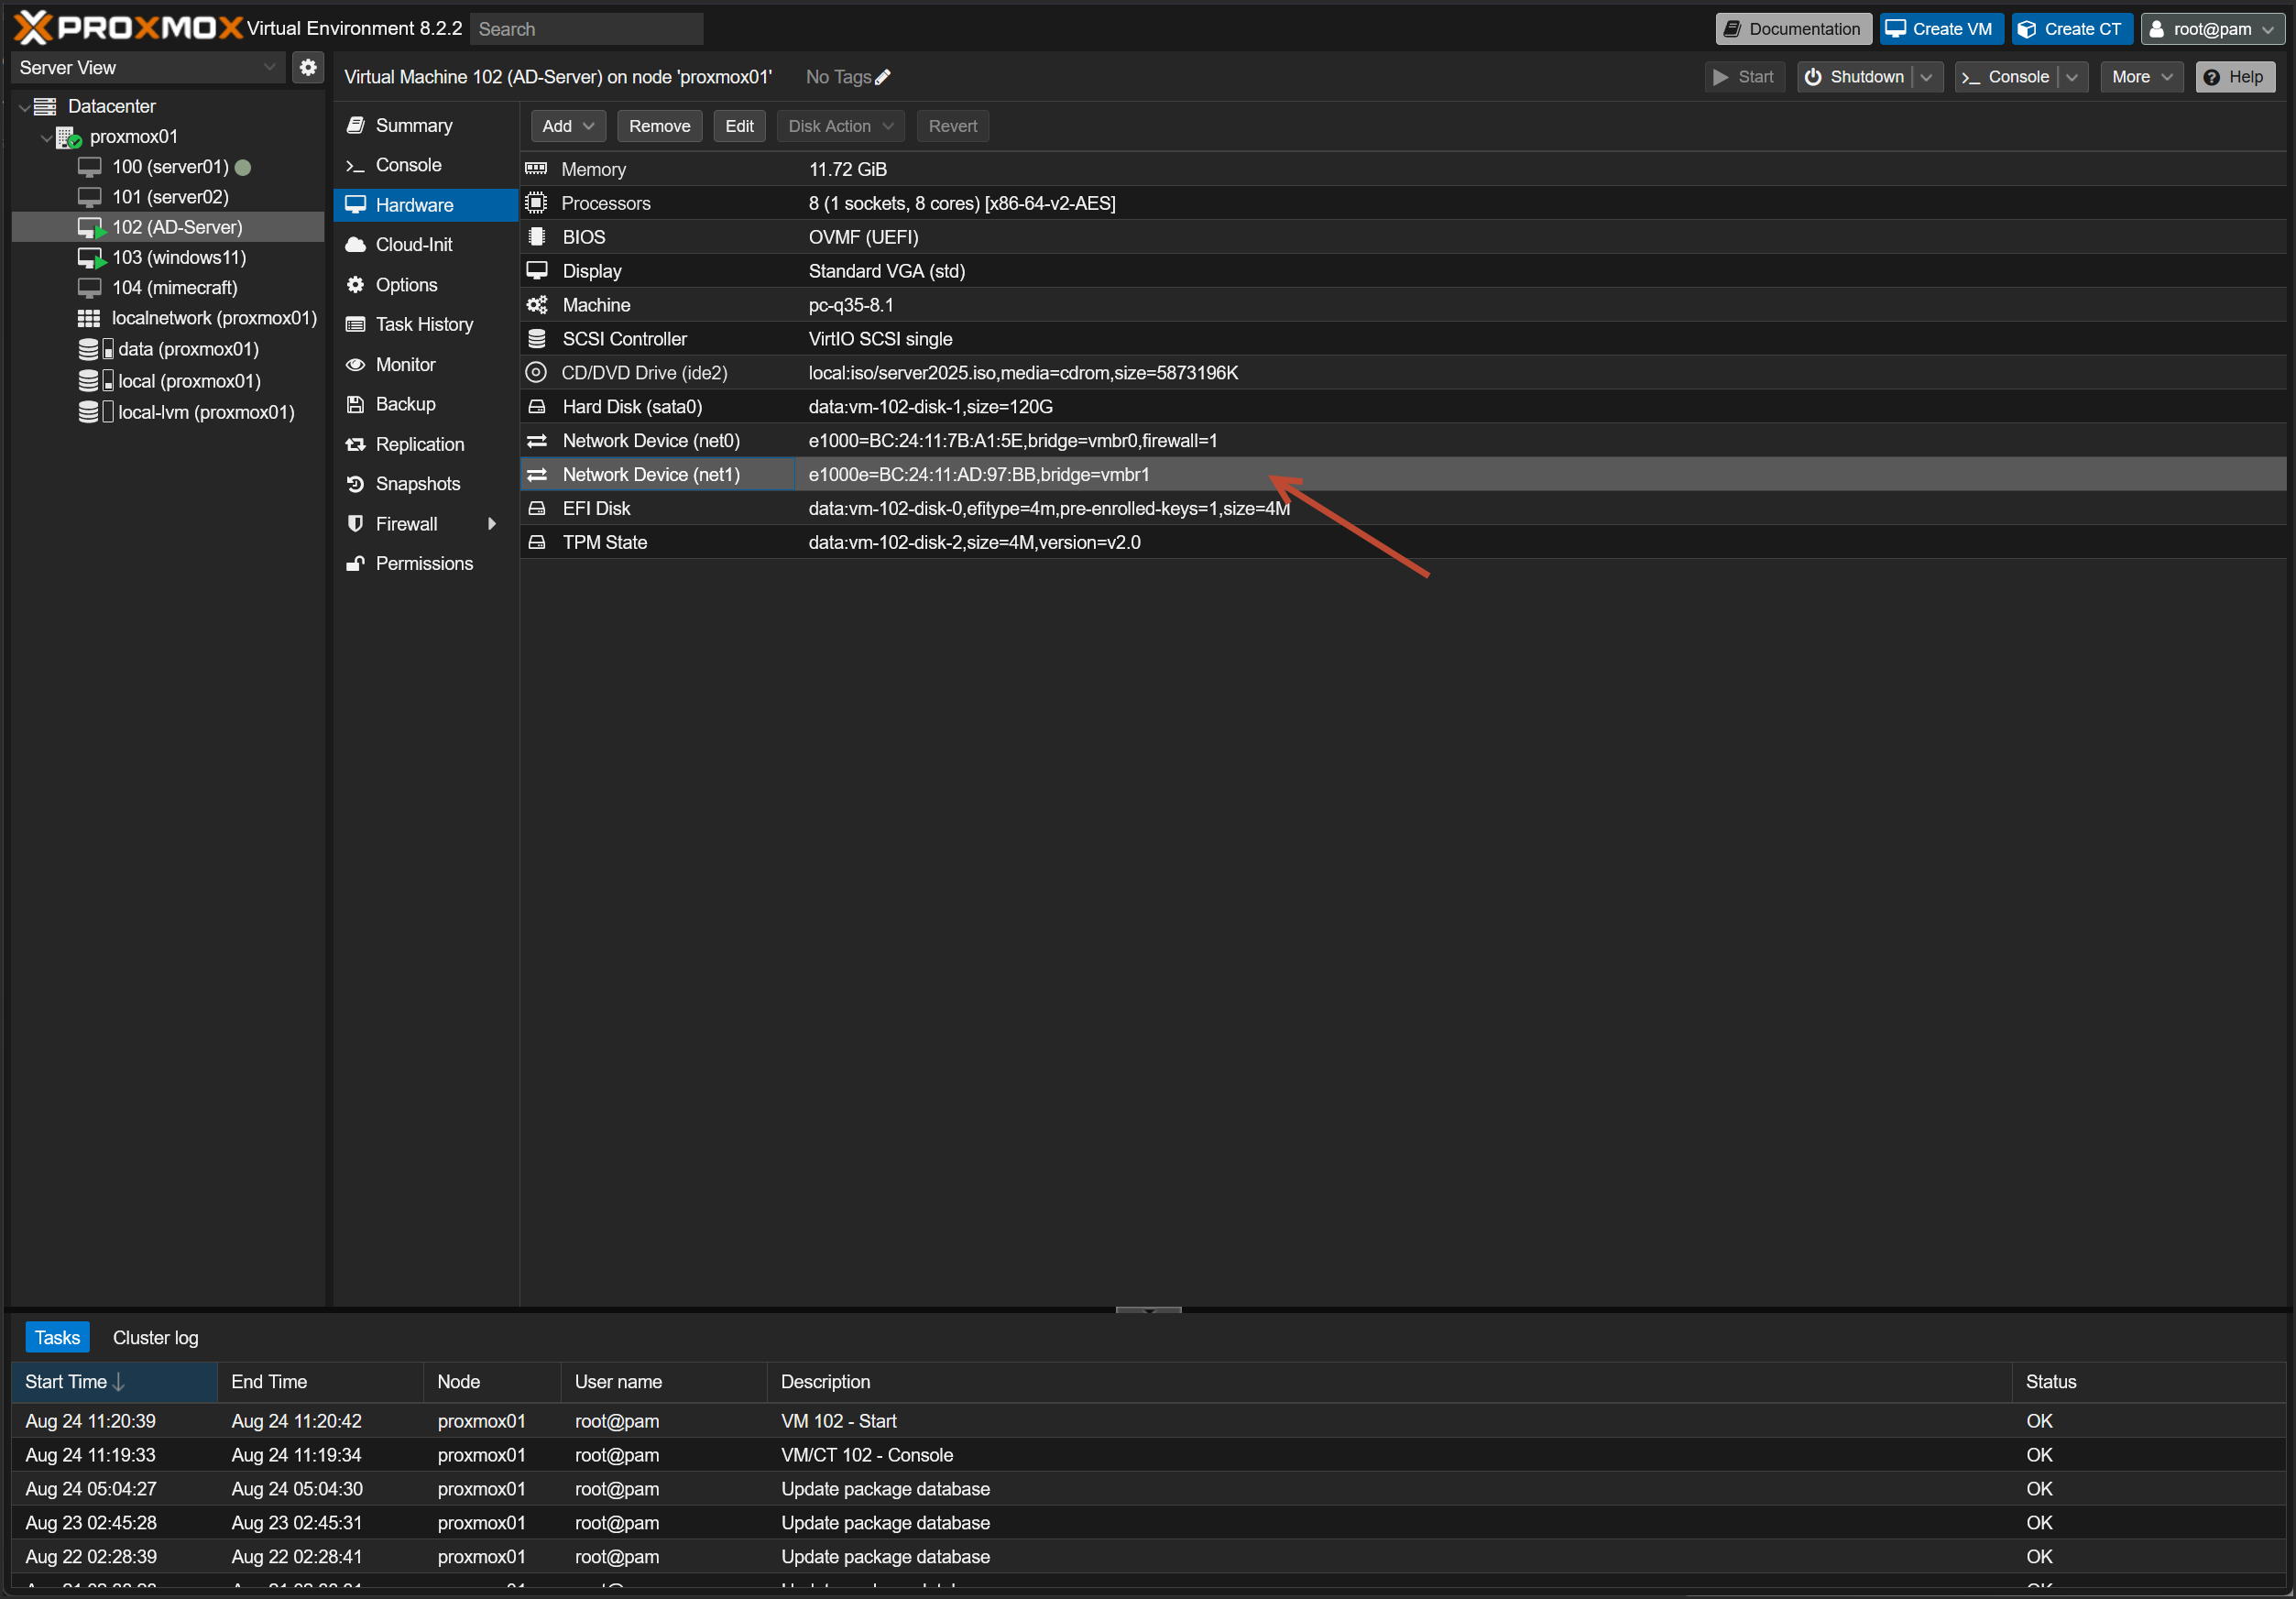
- Windows Server 2025 installed with two NICs:
- NIC 1: Internet-facing
- NIC 2: Internal LAN
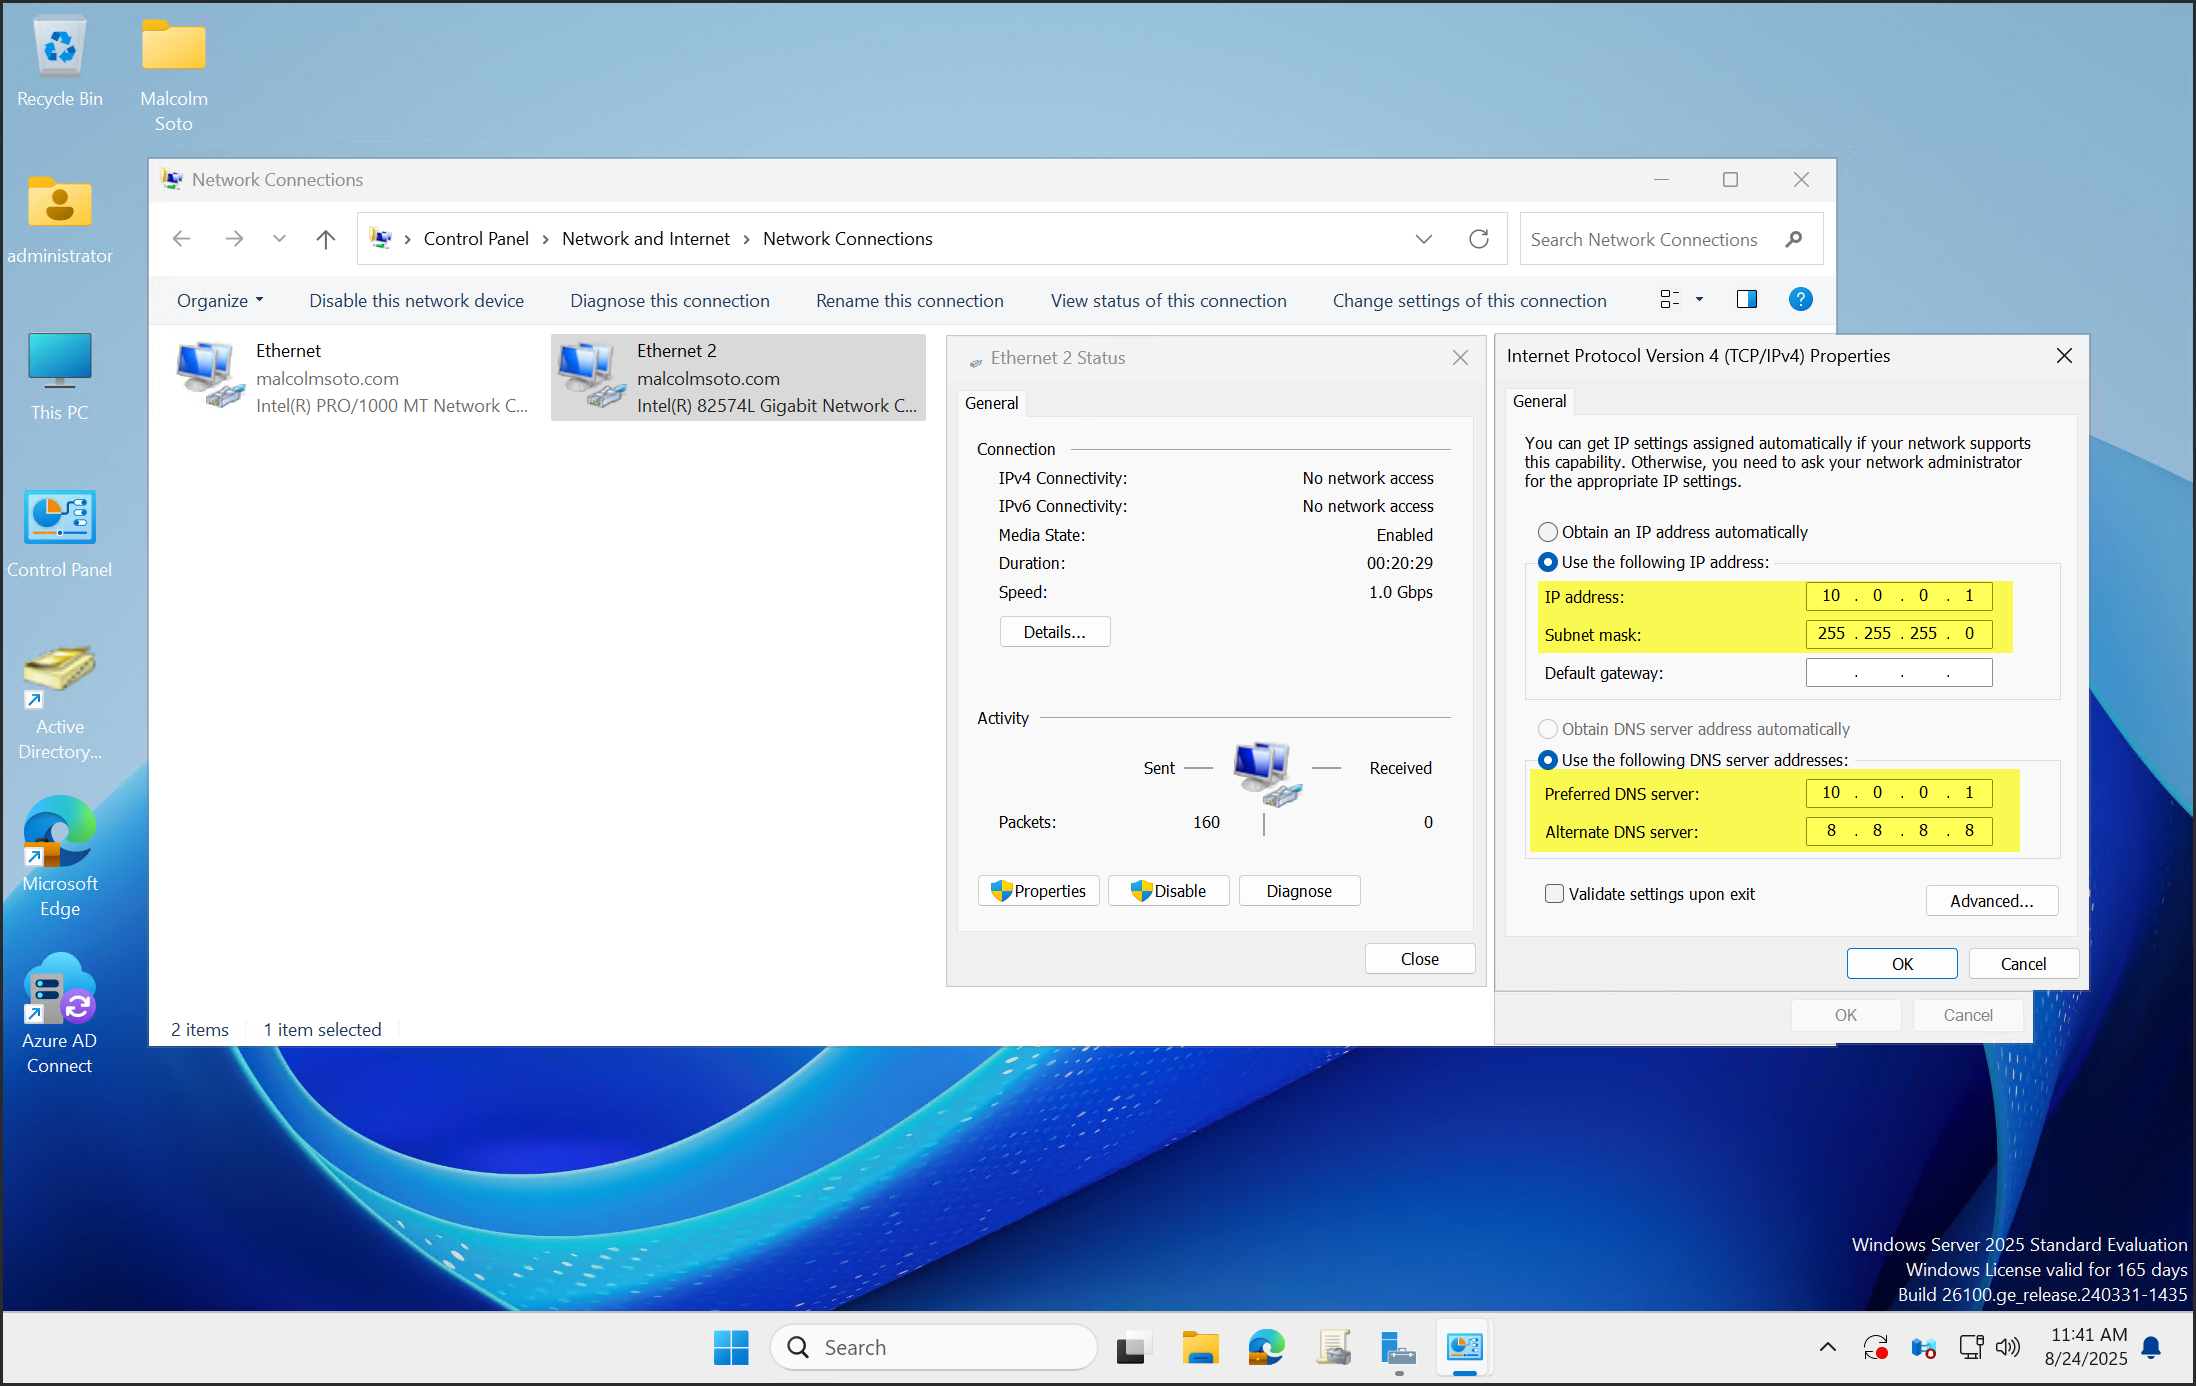
- Static IPs assigned to both NICs
- Basic understanding of Windows Server roles and networking
Let's Get Started!
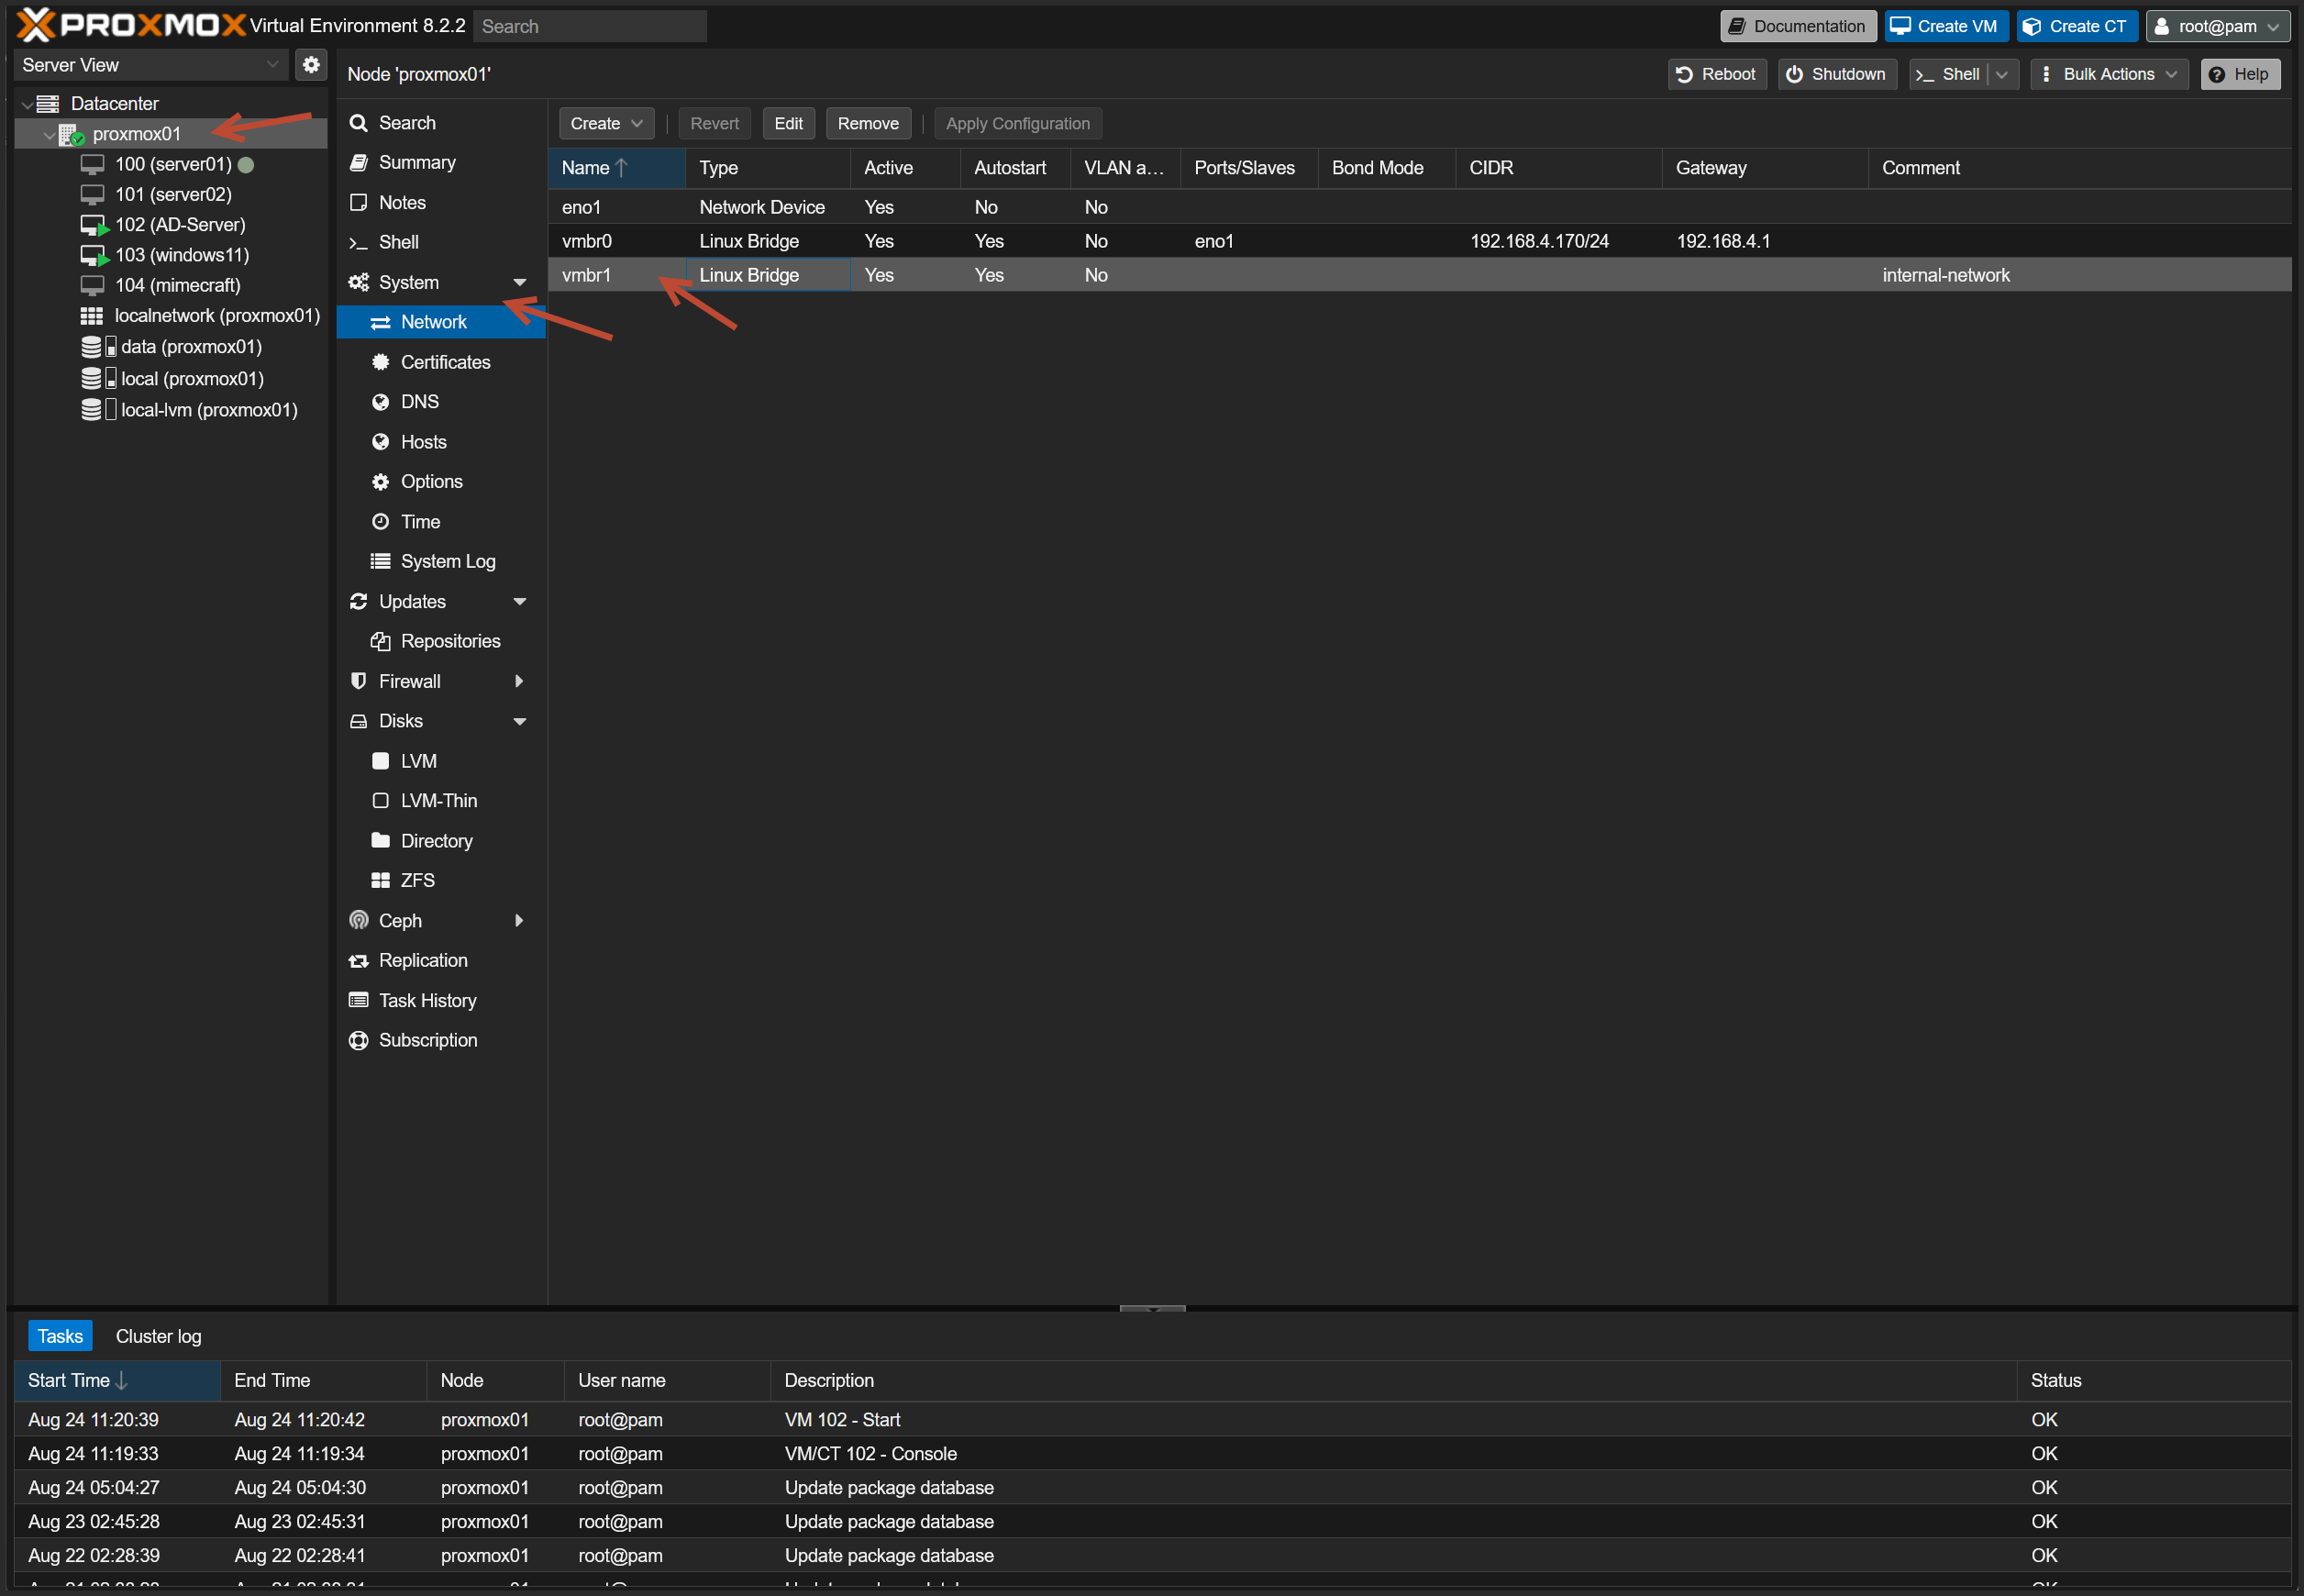
Create a Linux Bridge
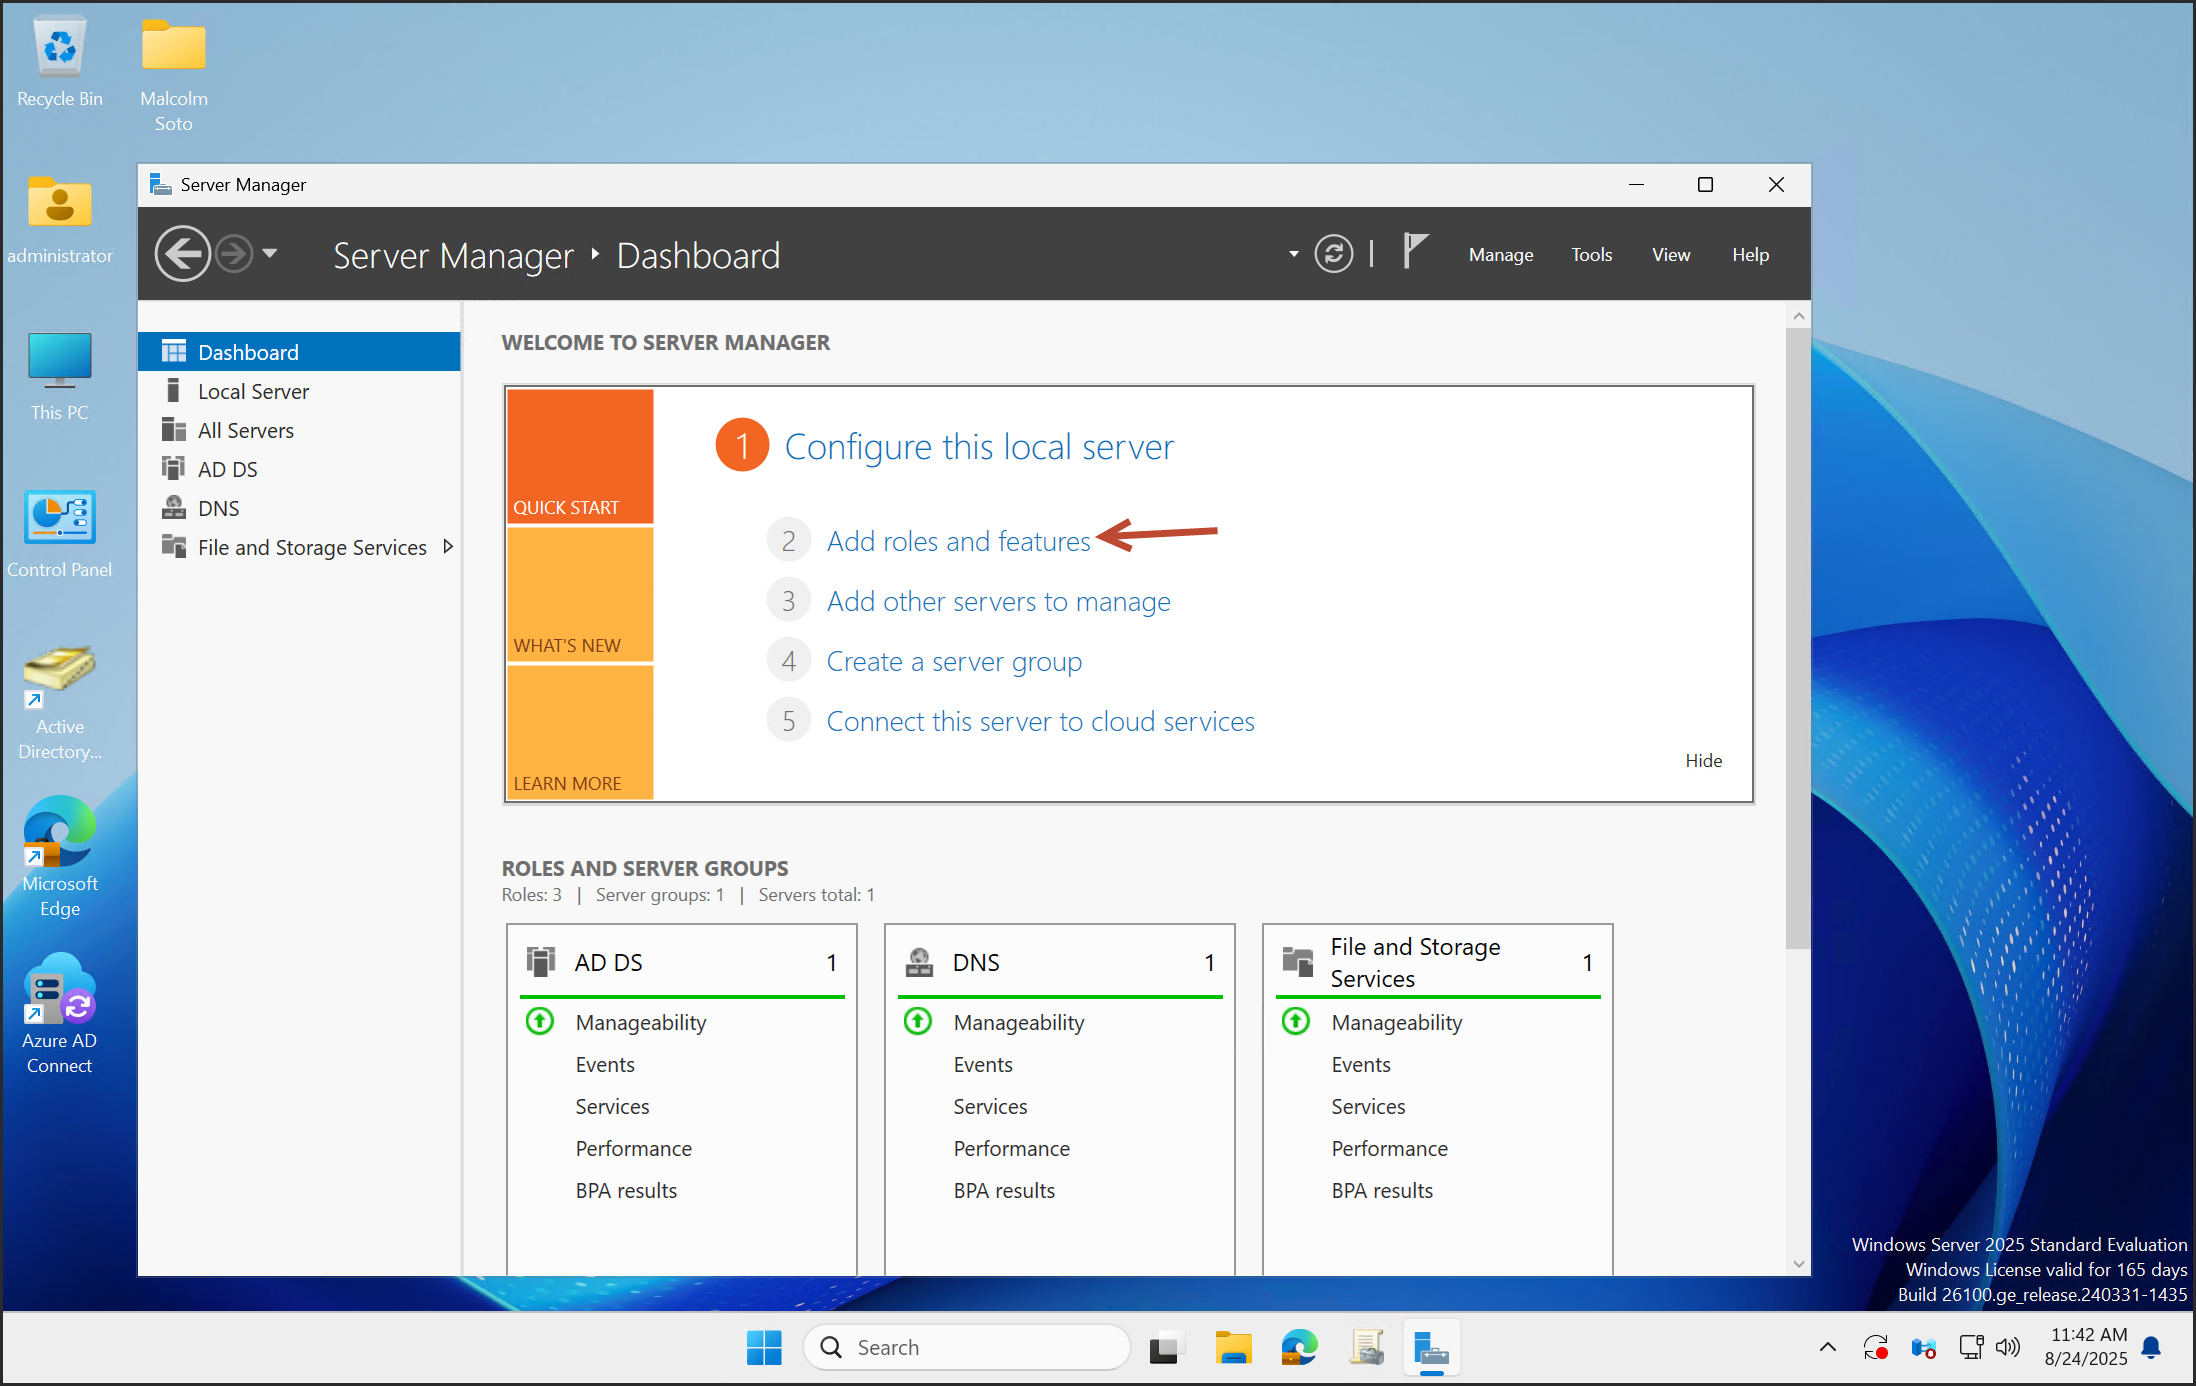
Install Roles and Features
Click Add roles and features in Server Manager.
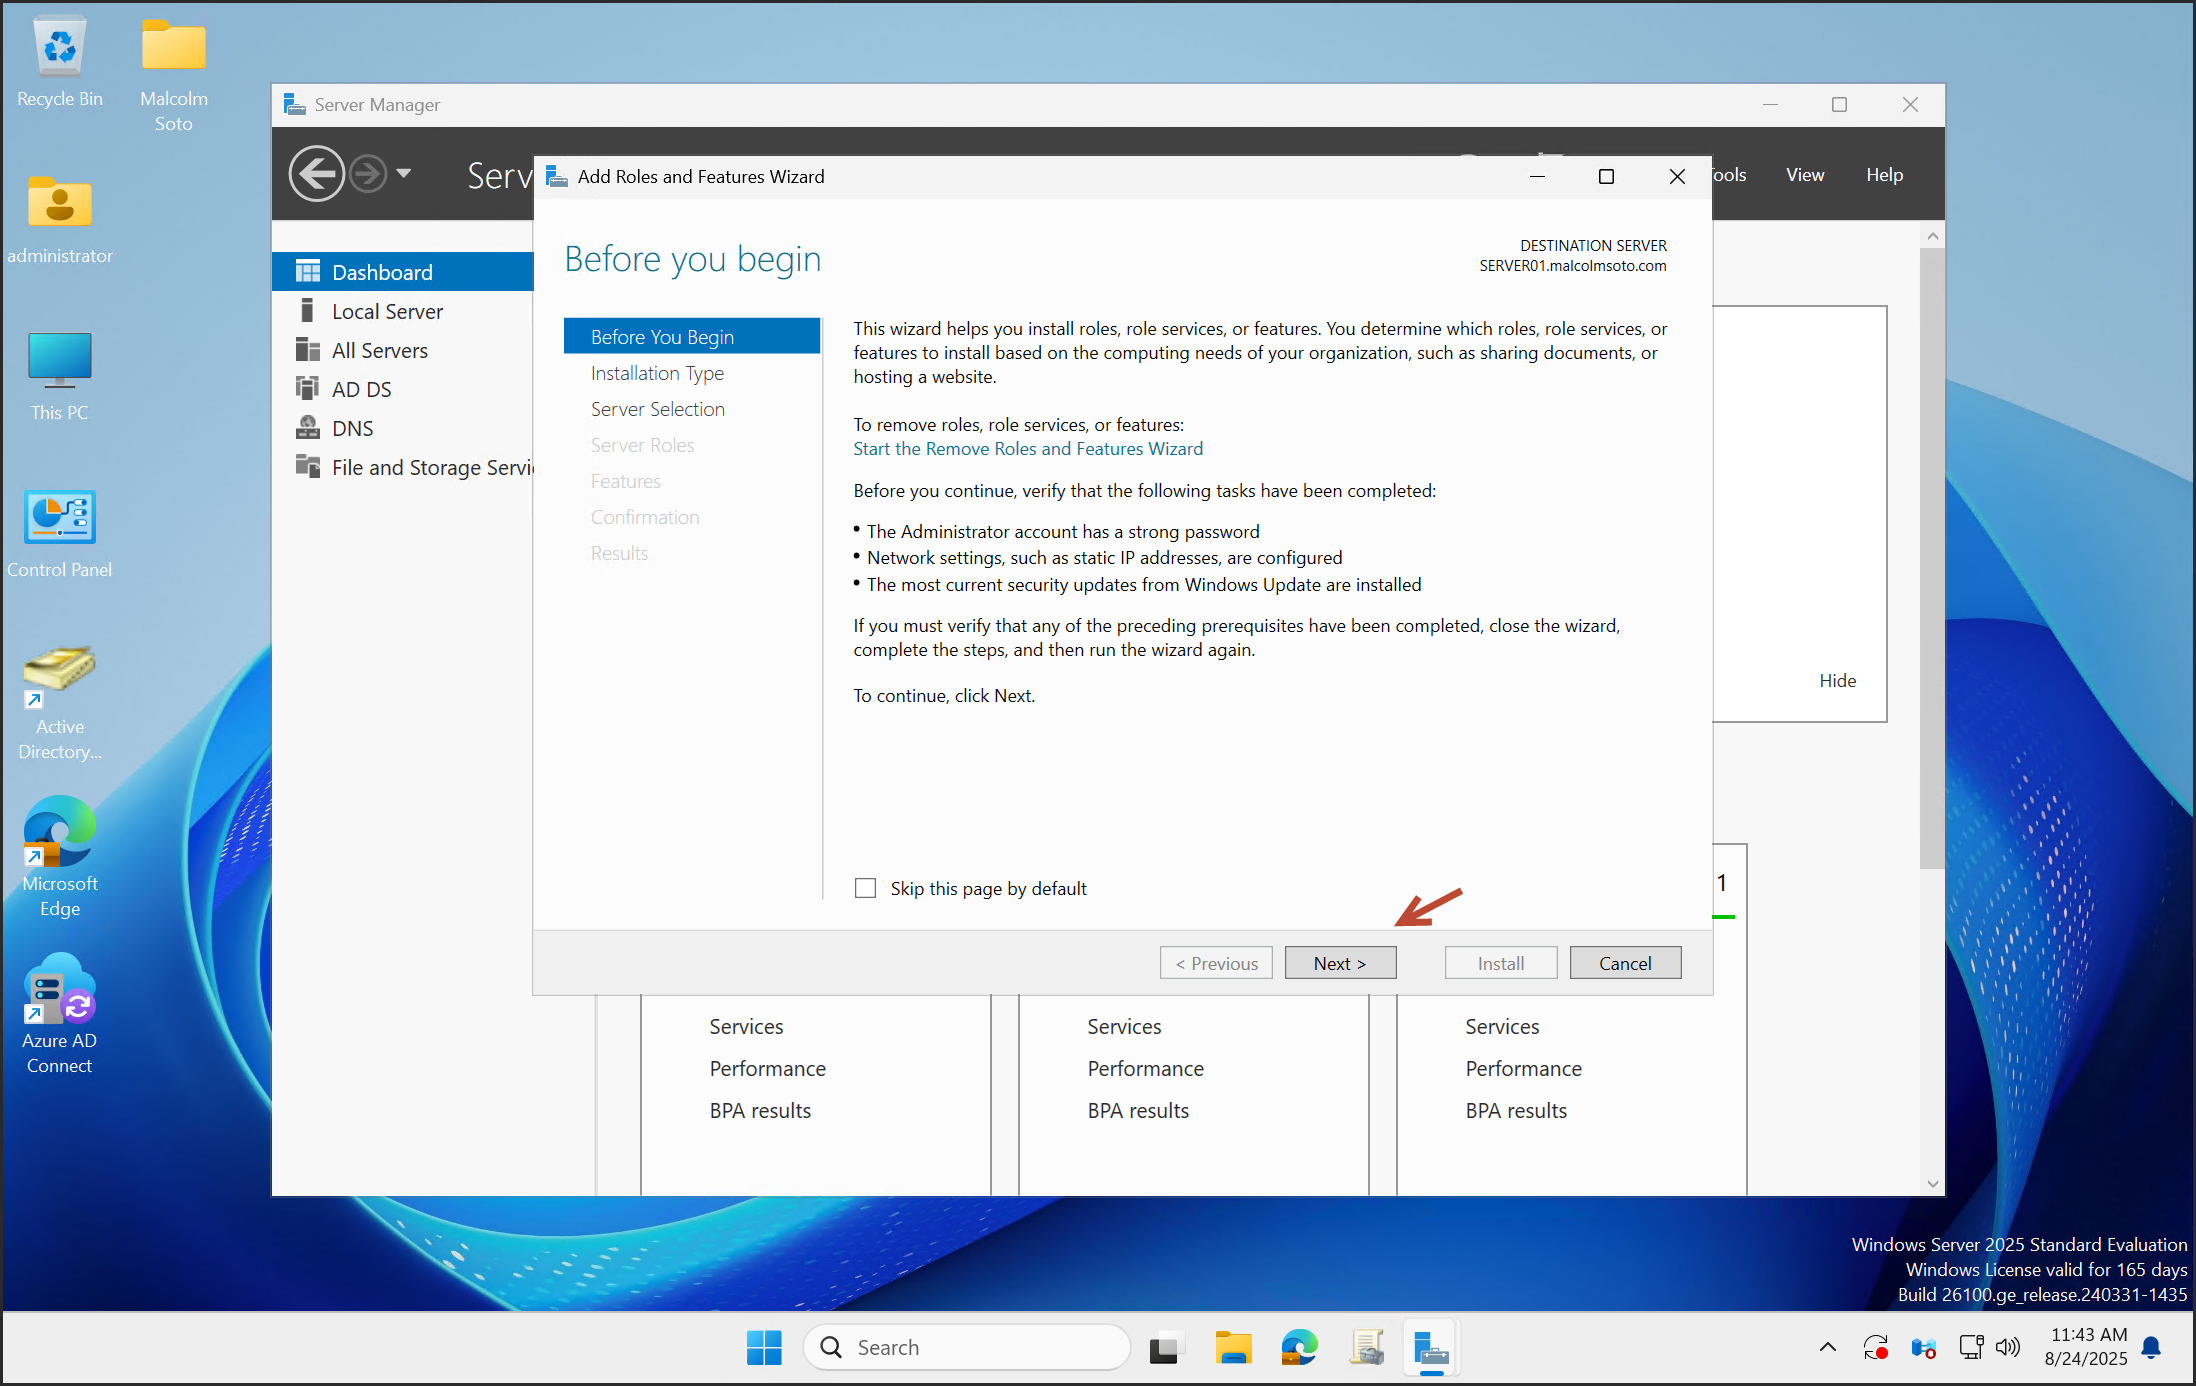
Click Next.
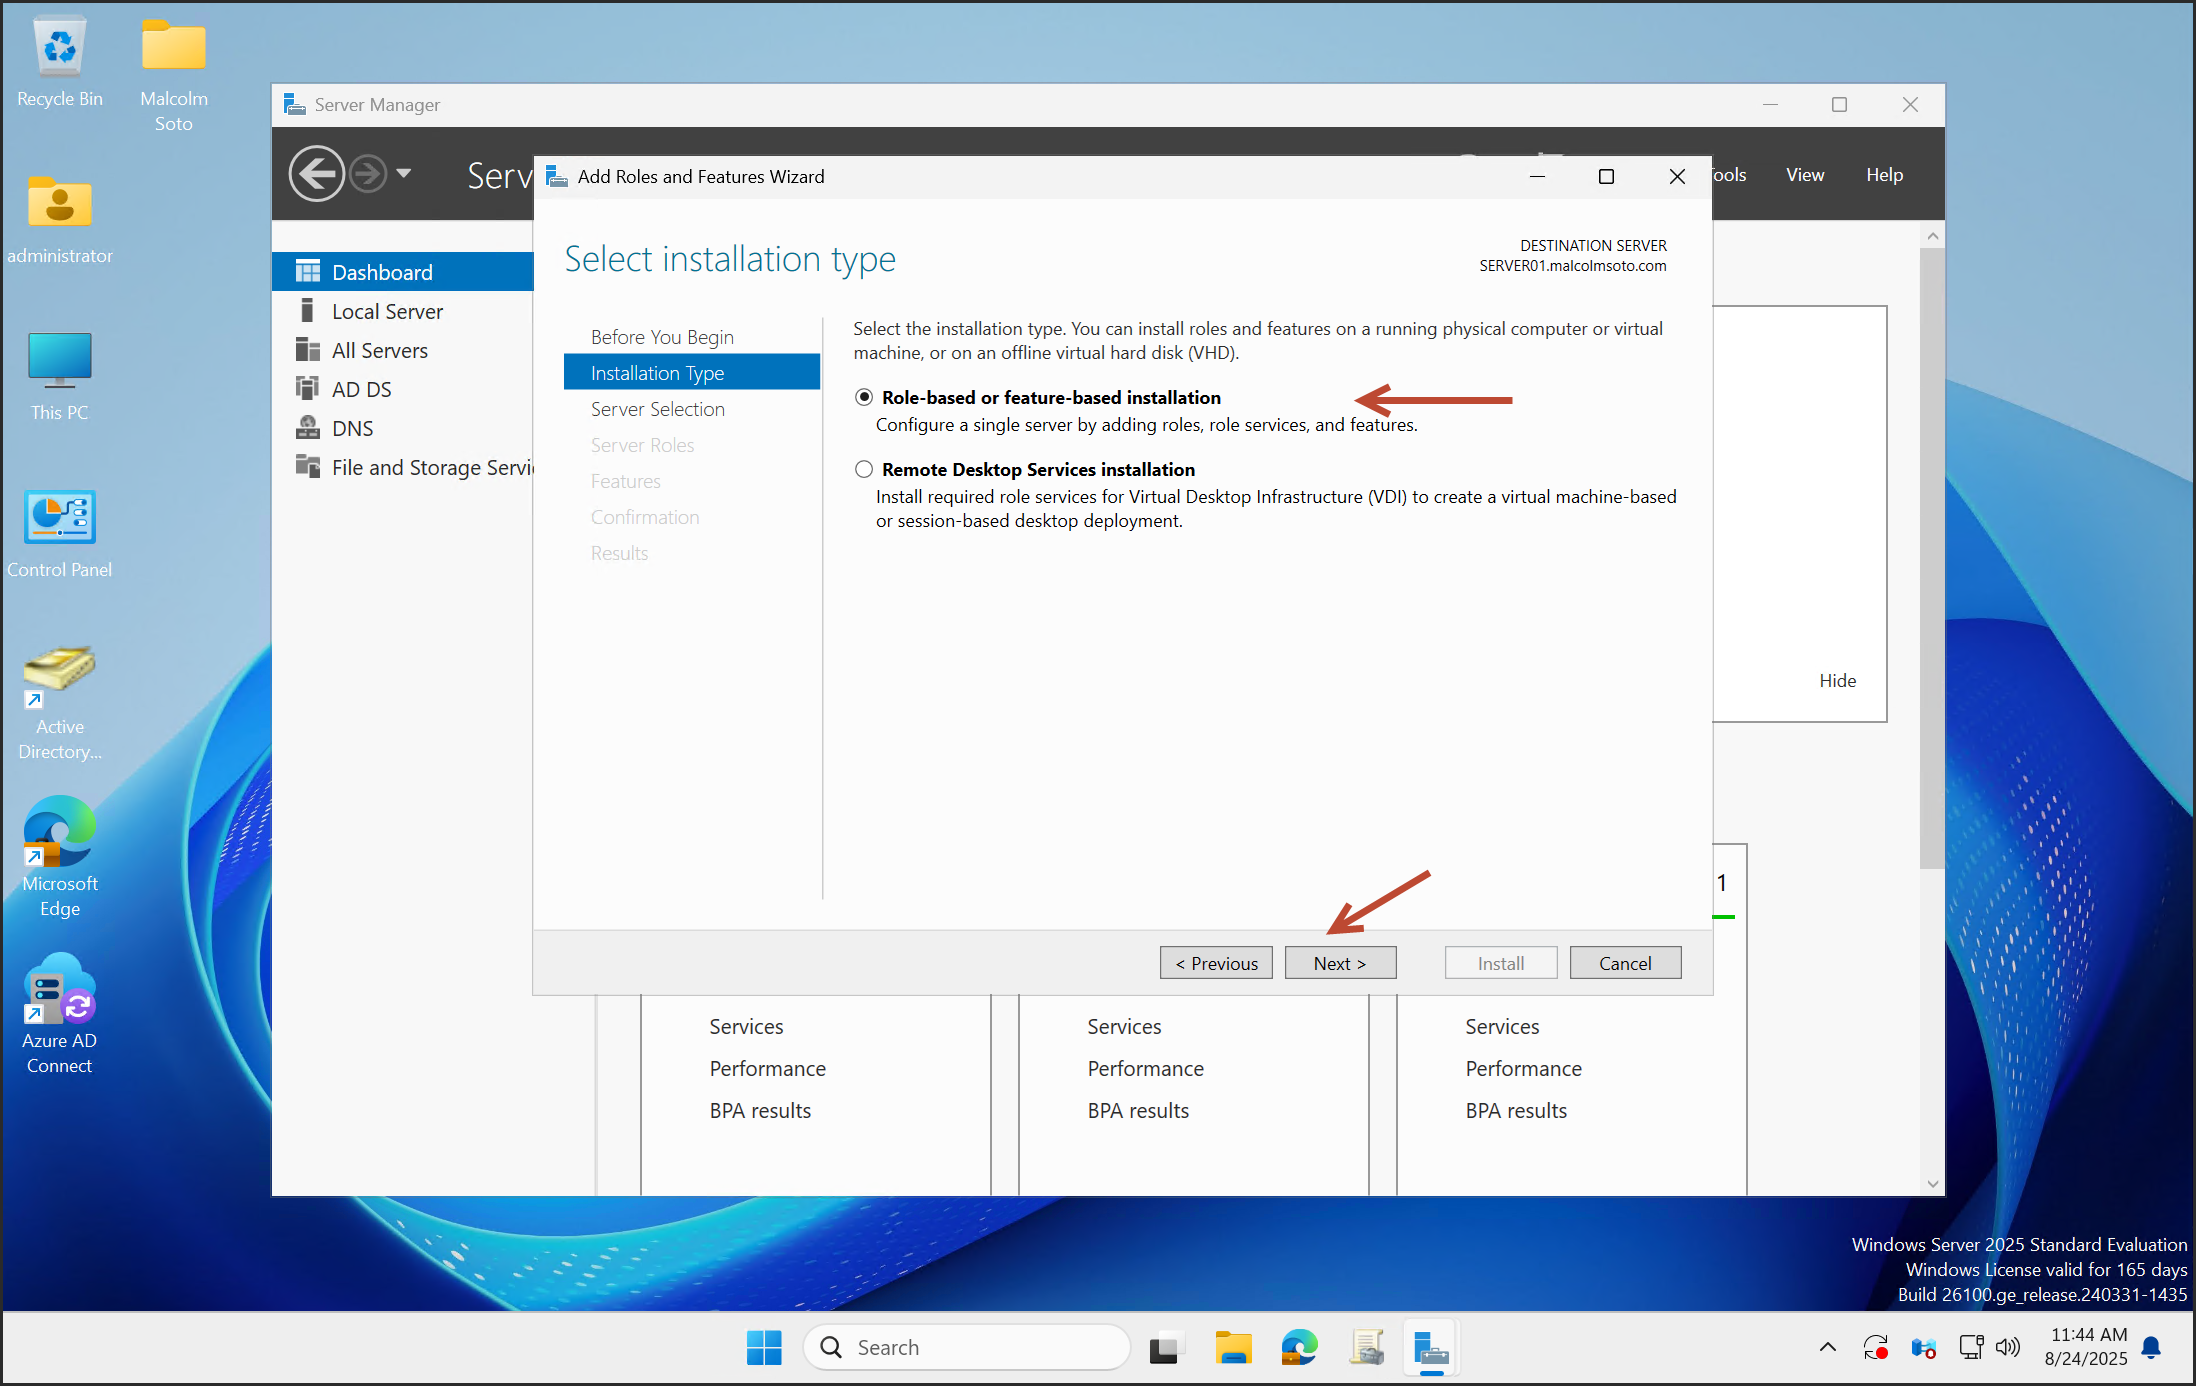
Select Role-based or feature-based installation.
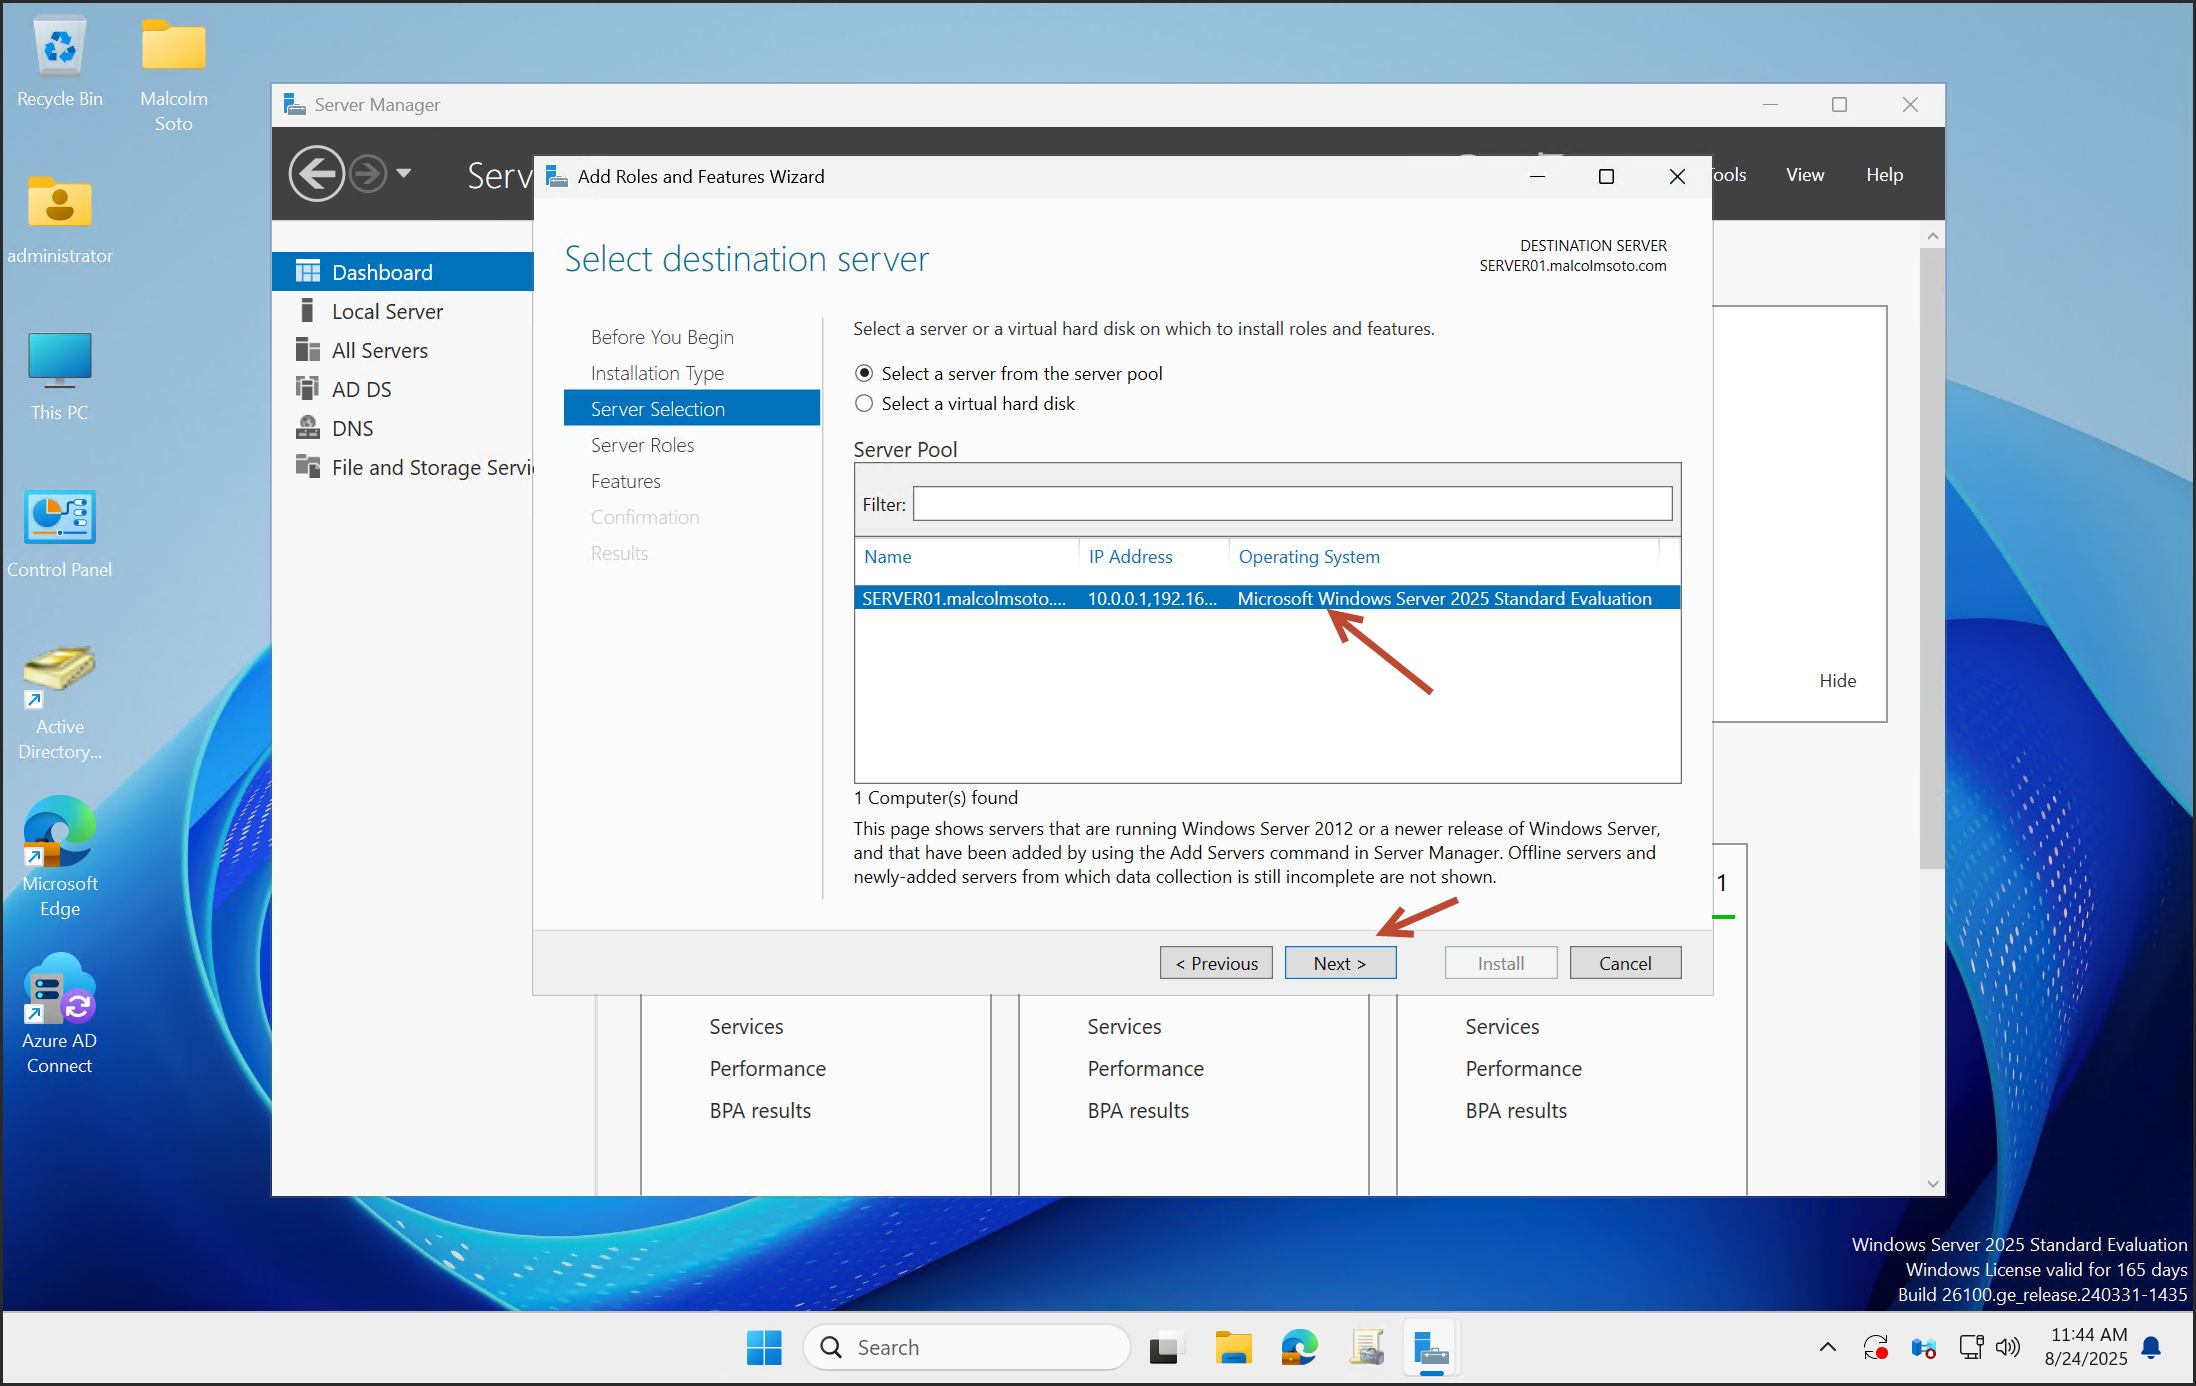
Select your server, then click Next.
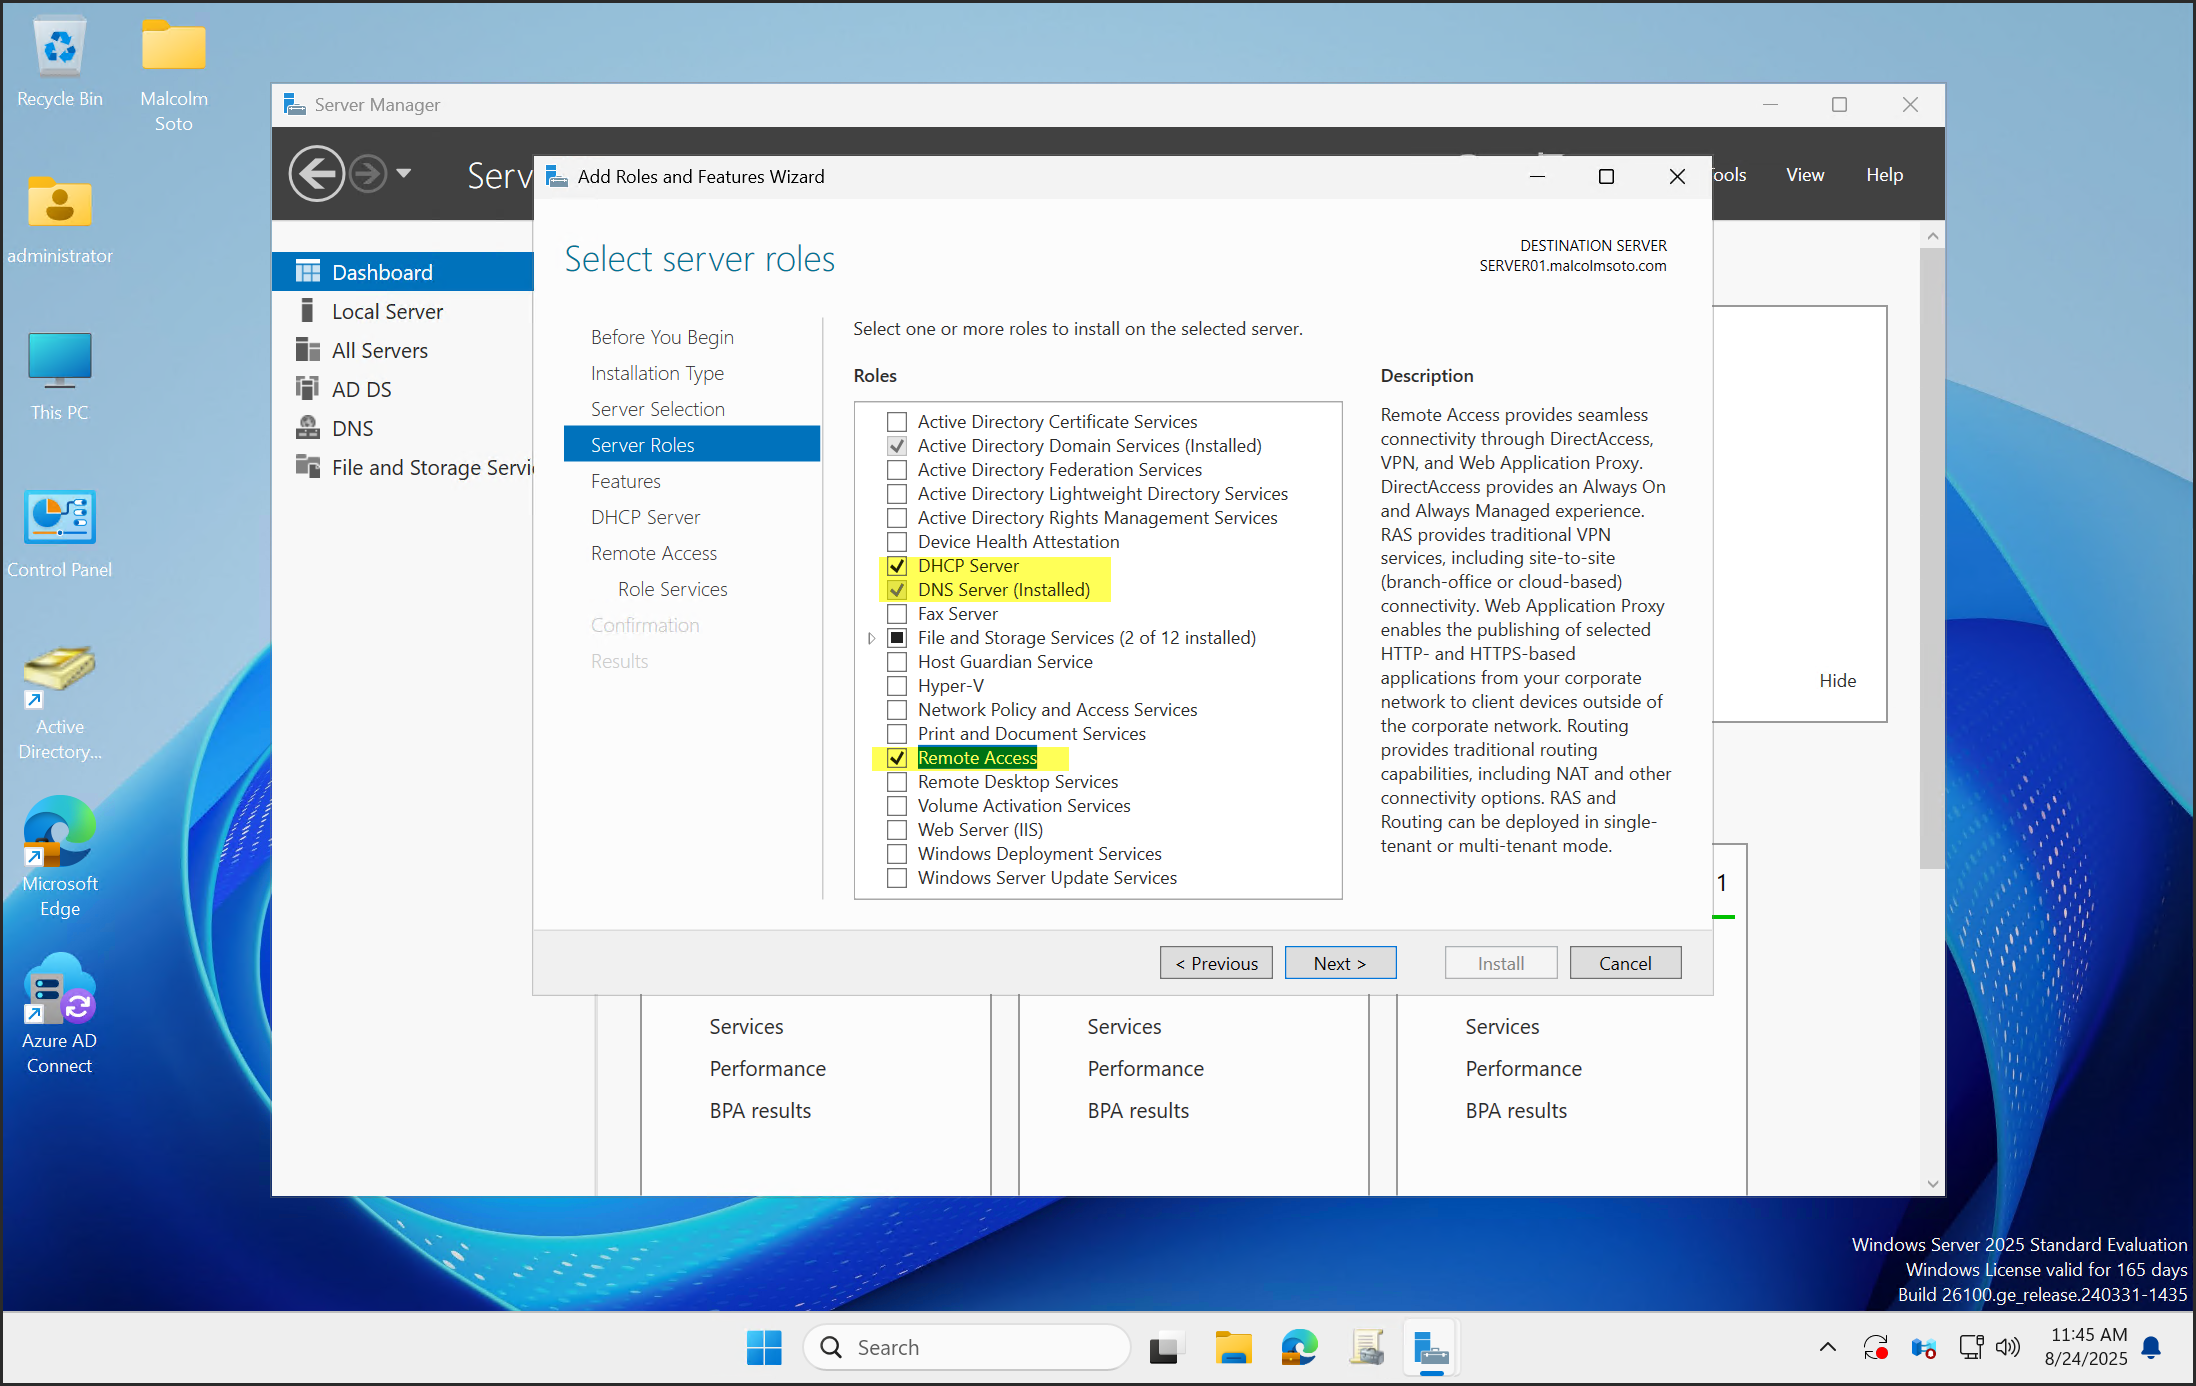
Select the following roles:
- DHCP Server
- DNS Server
- Remote Access
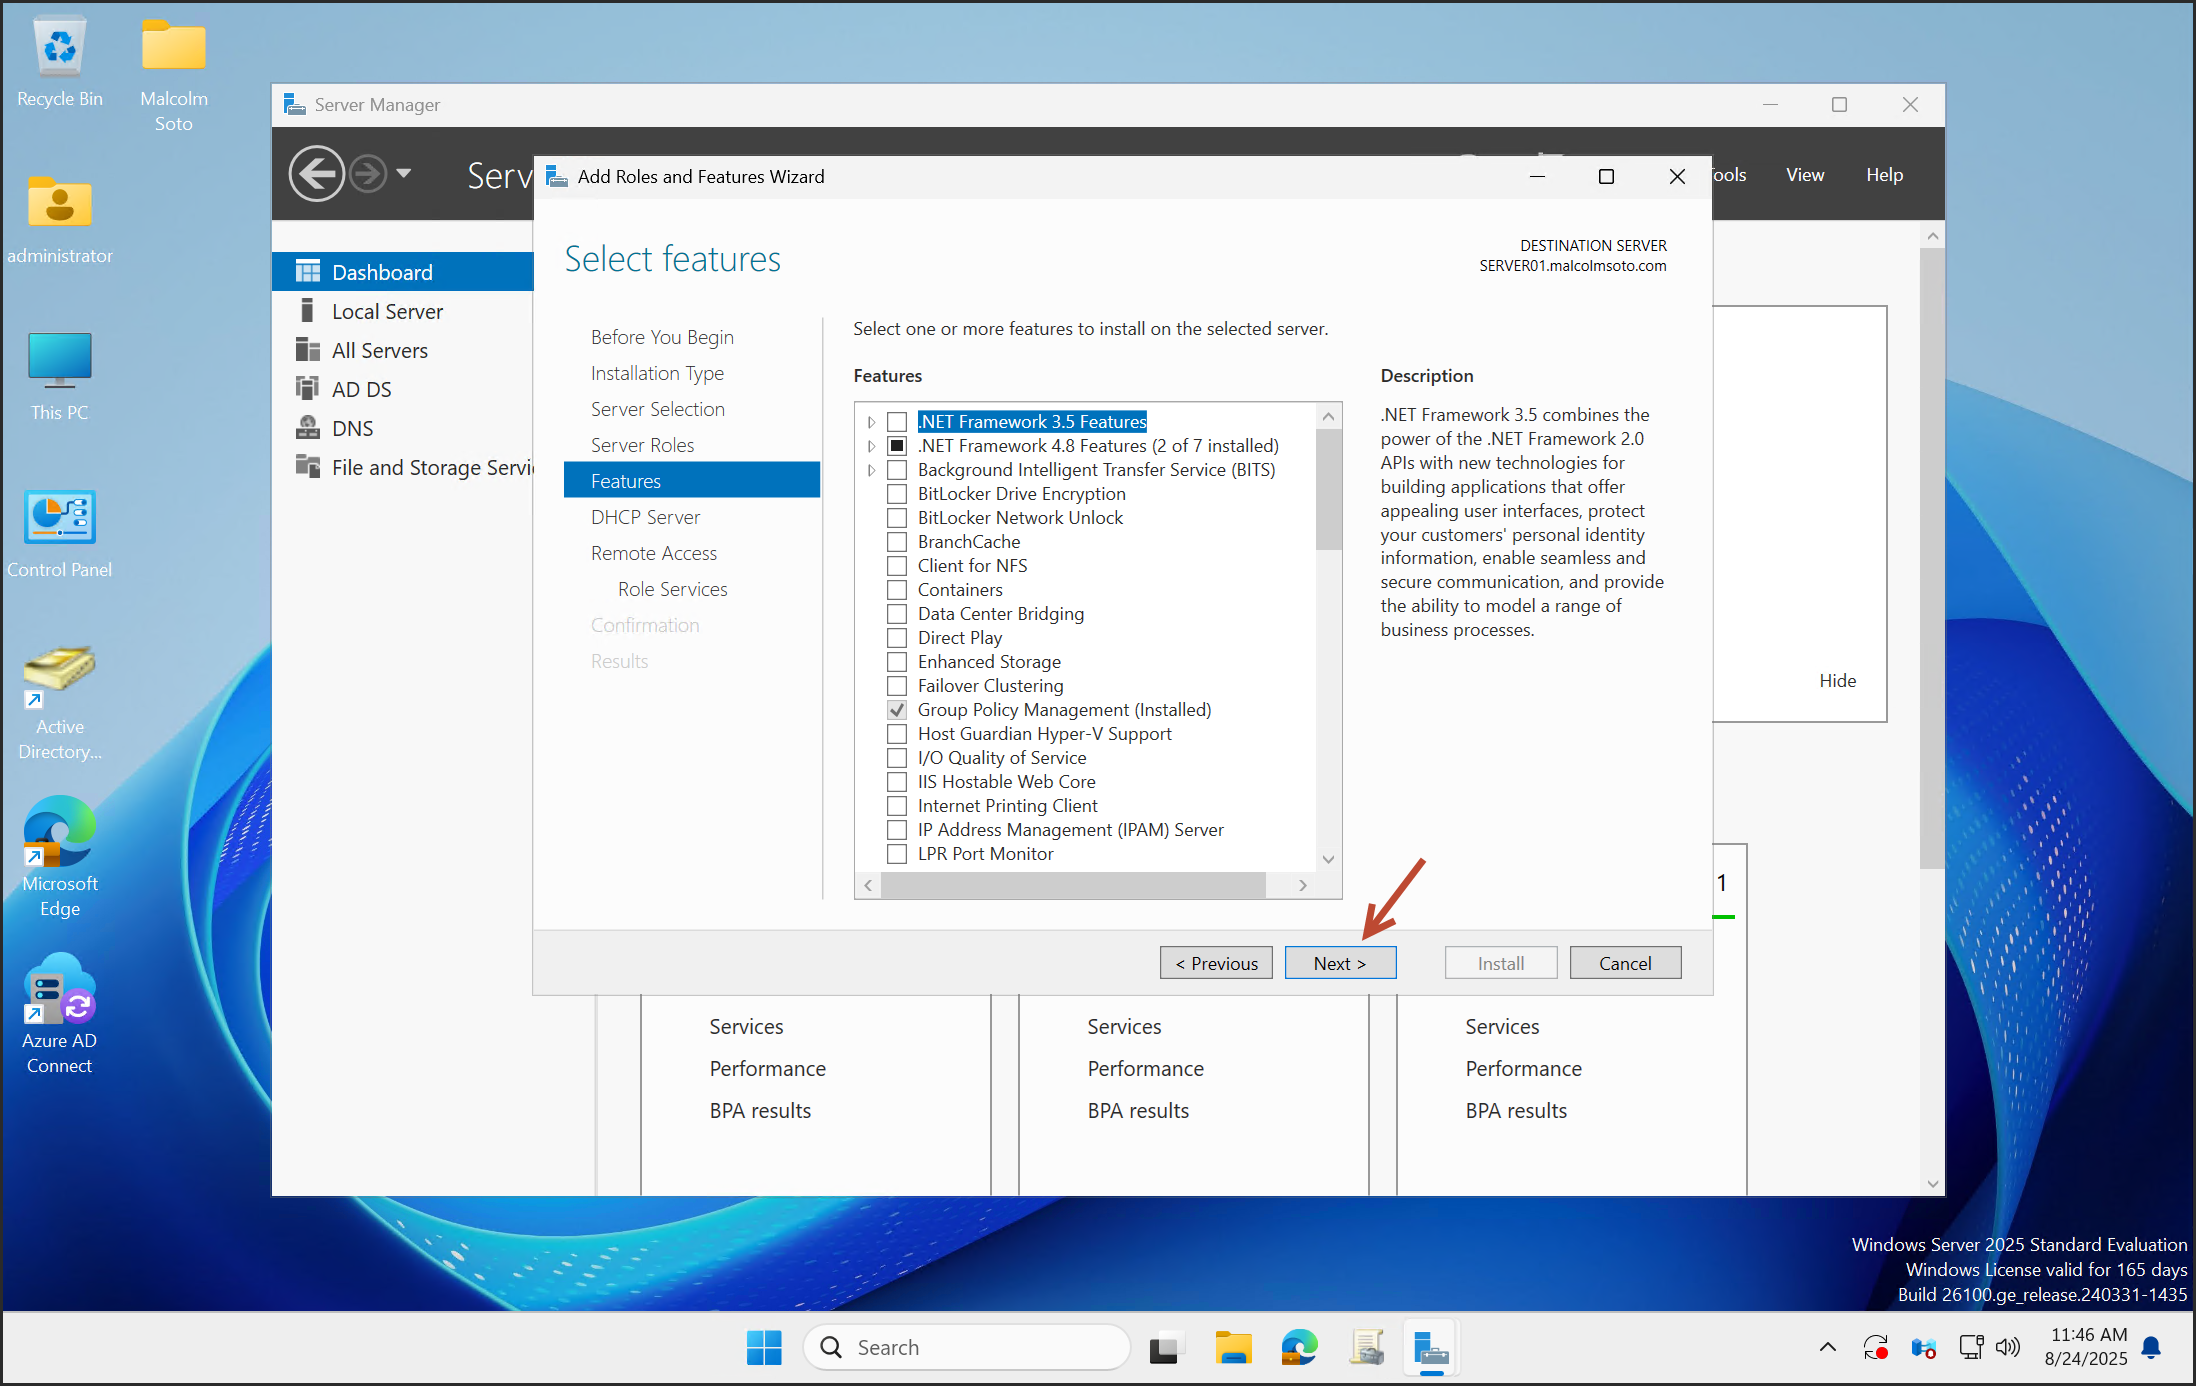
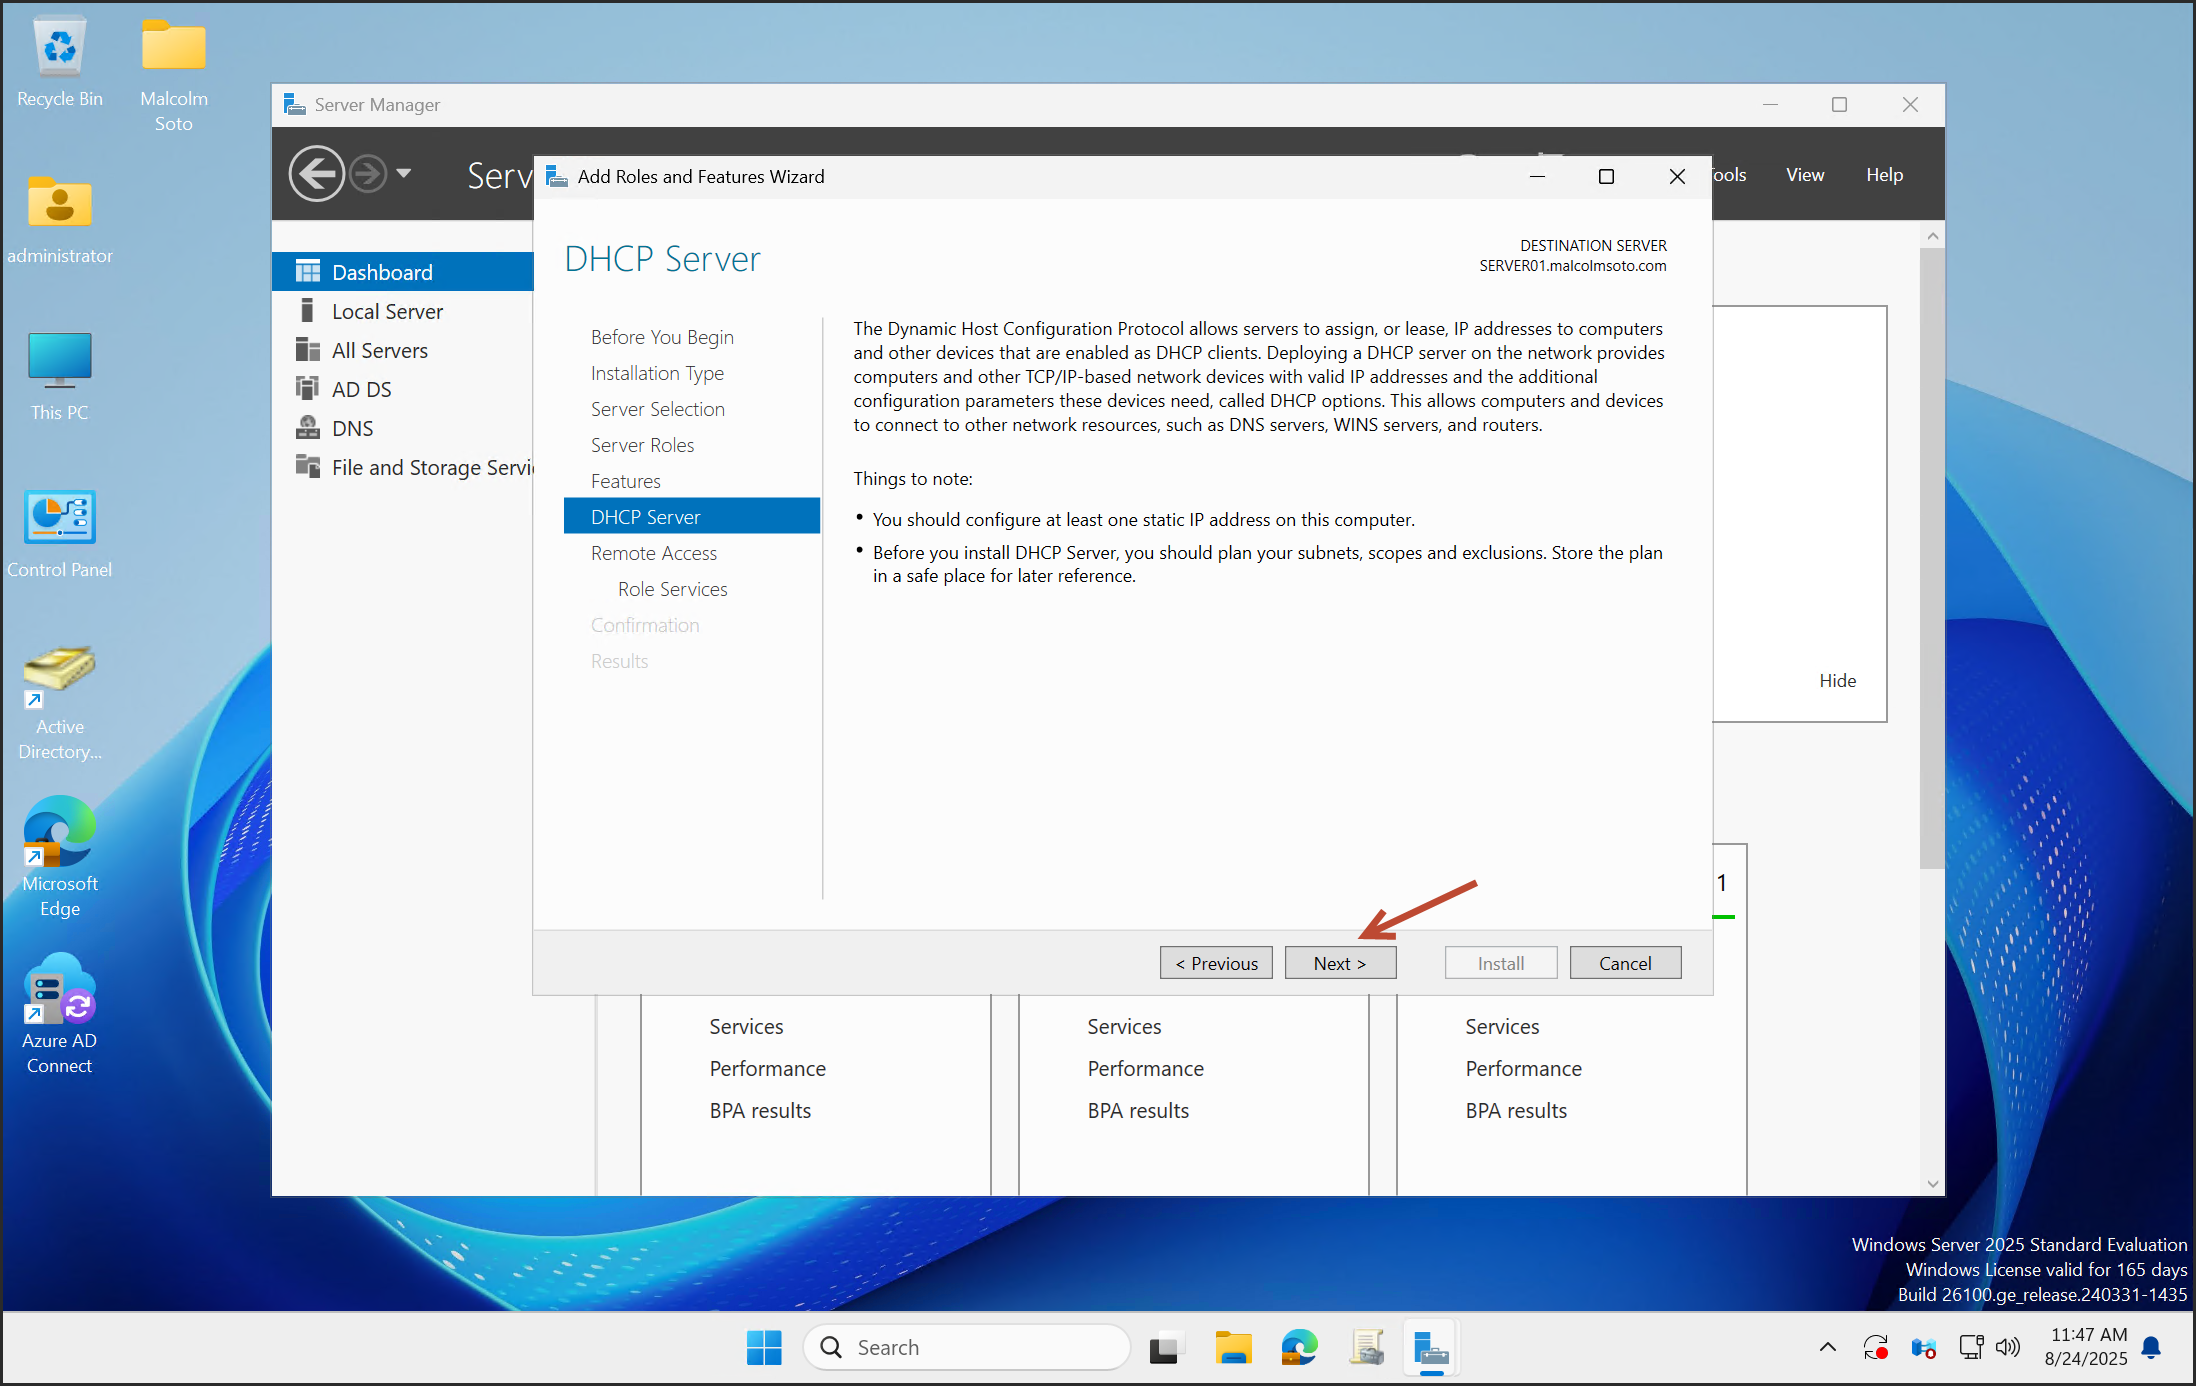
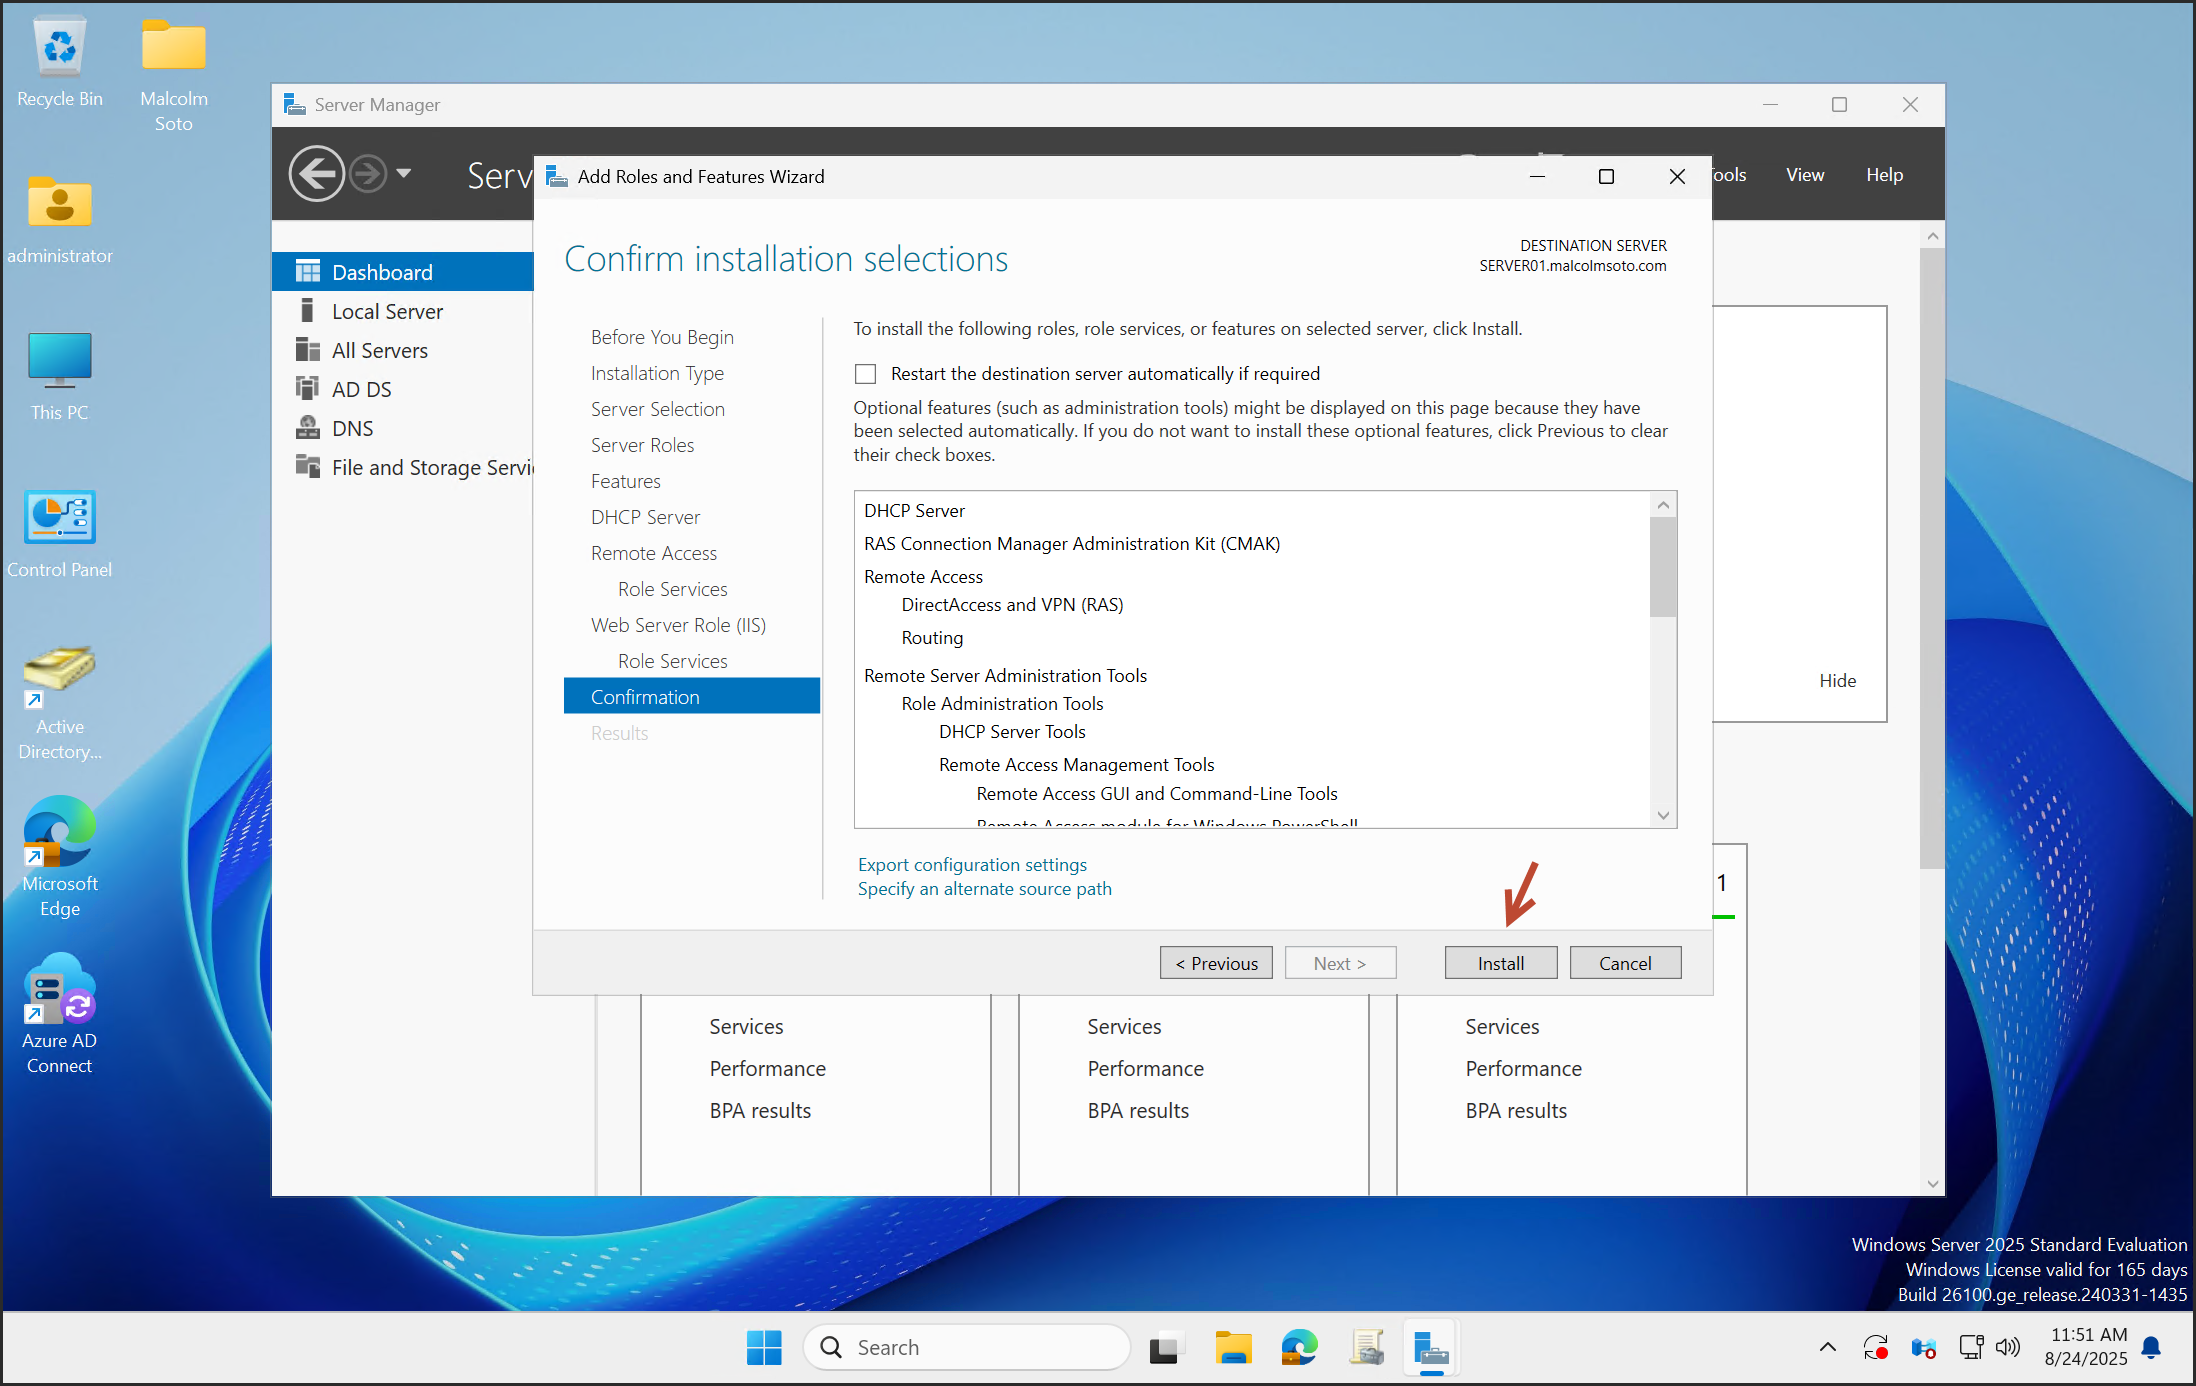
Click Next through the feature and confirmation screens.
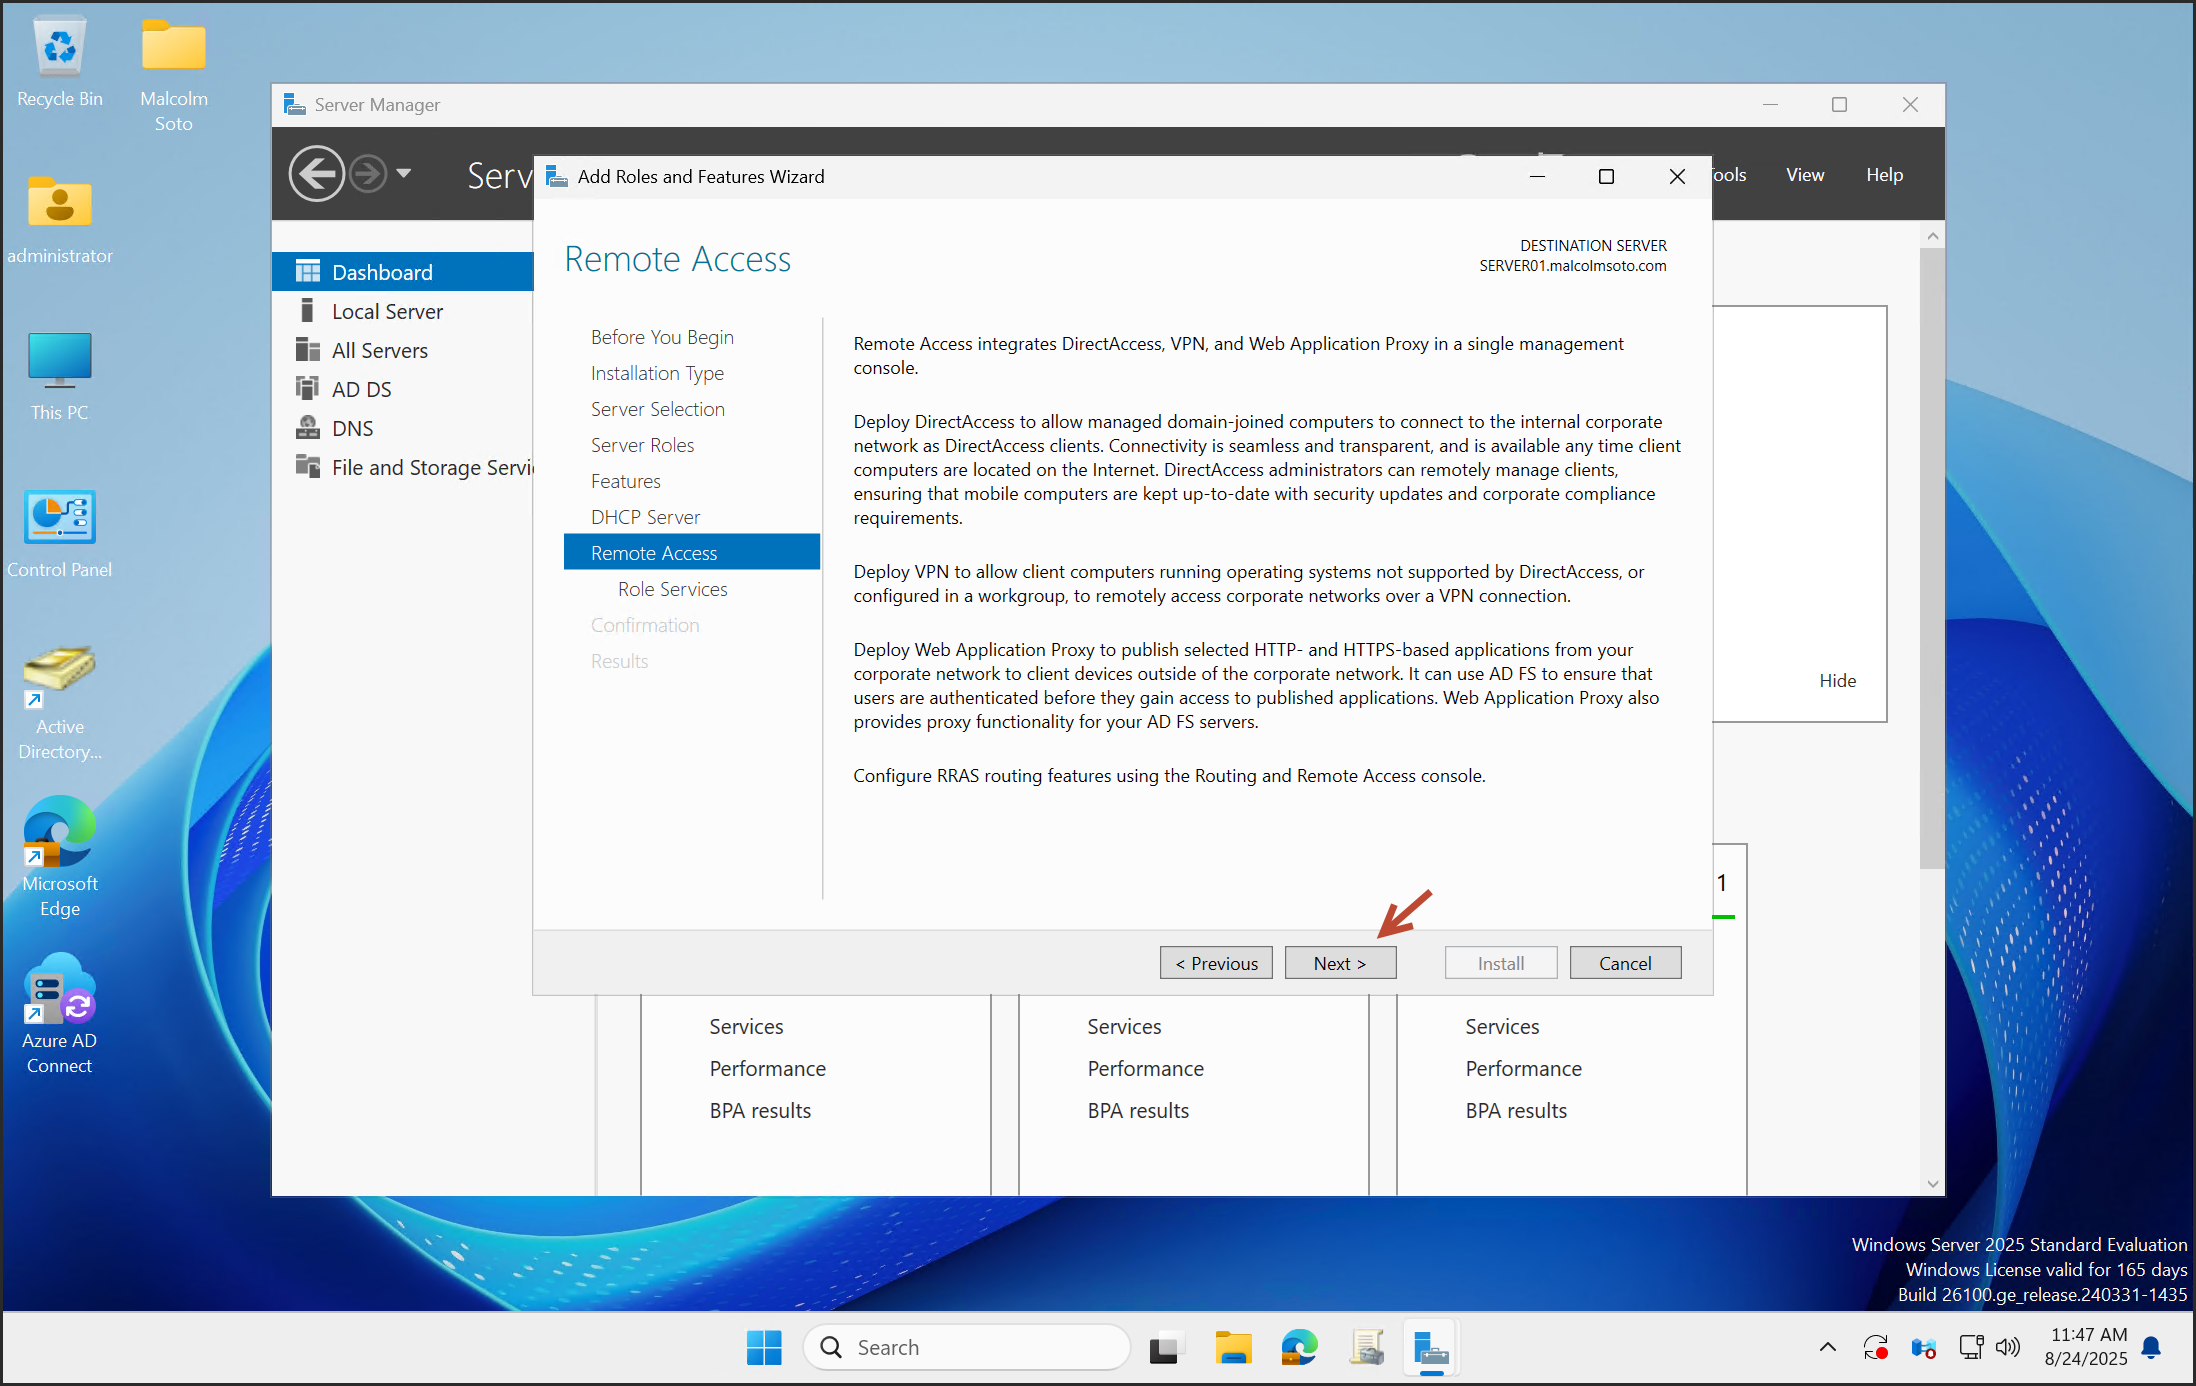
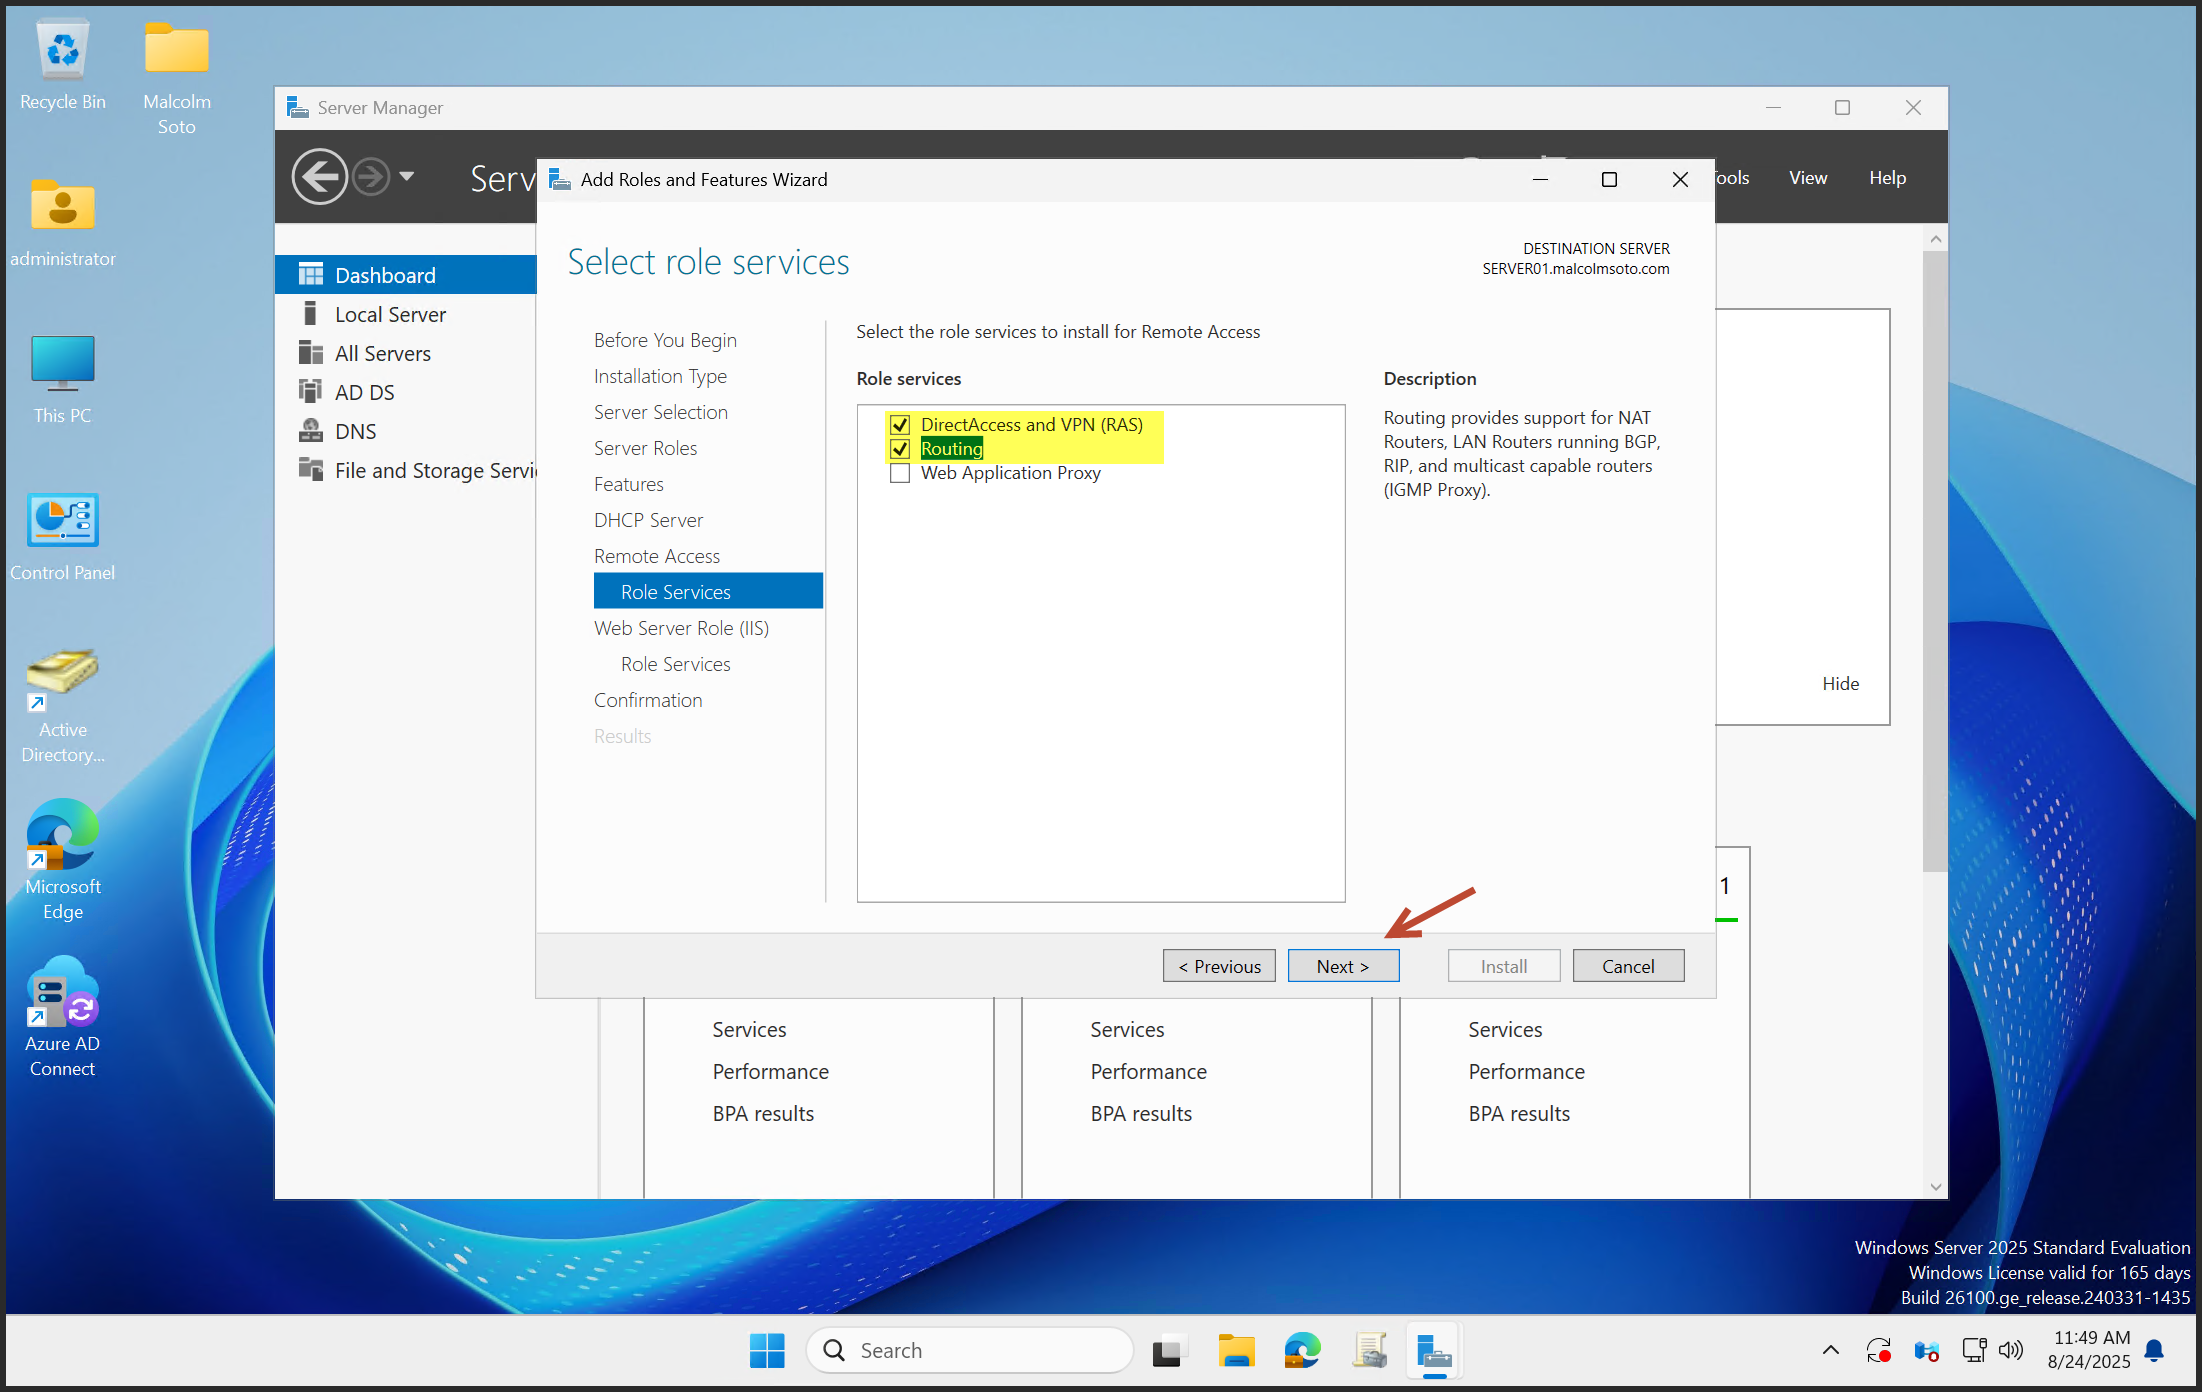
Select Routing, then click Next.


Click Install.
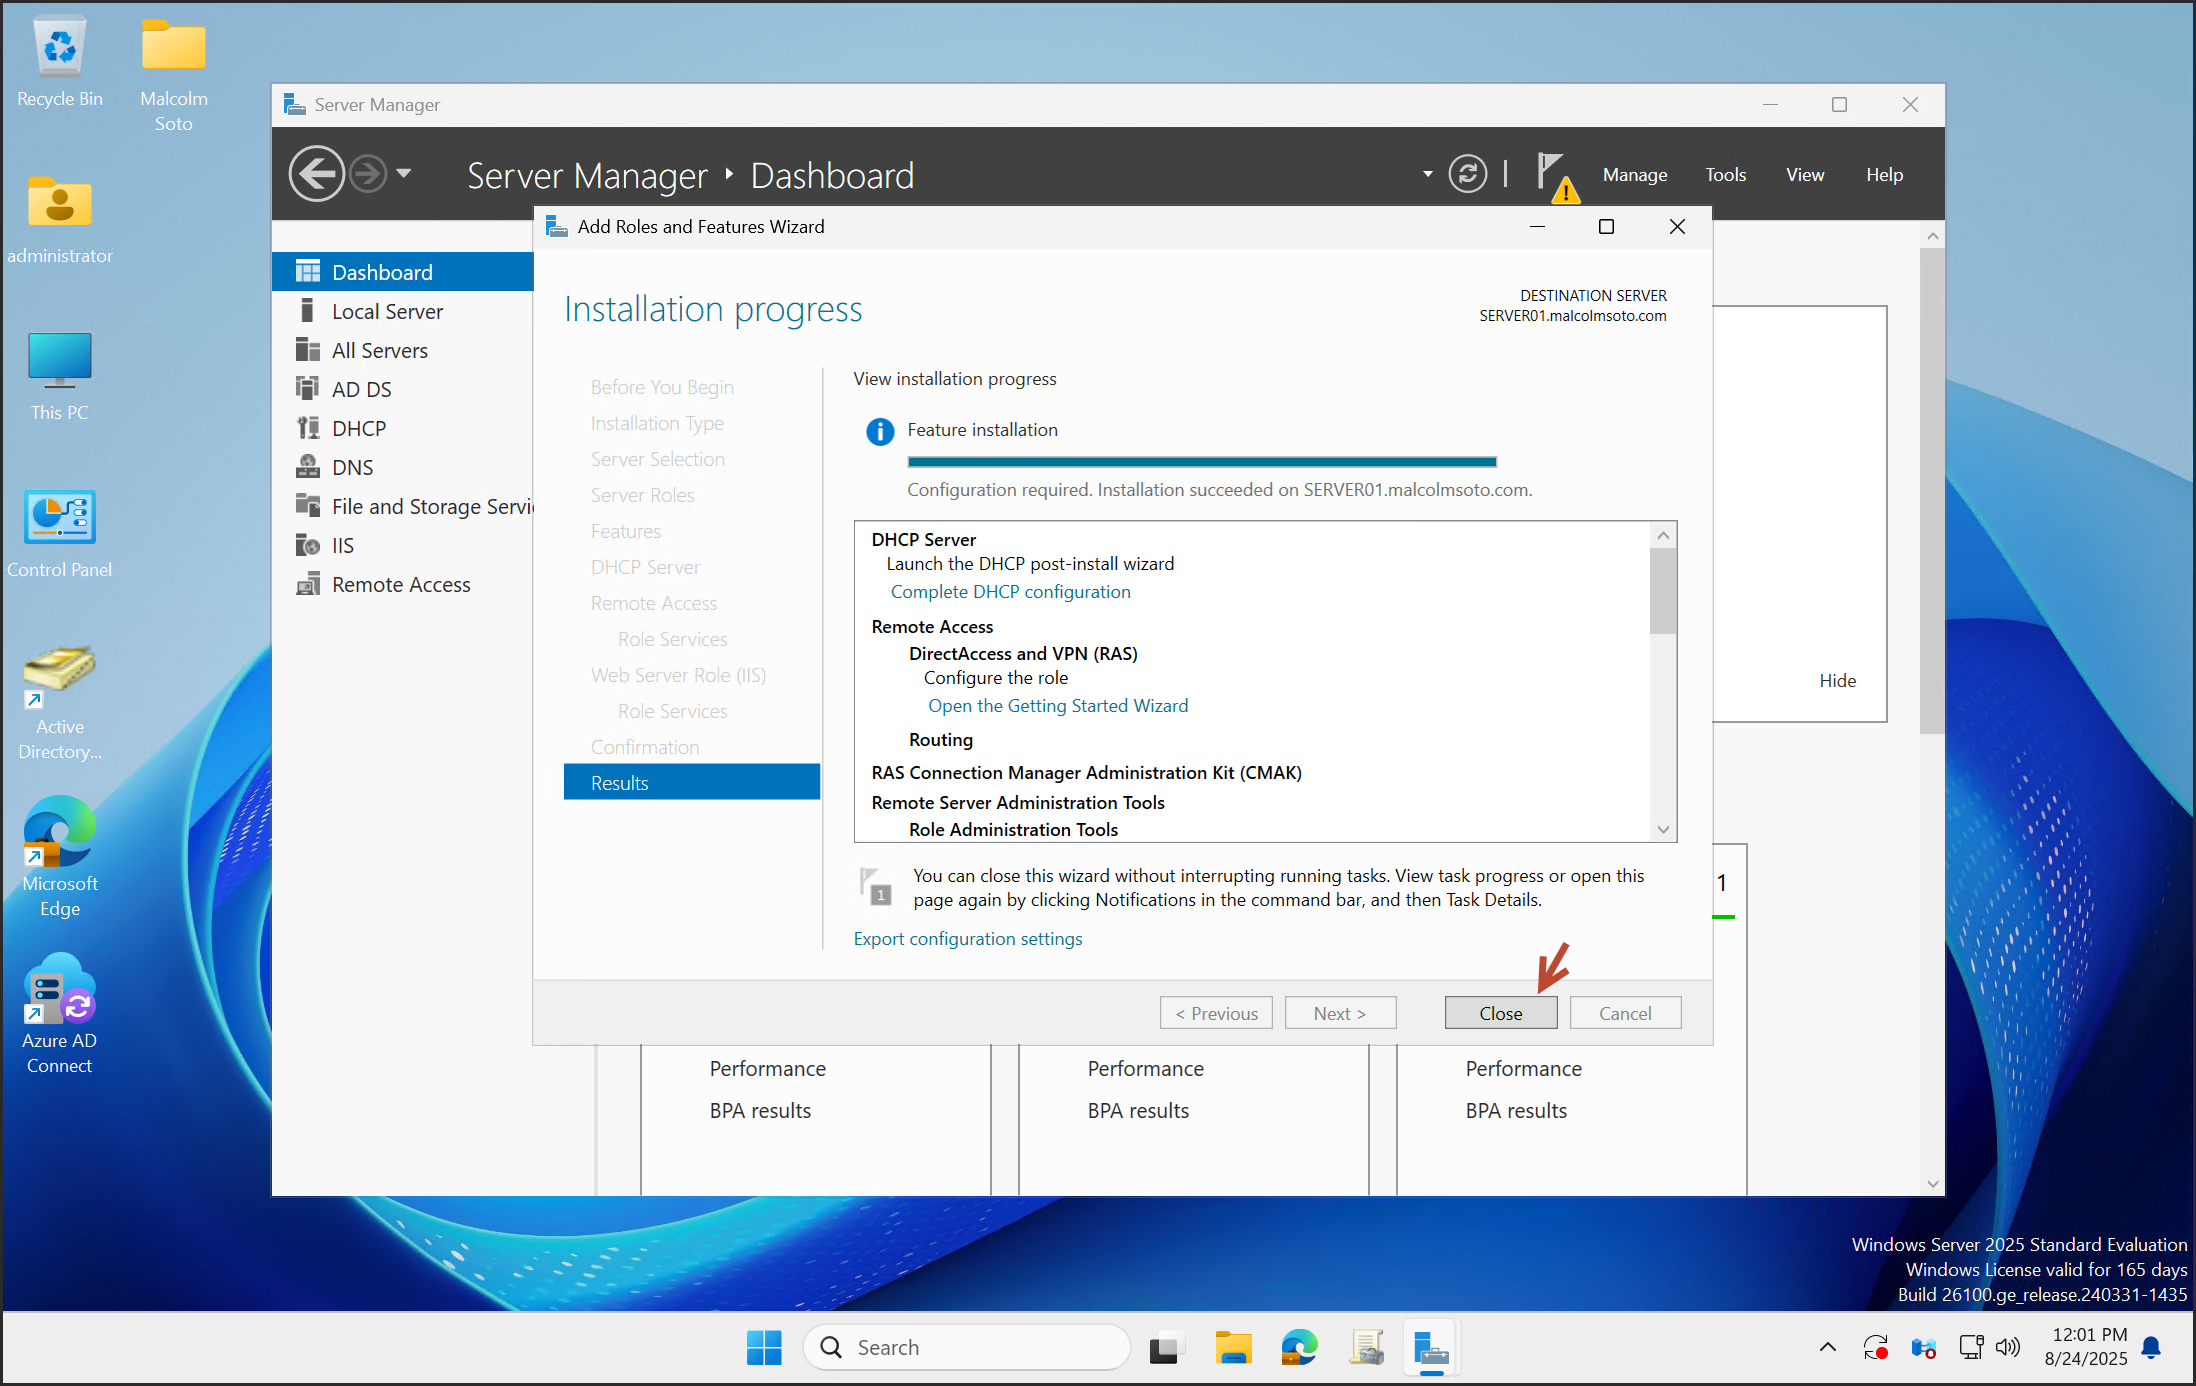
Click Close when installation completes.
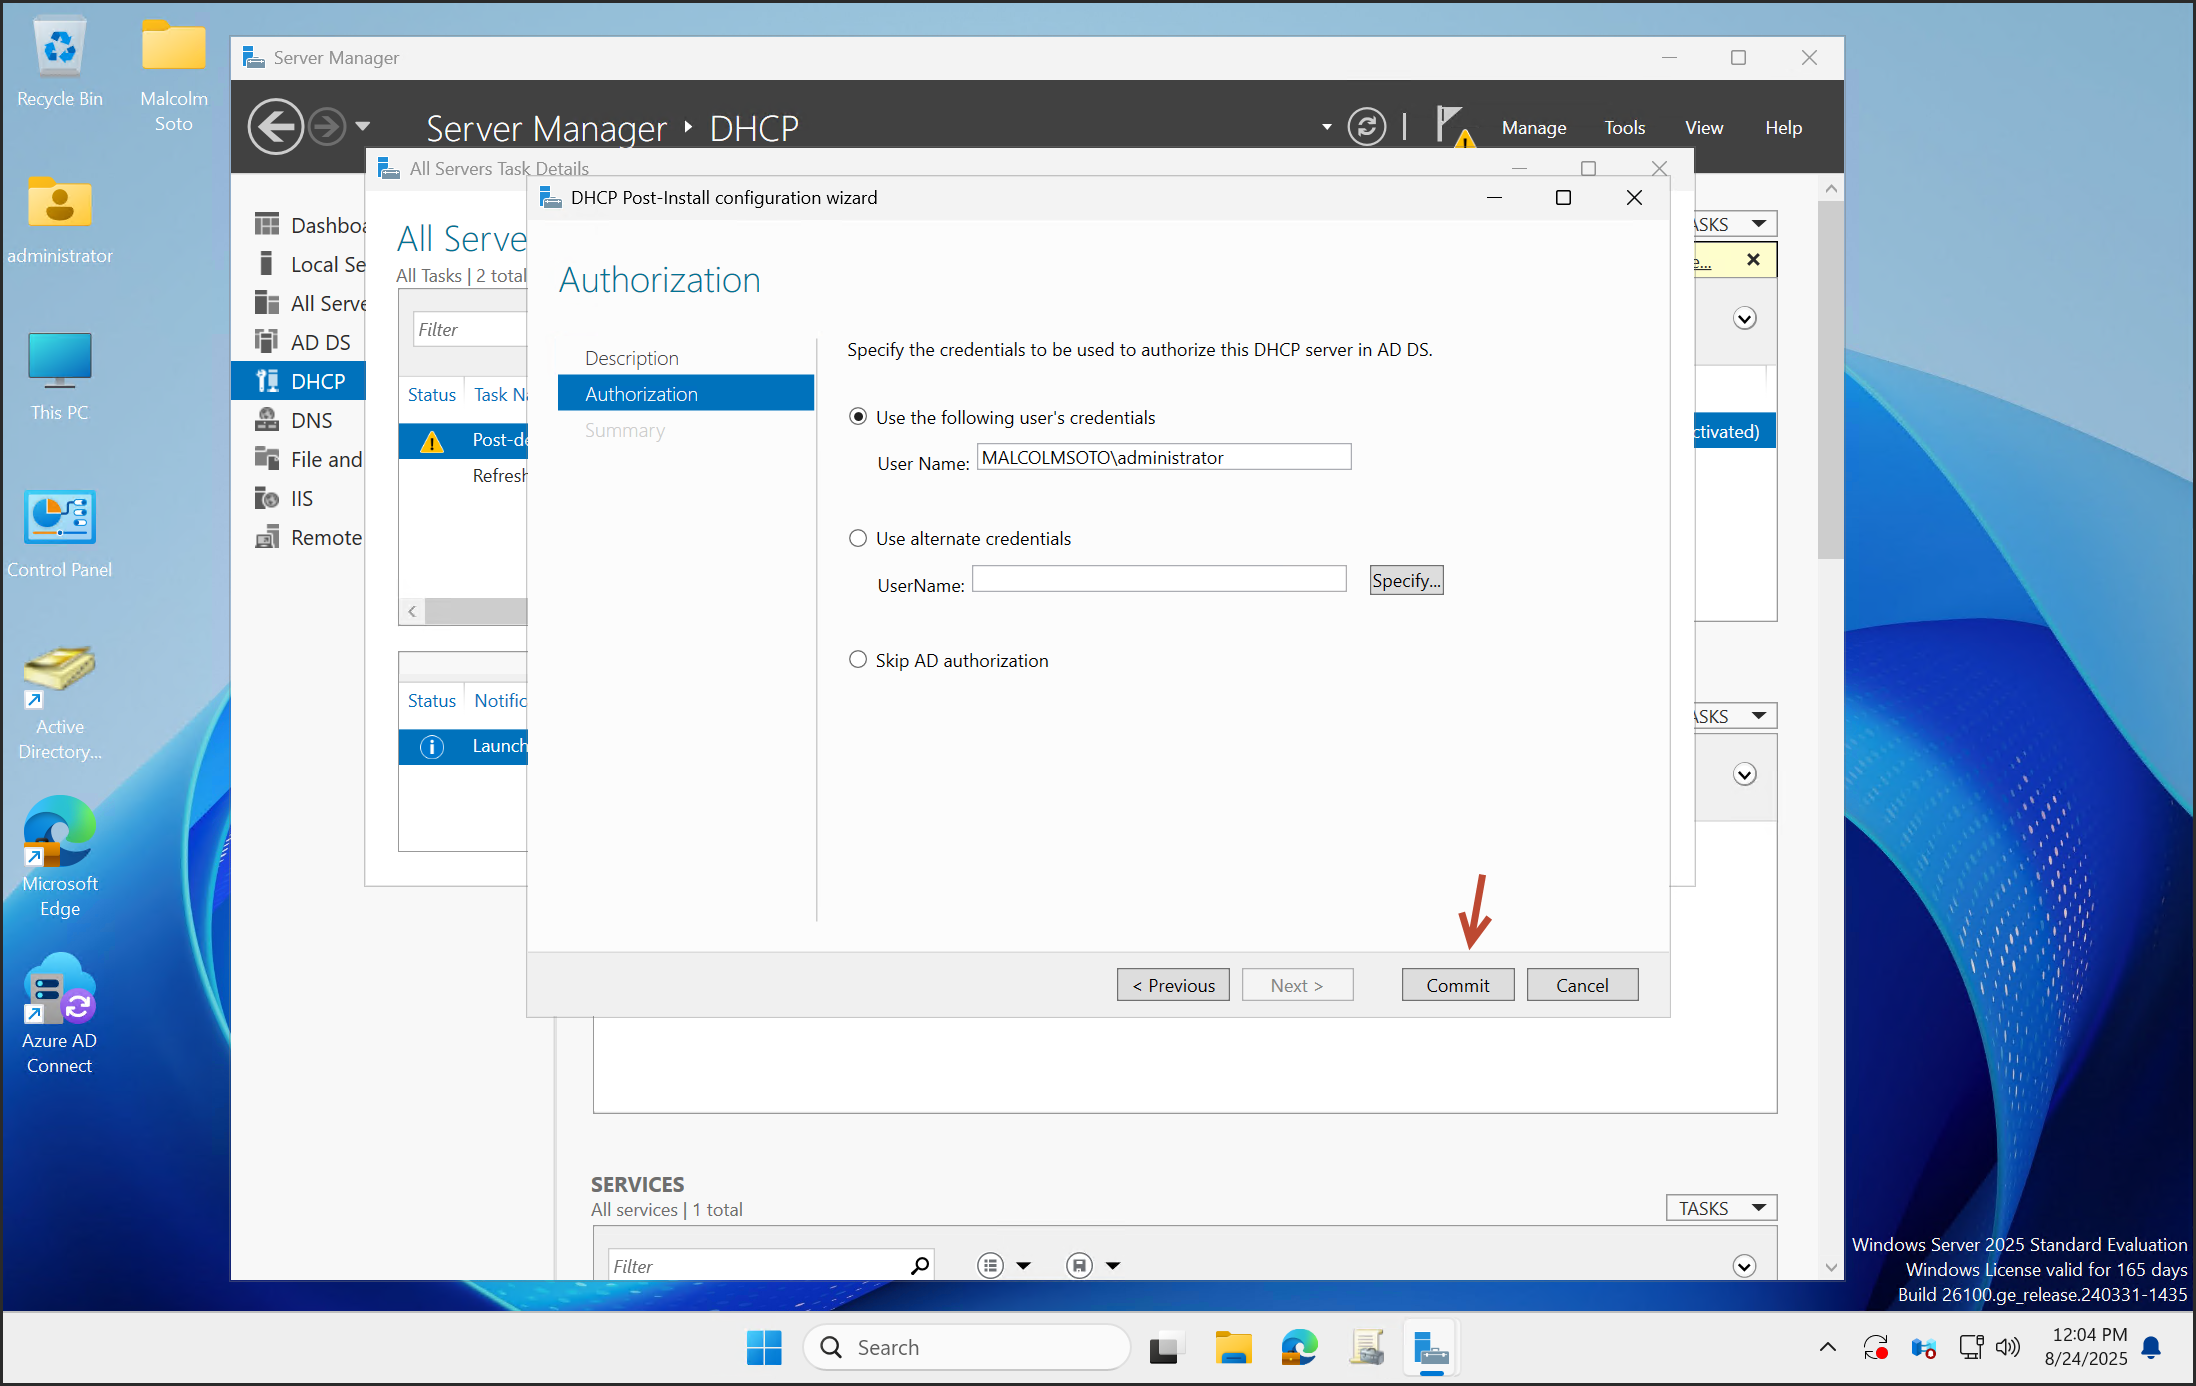
DHCP Setup
Launch the DHCP post-install wizard.
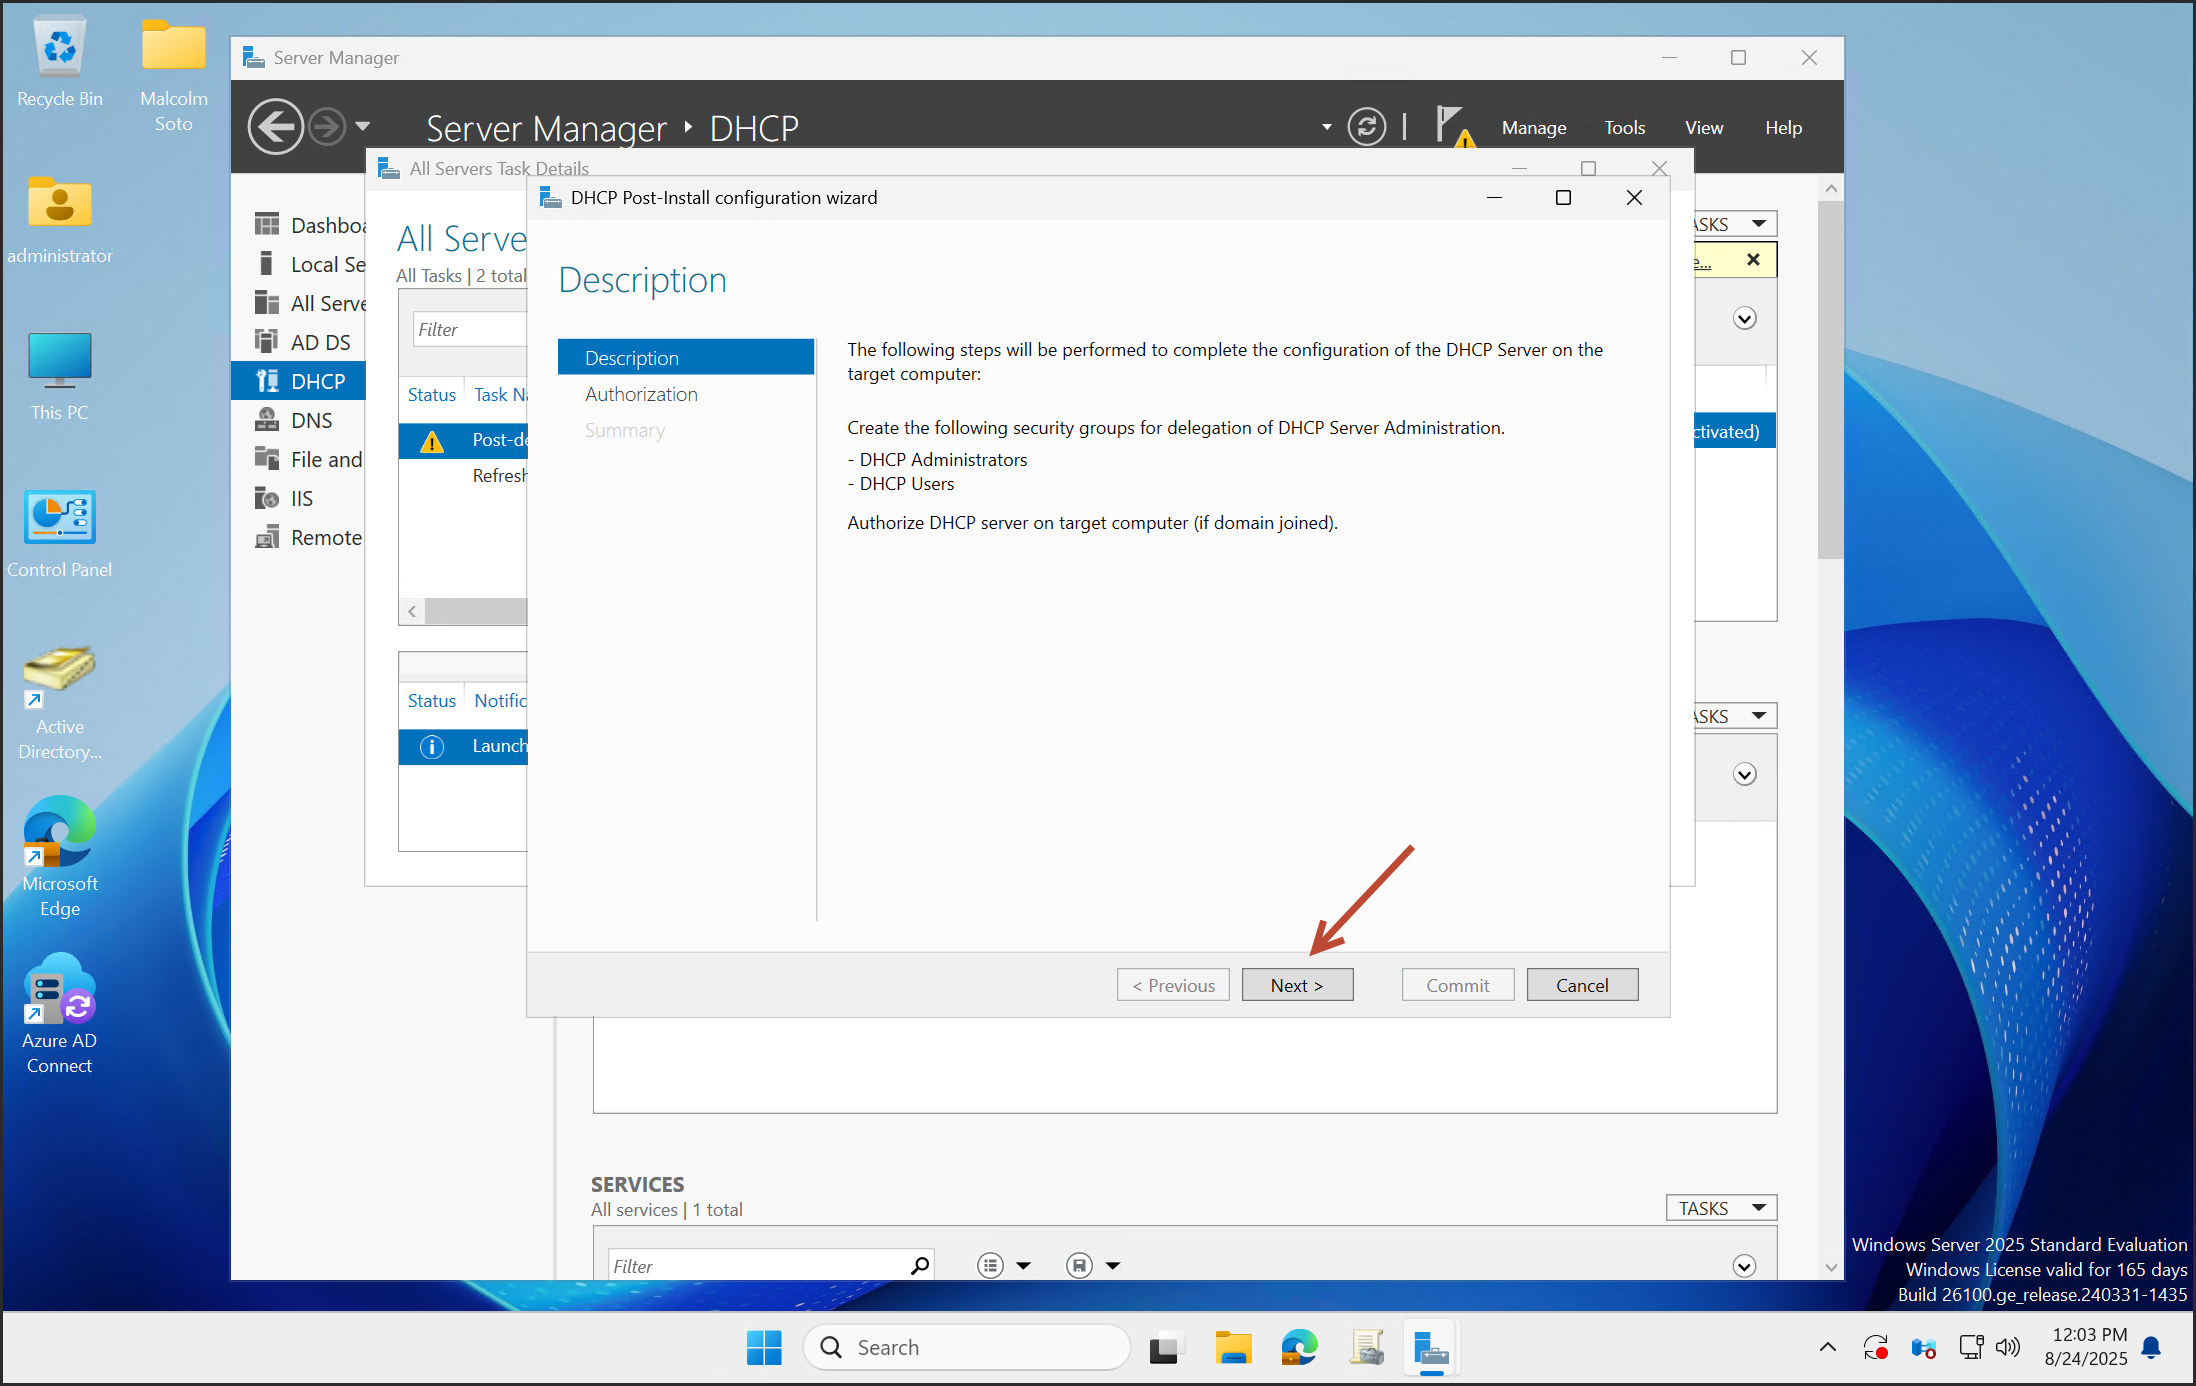
Click Next, then Commit.

Open the DHCP console.
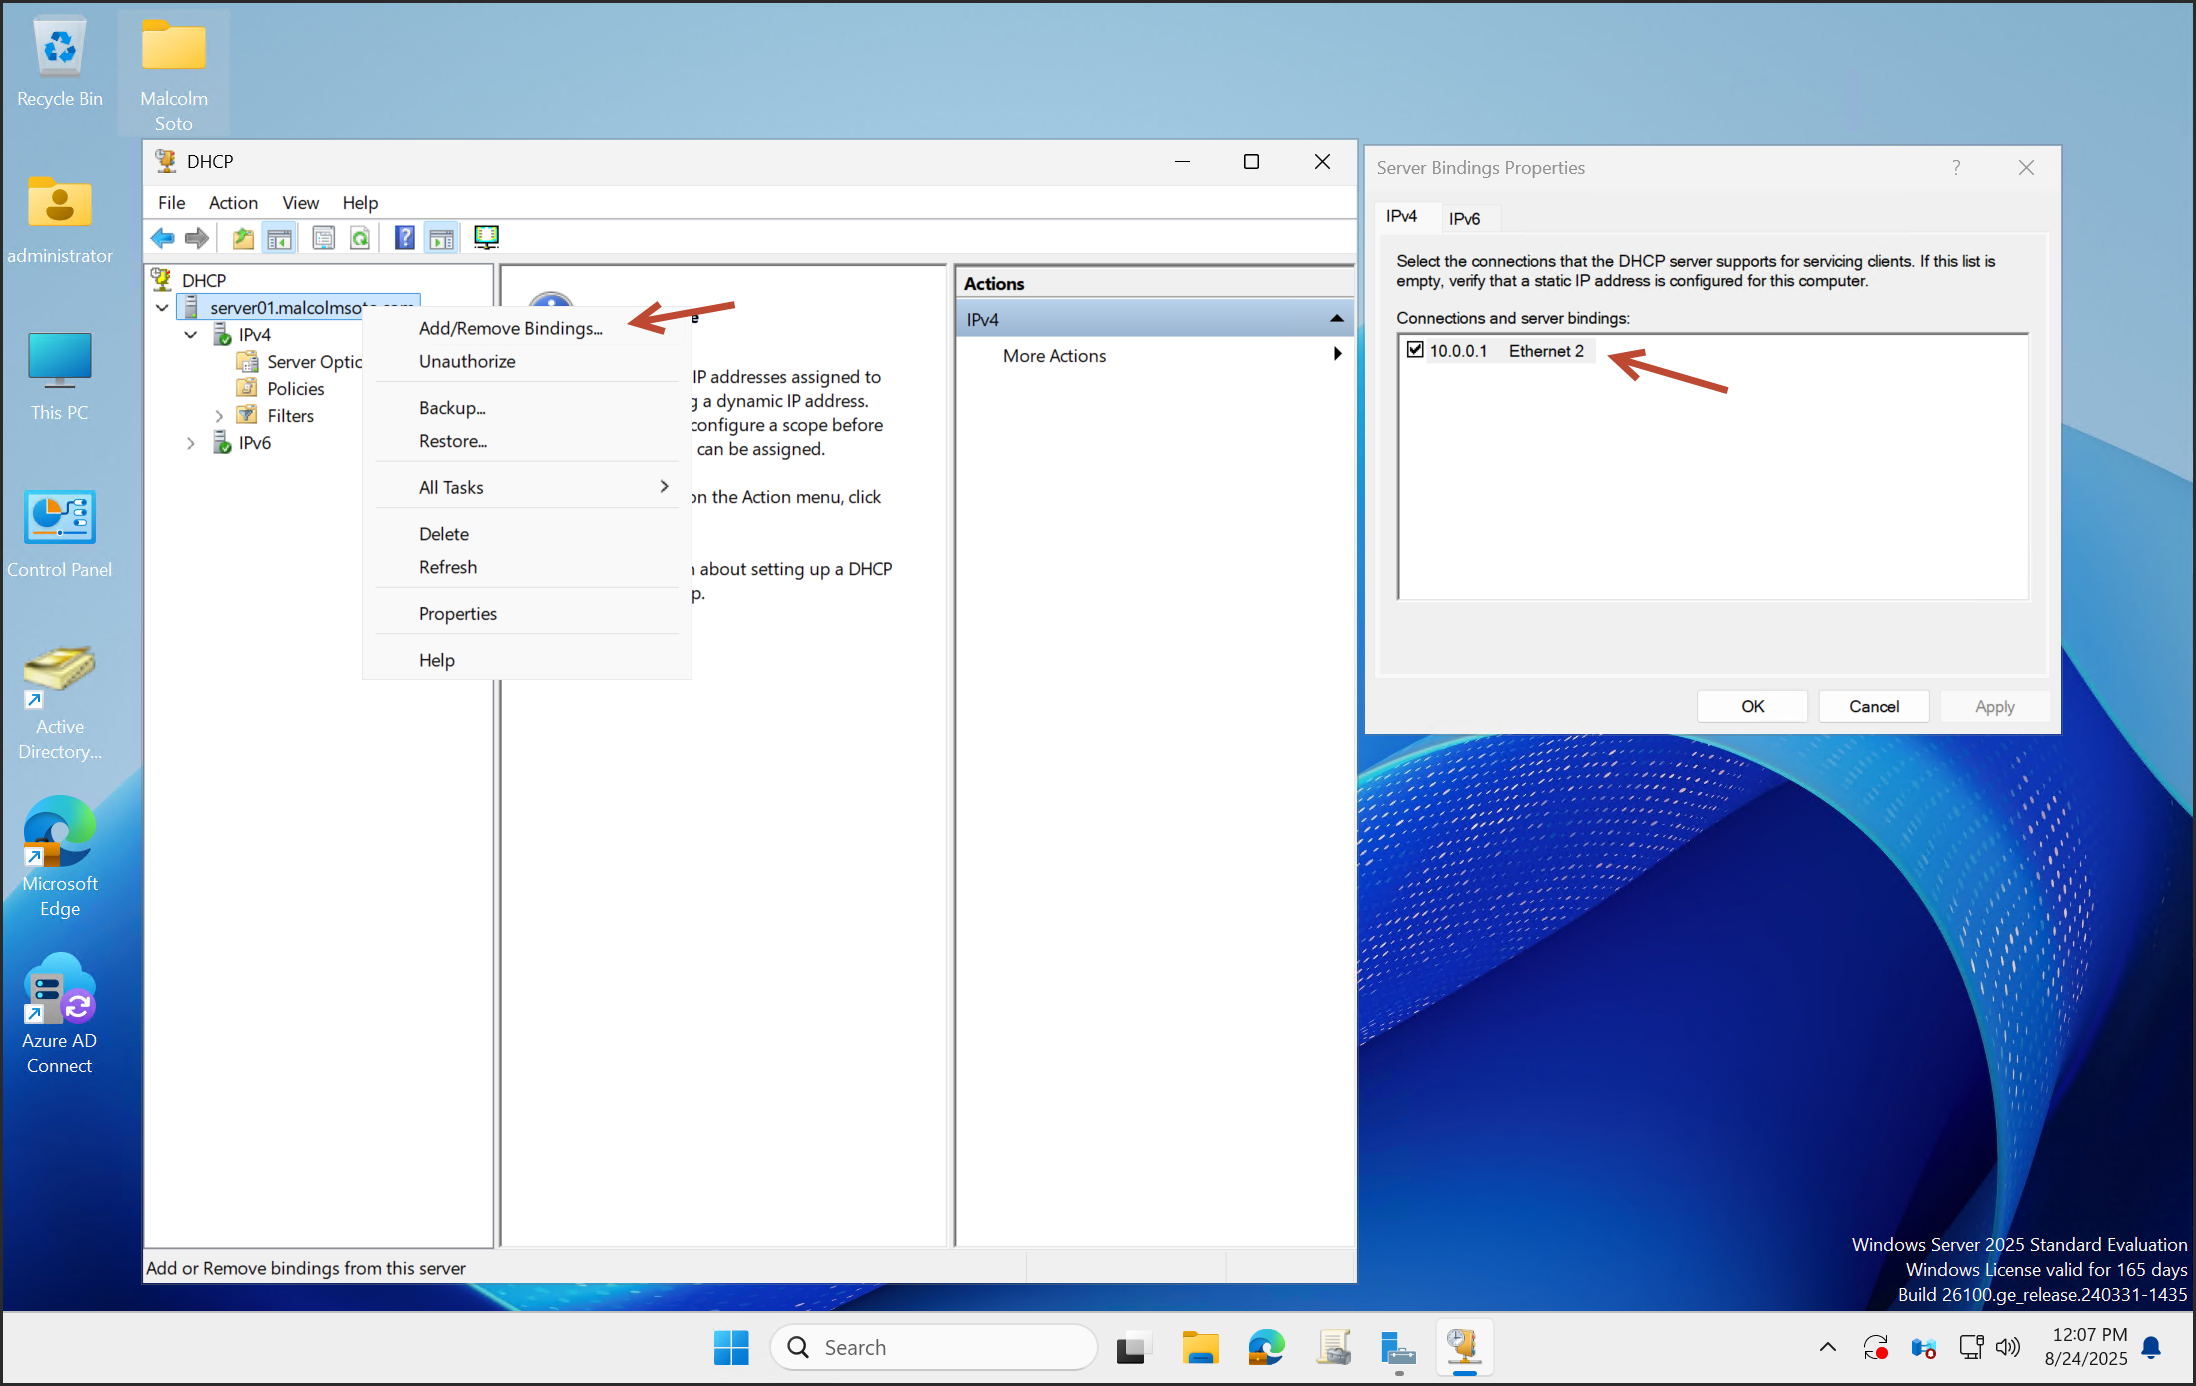
Confirm the binding is set to NIC #2.
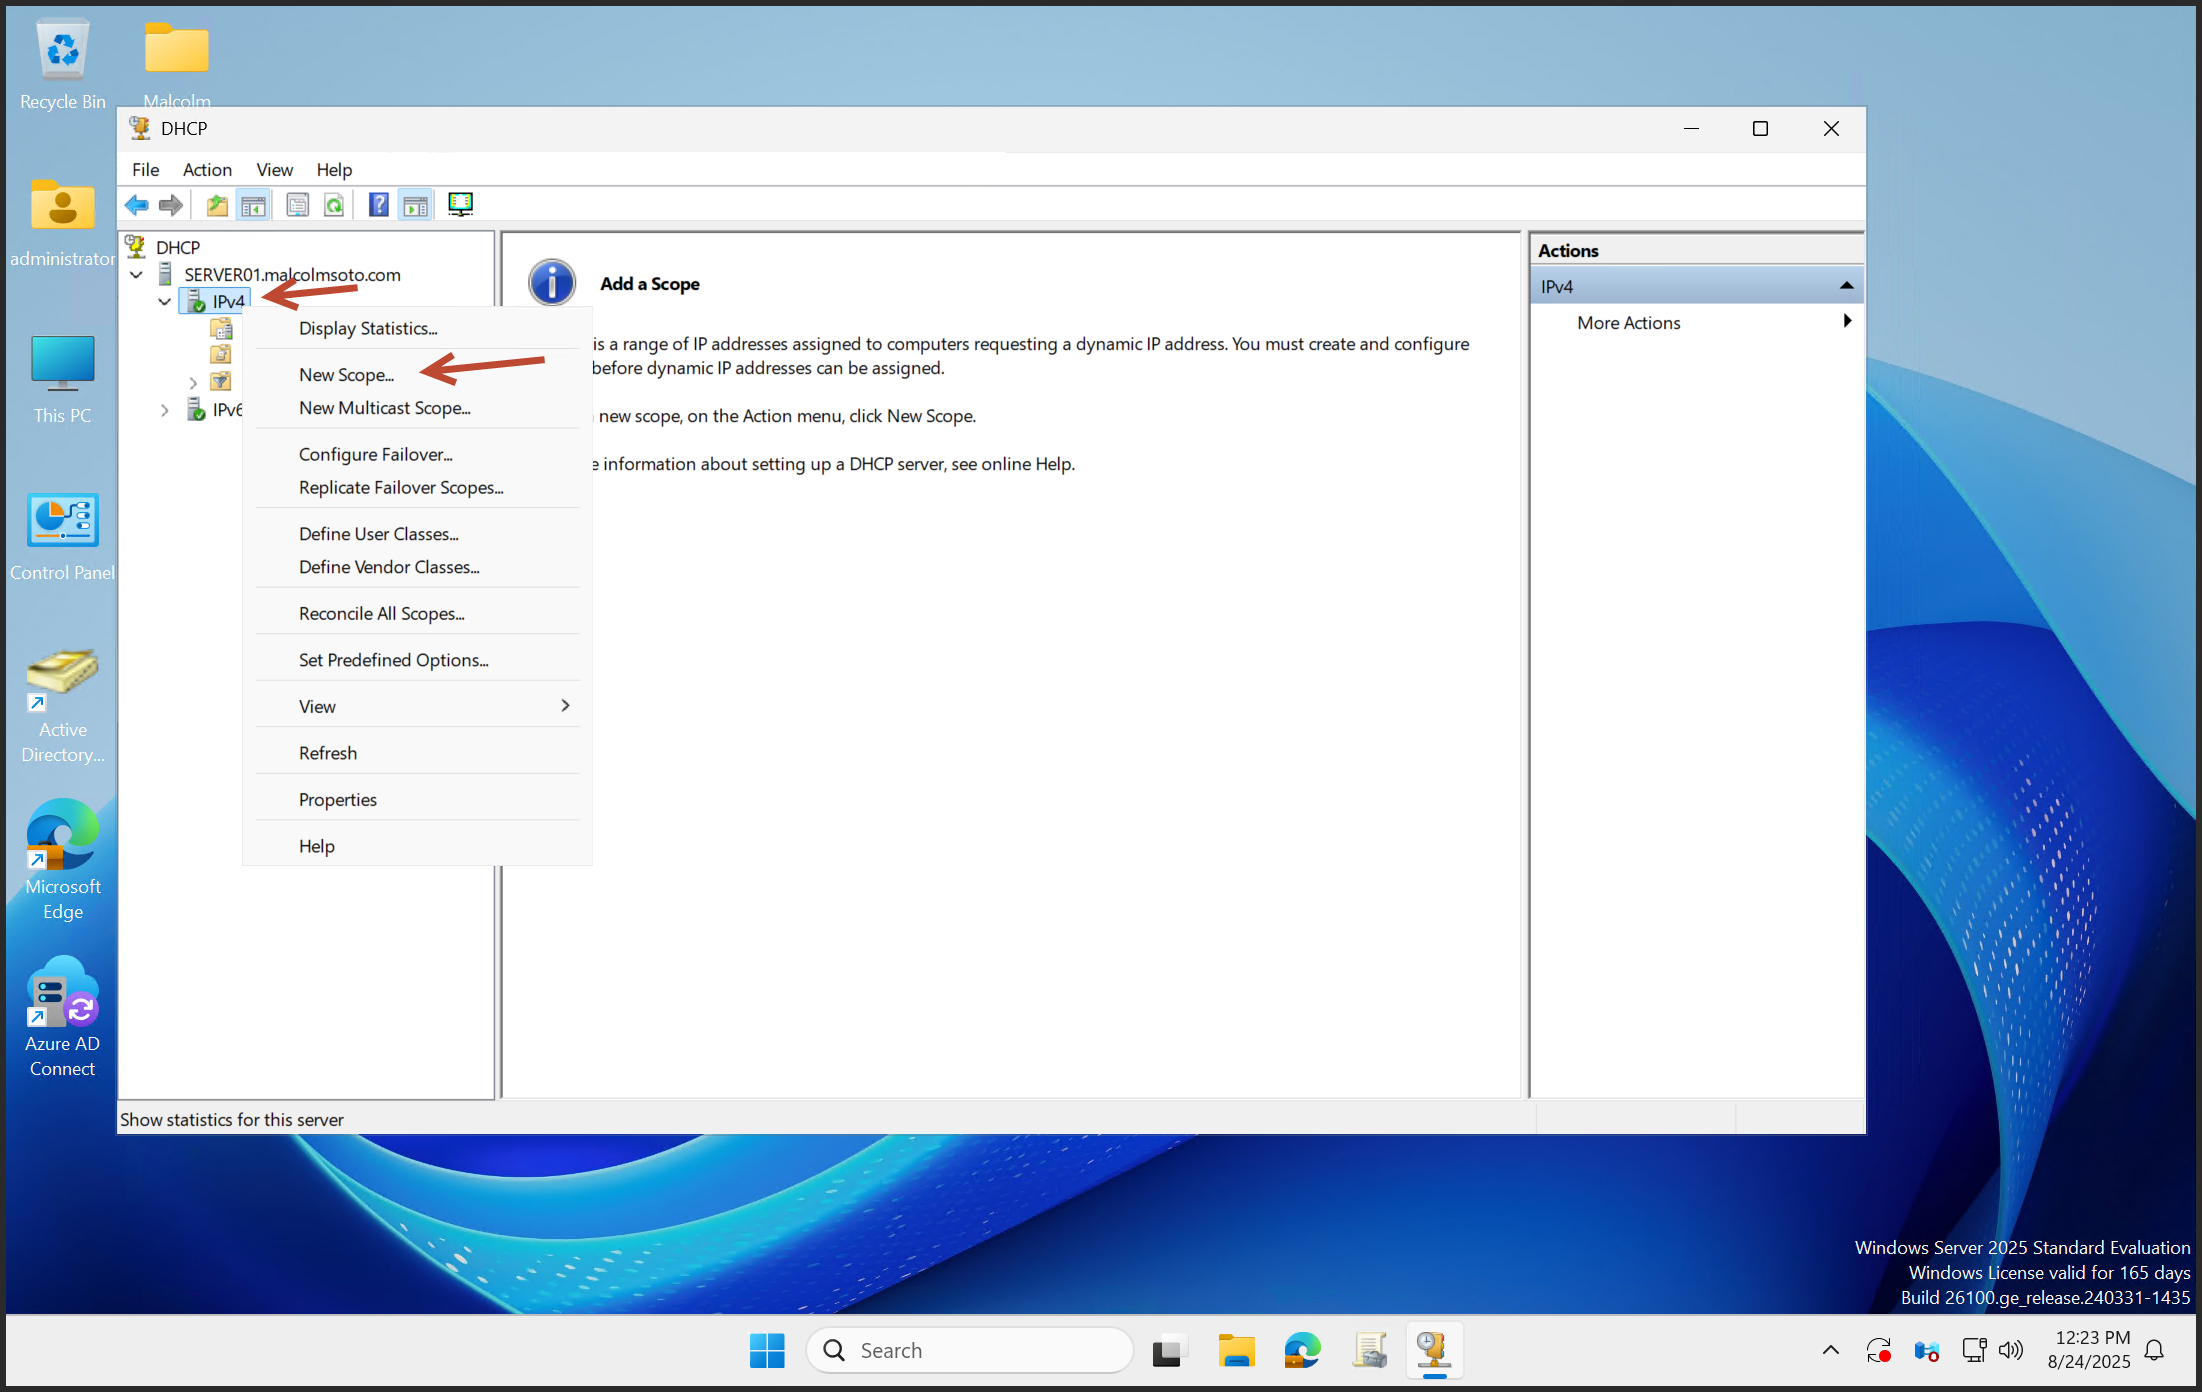
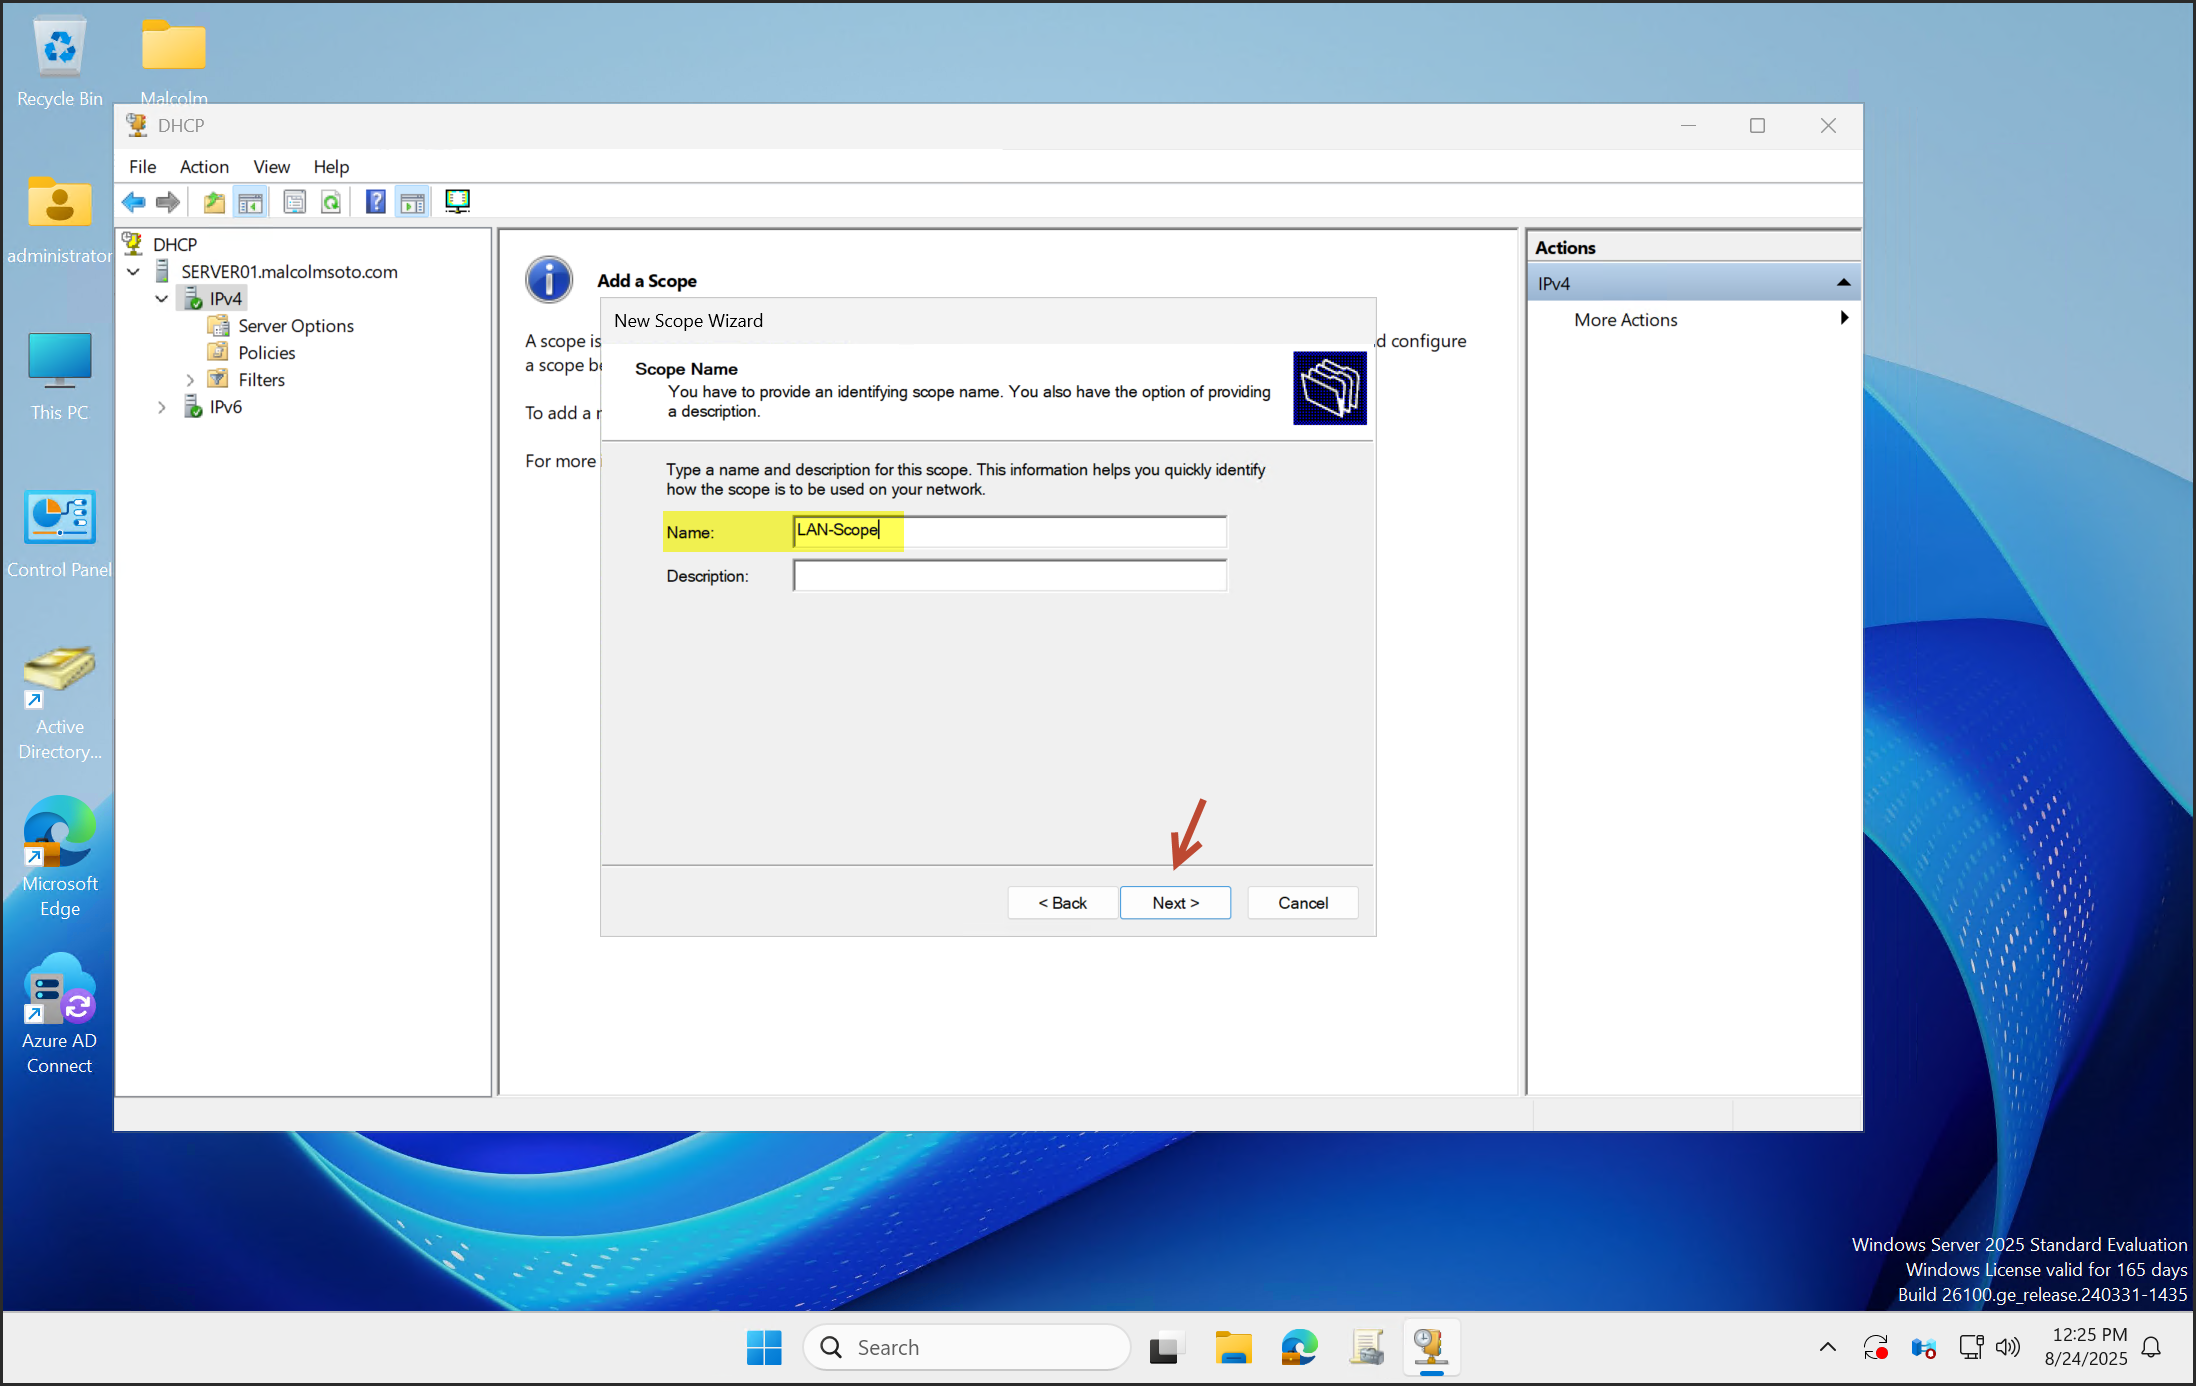
Right-click IPv4 and select New Scope.
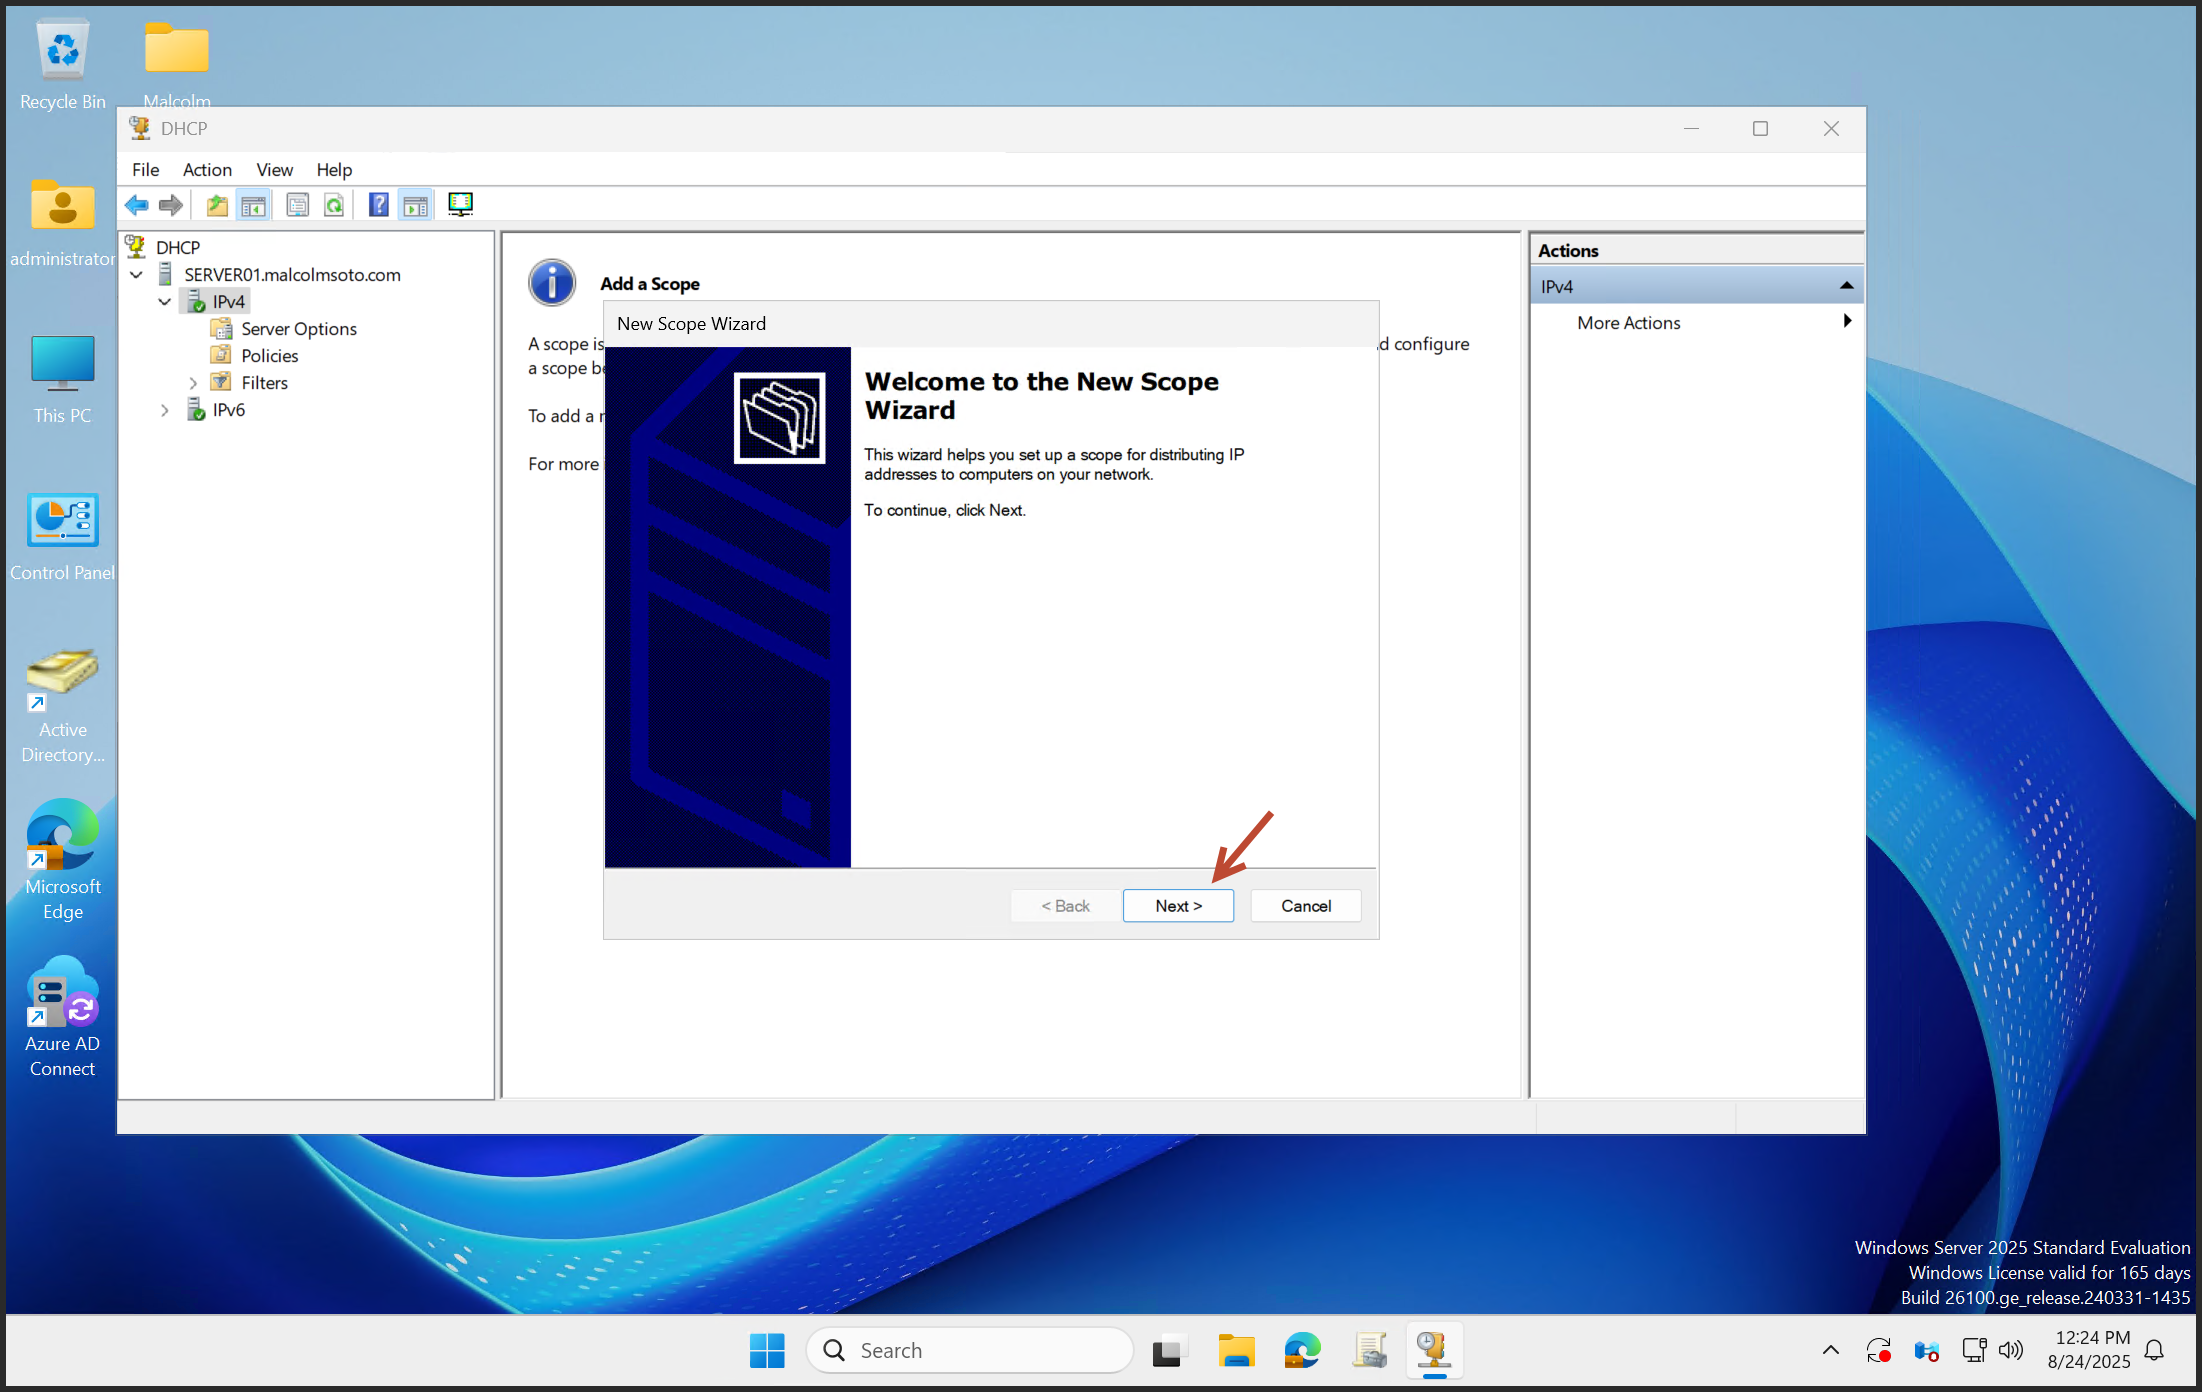
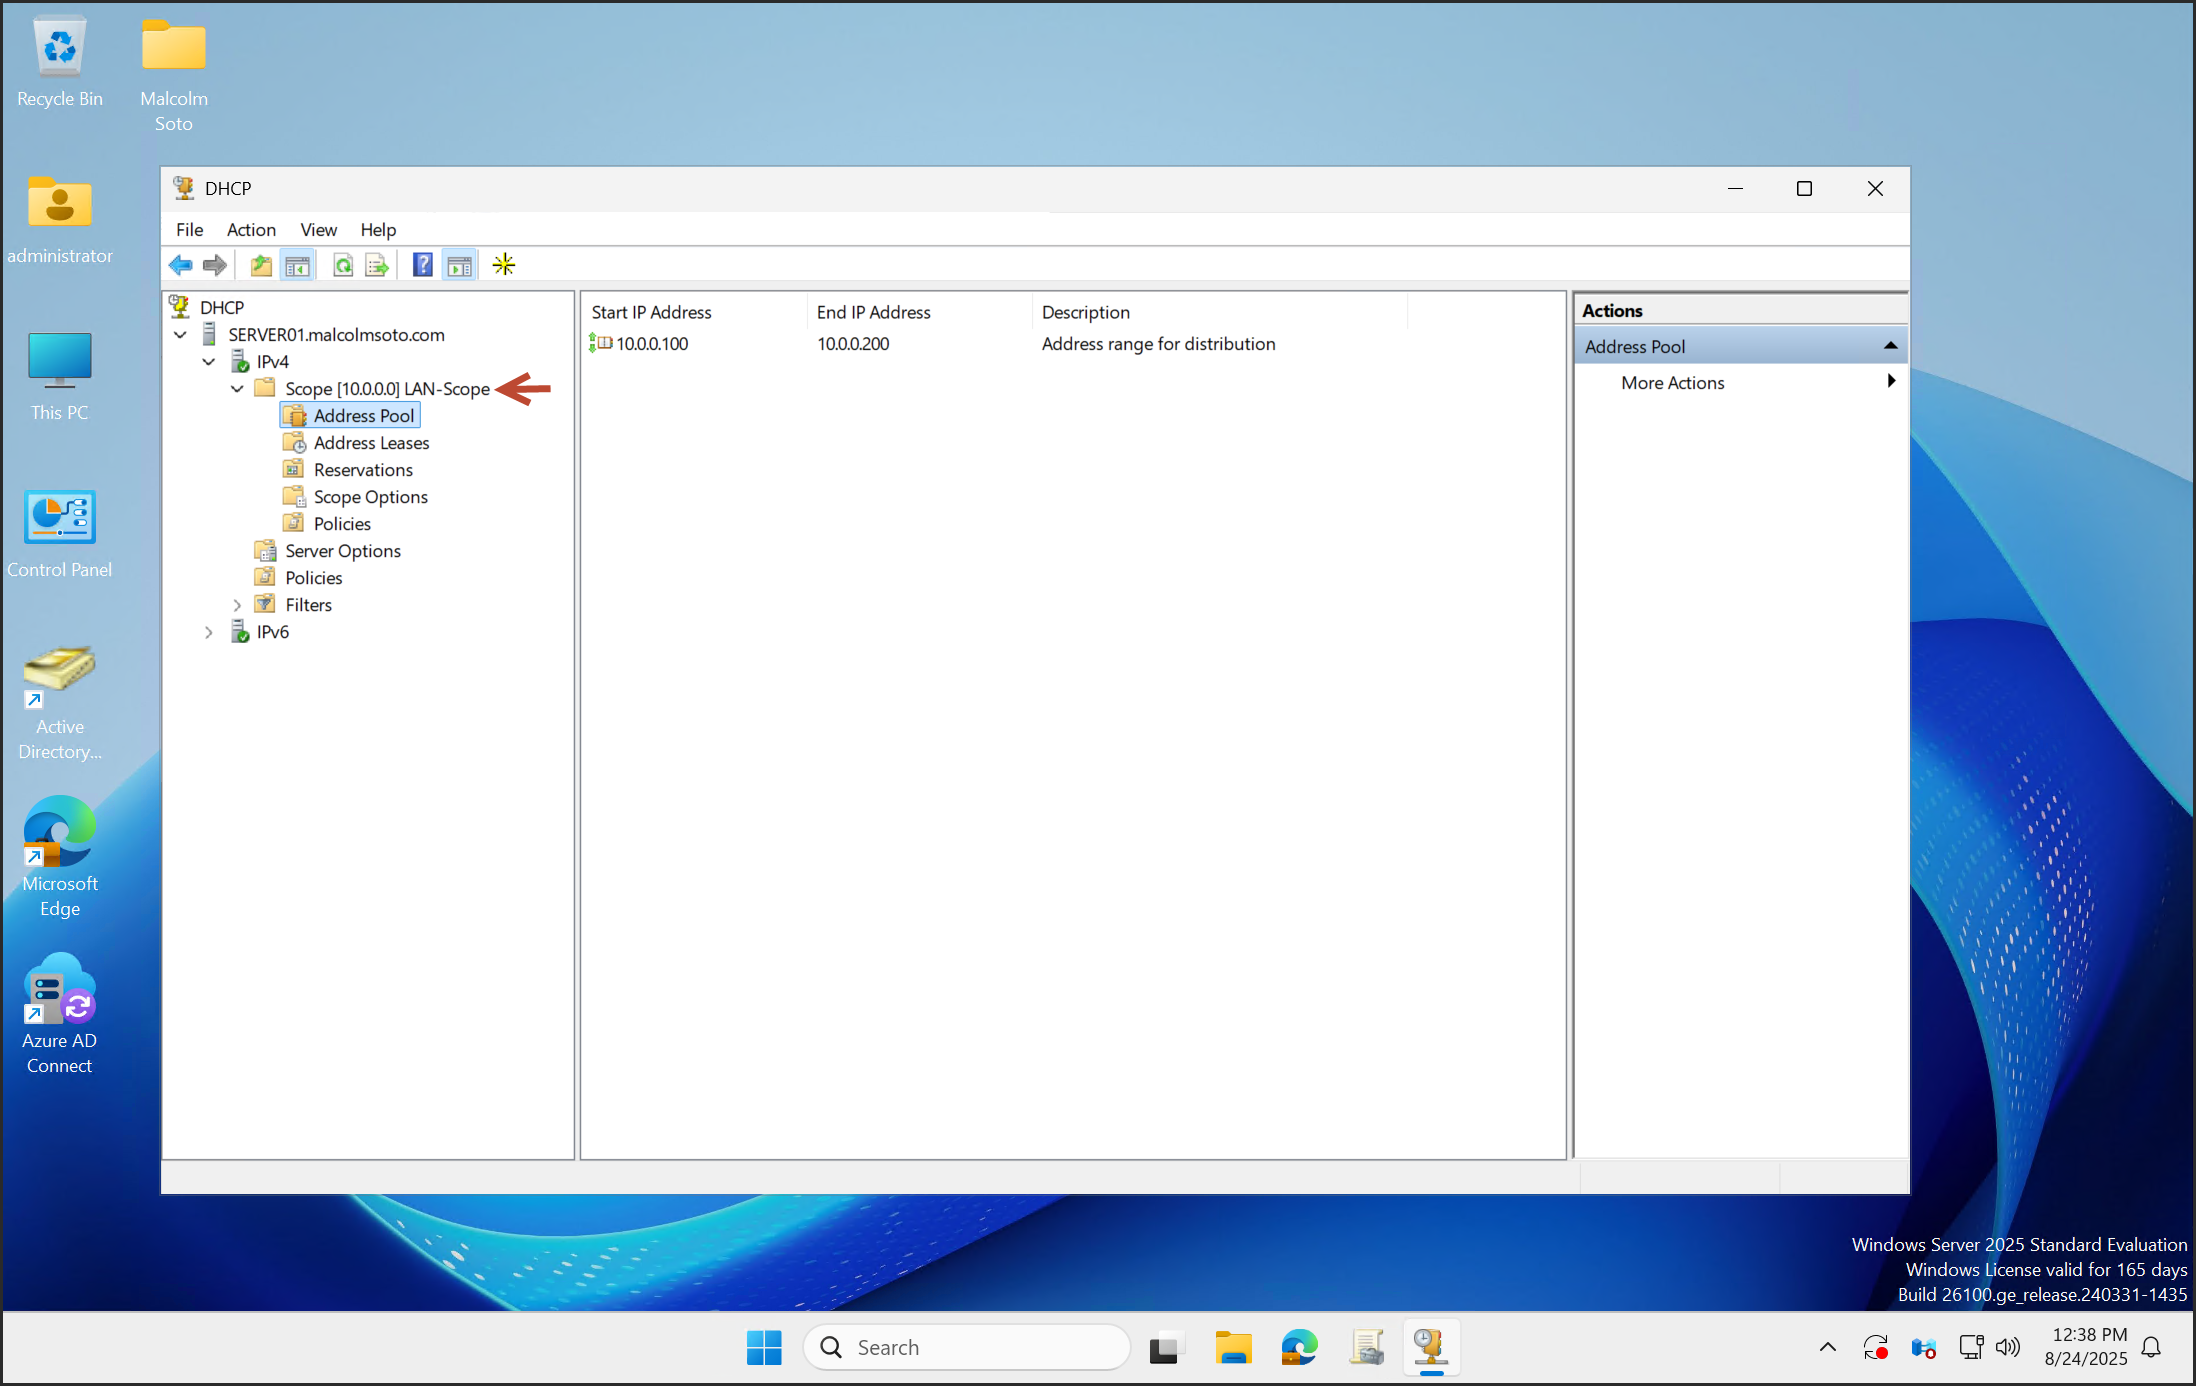
Name the scope and define the IP range and subnet mask.
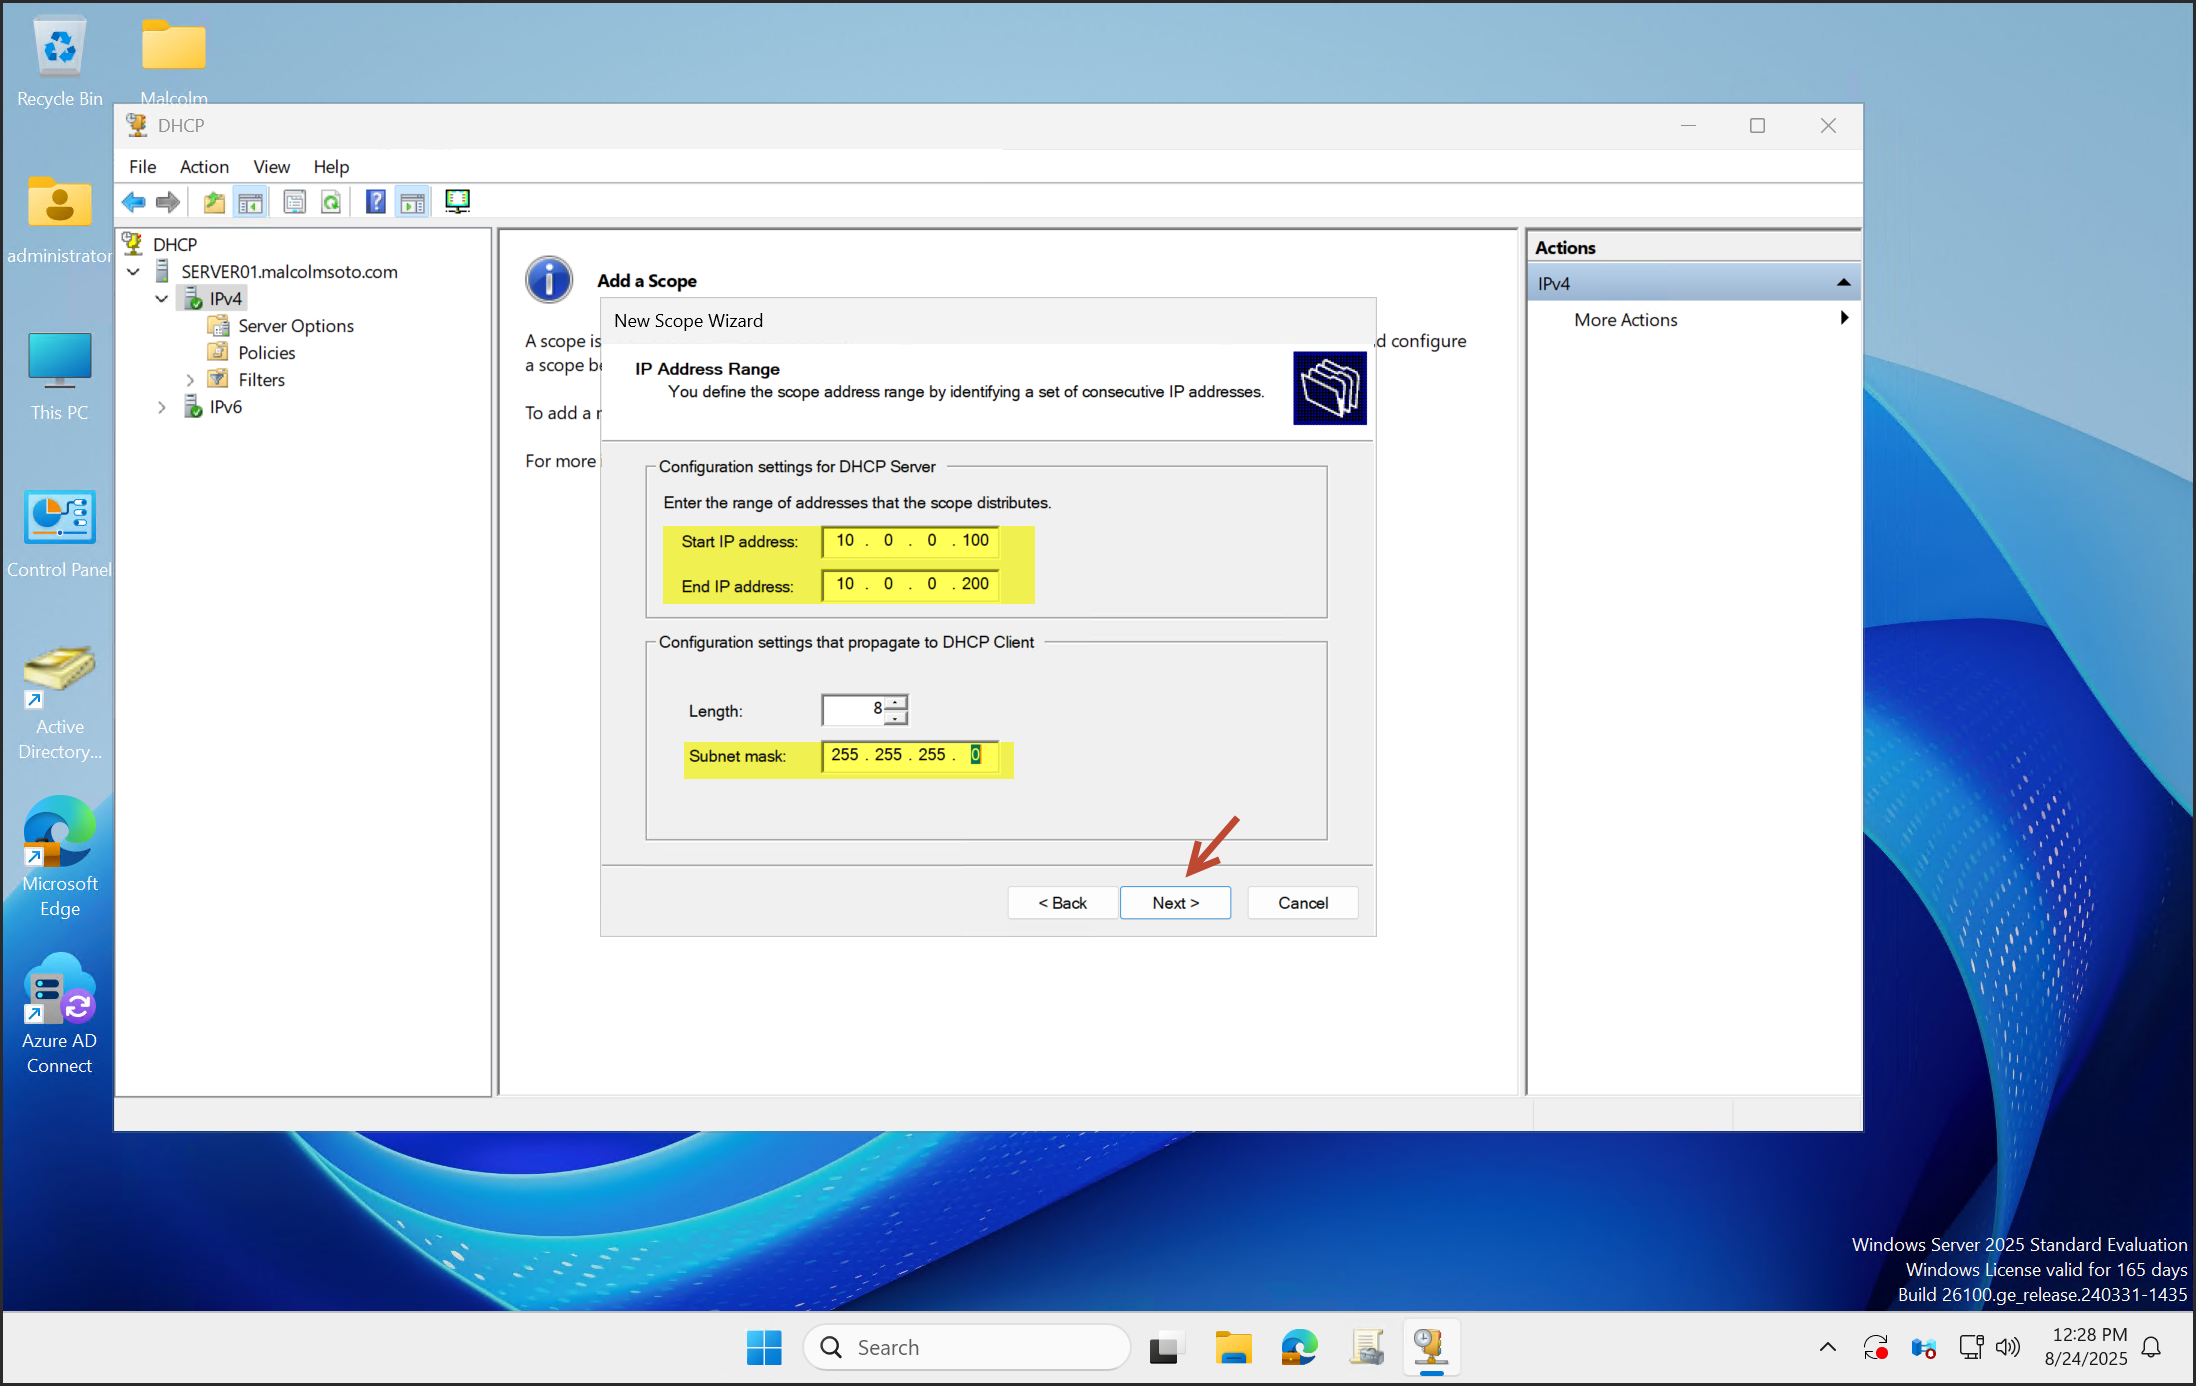
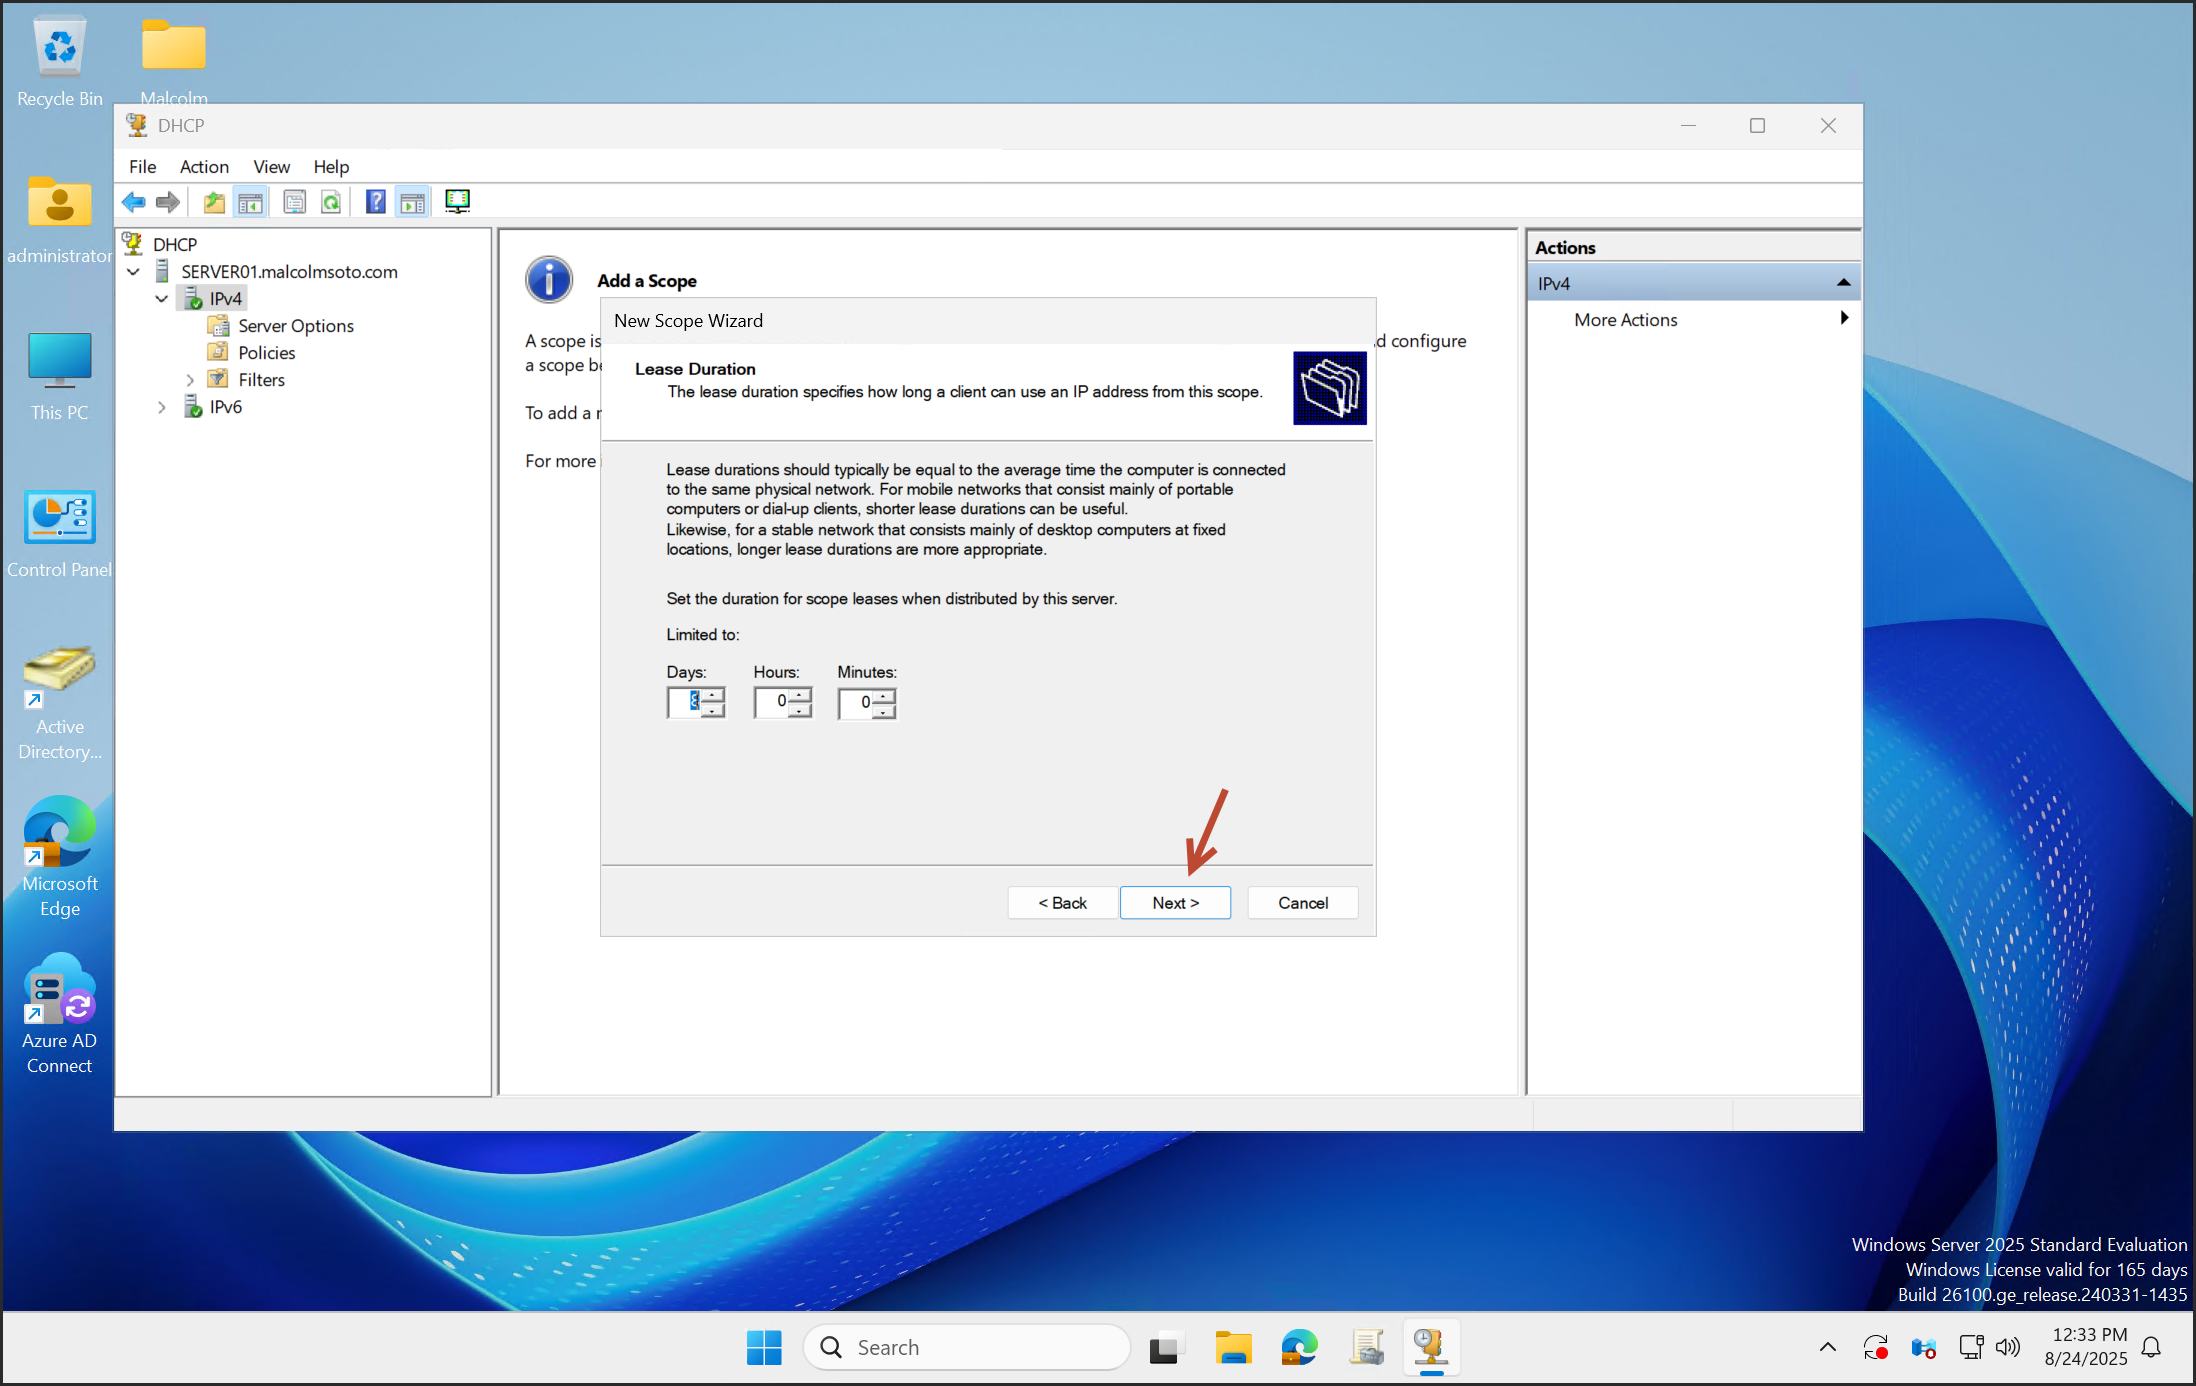
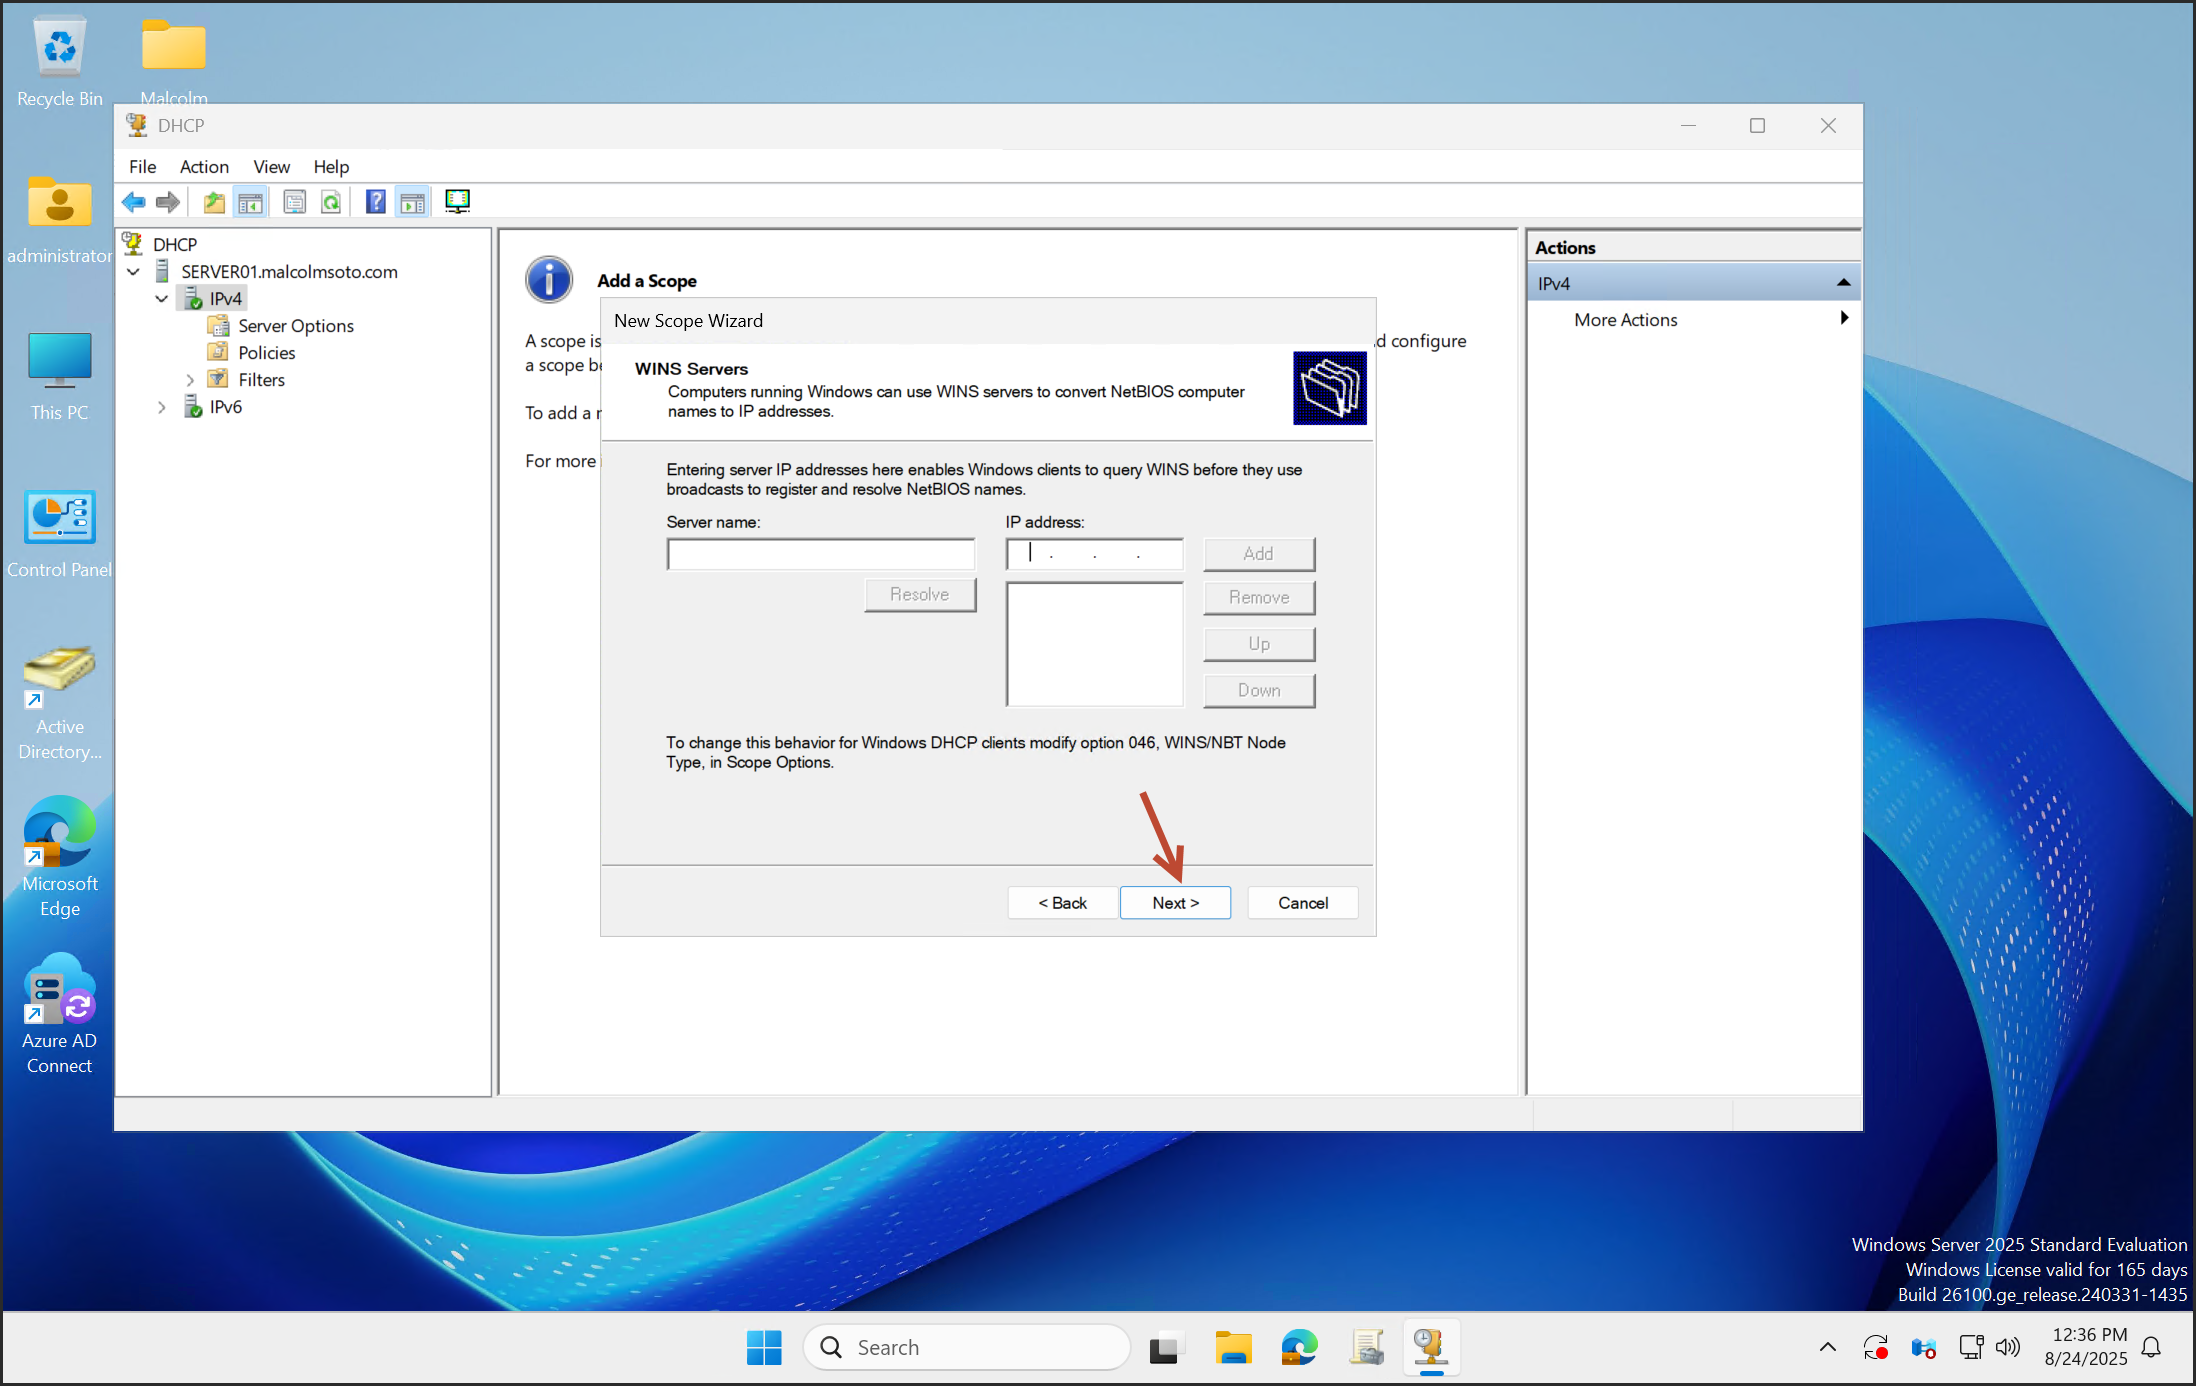
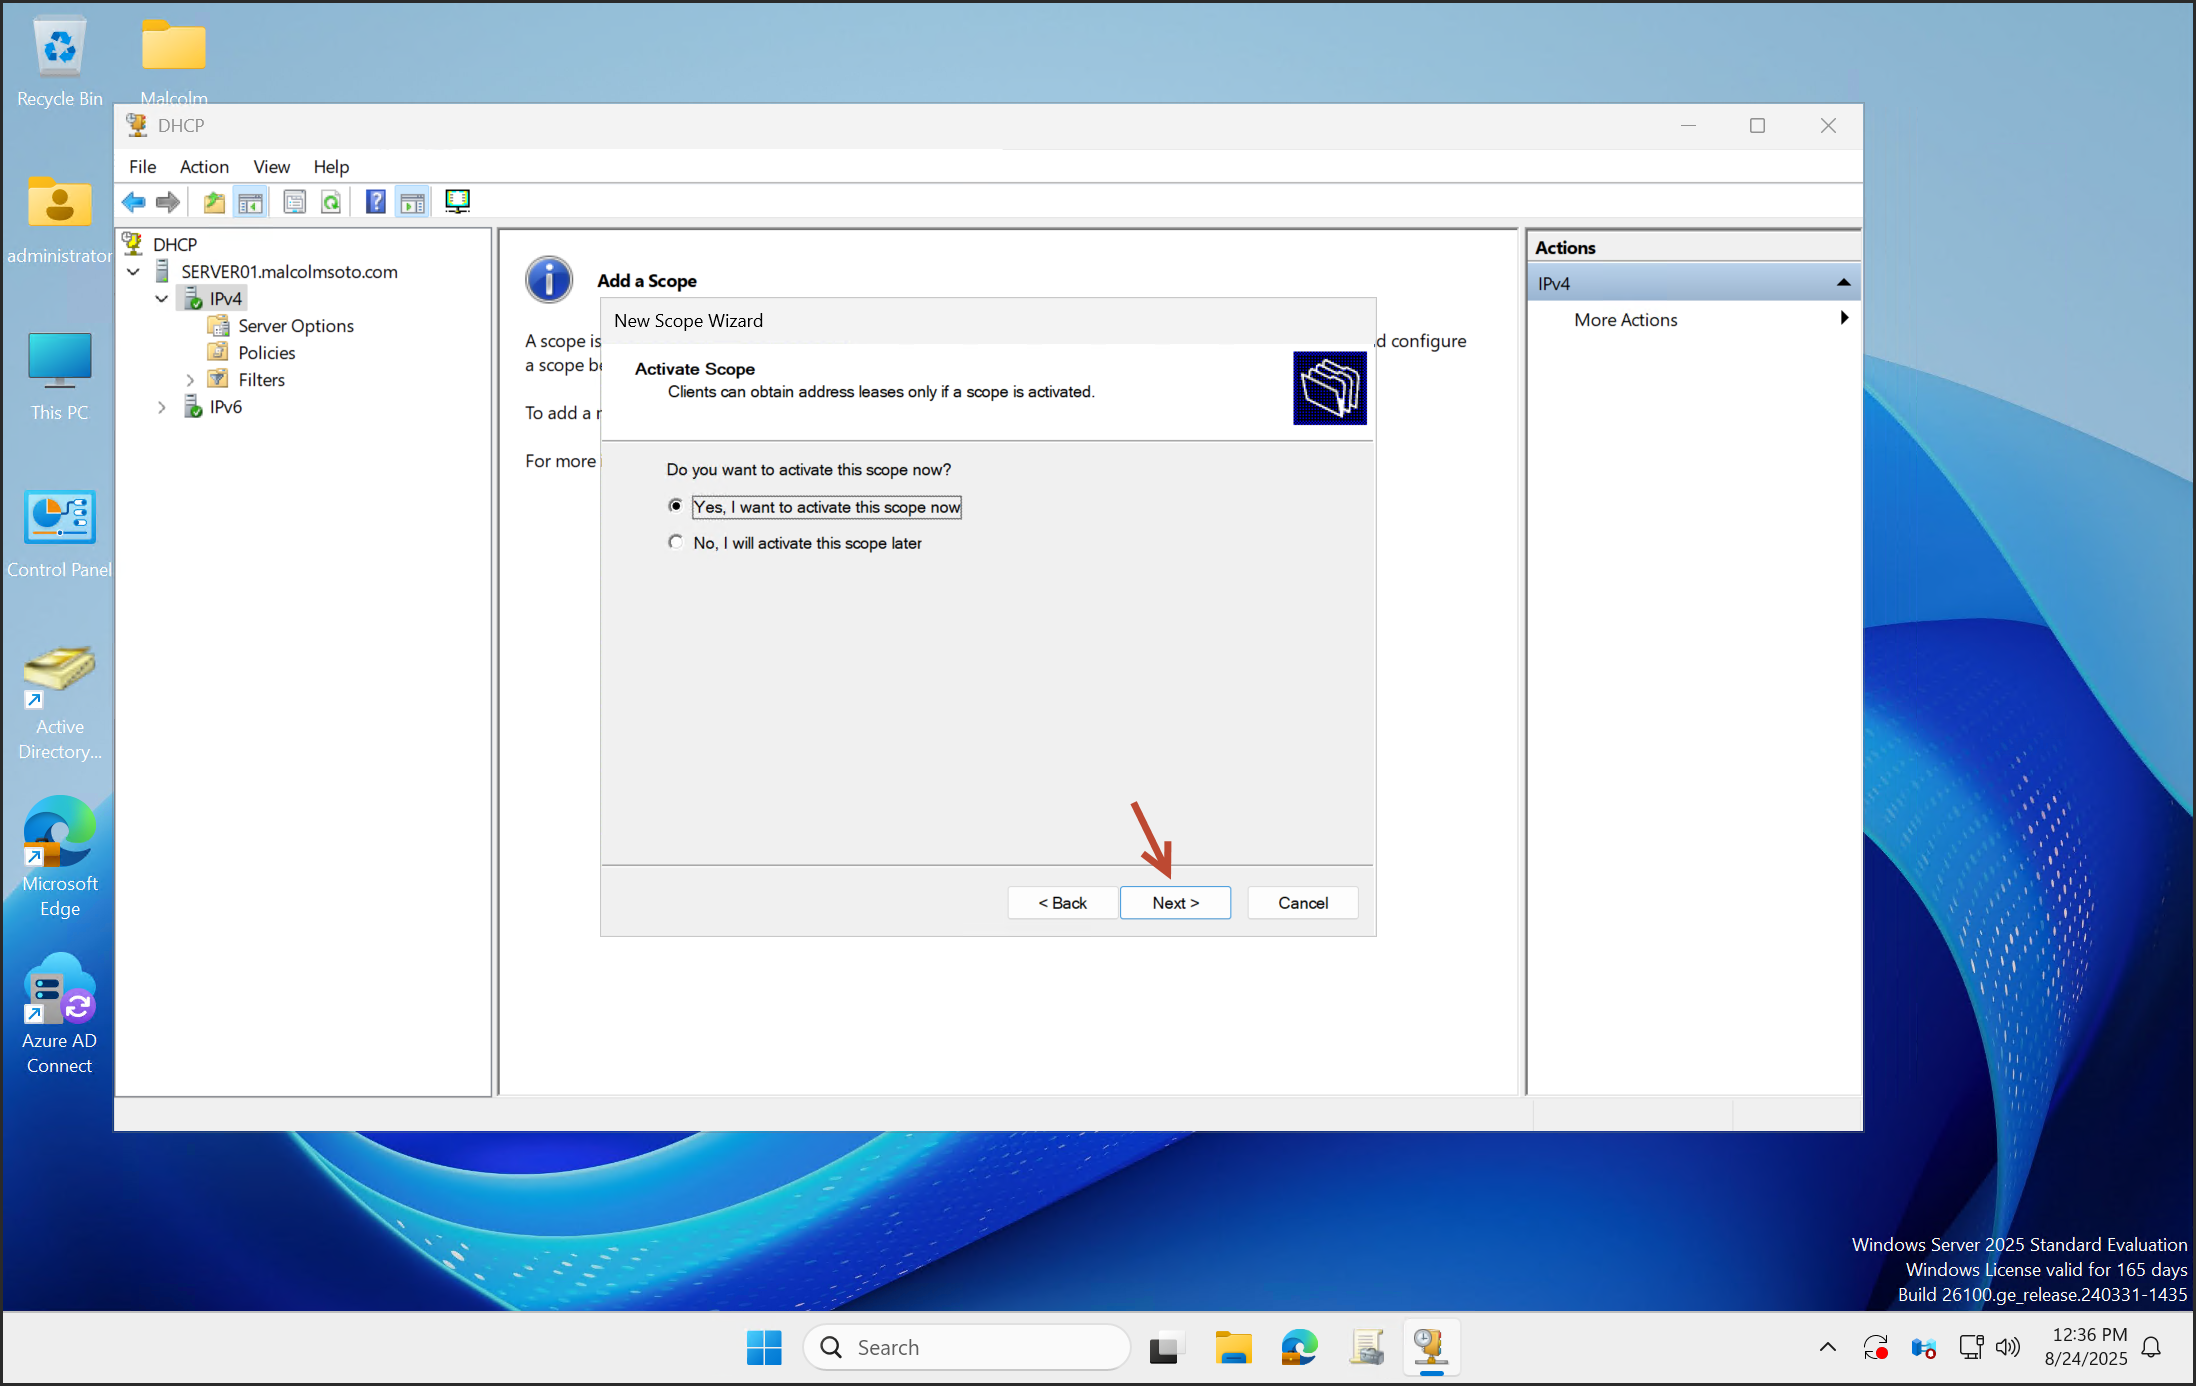
Click Next through the remaining steps.


Add the router IP (e.g., 10.0.0.1) and DNS server.

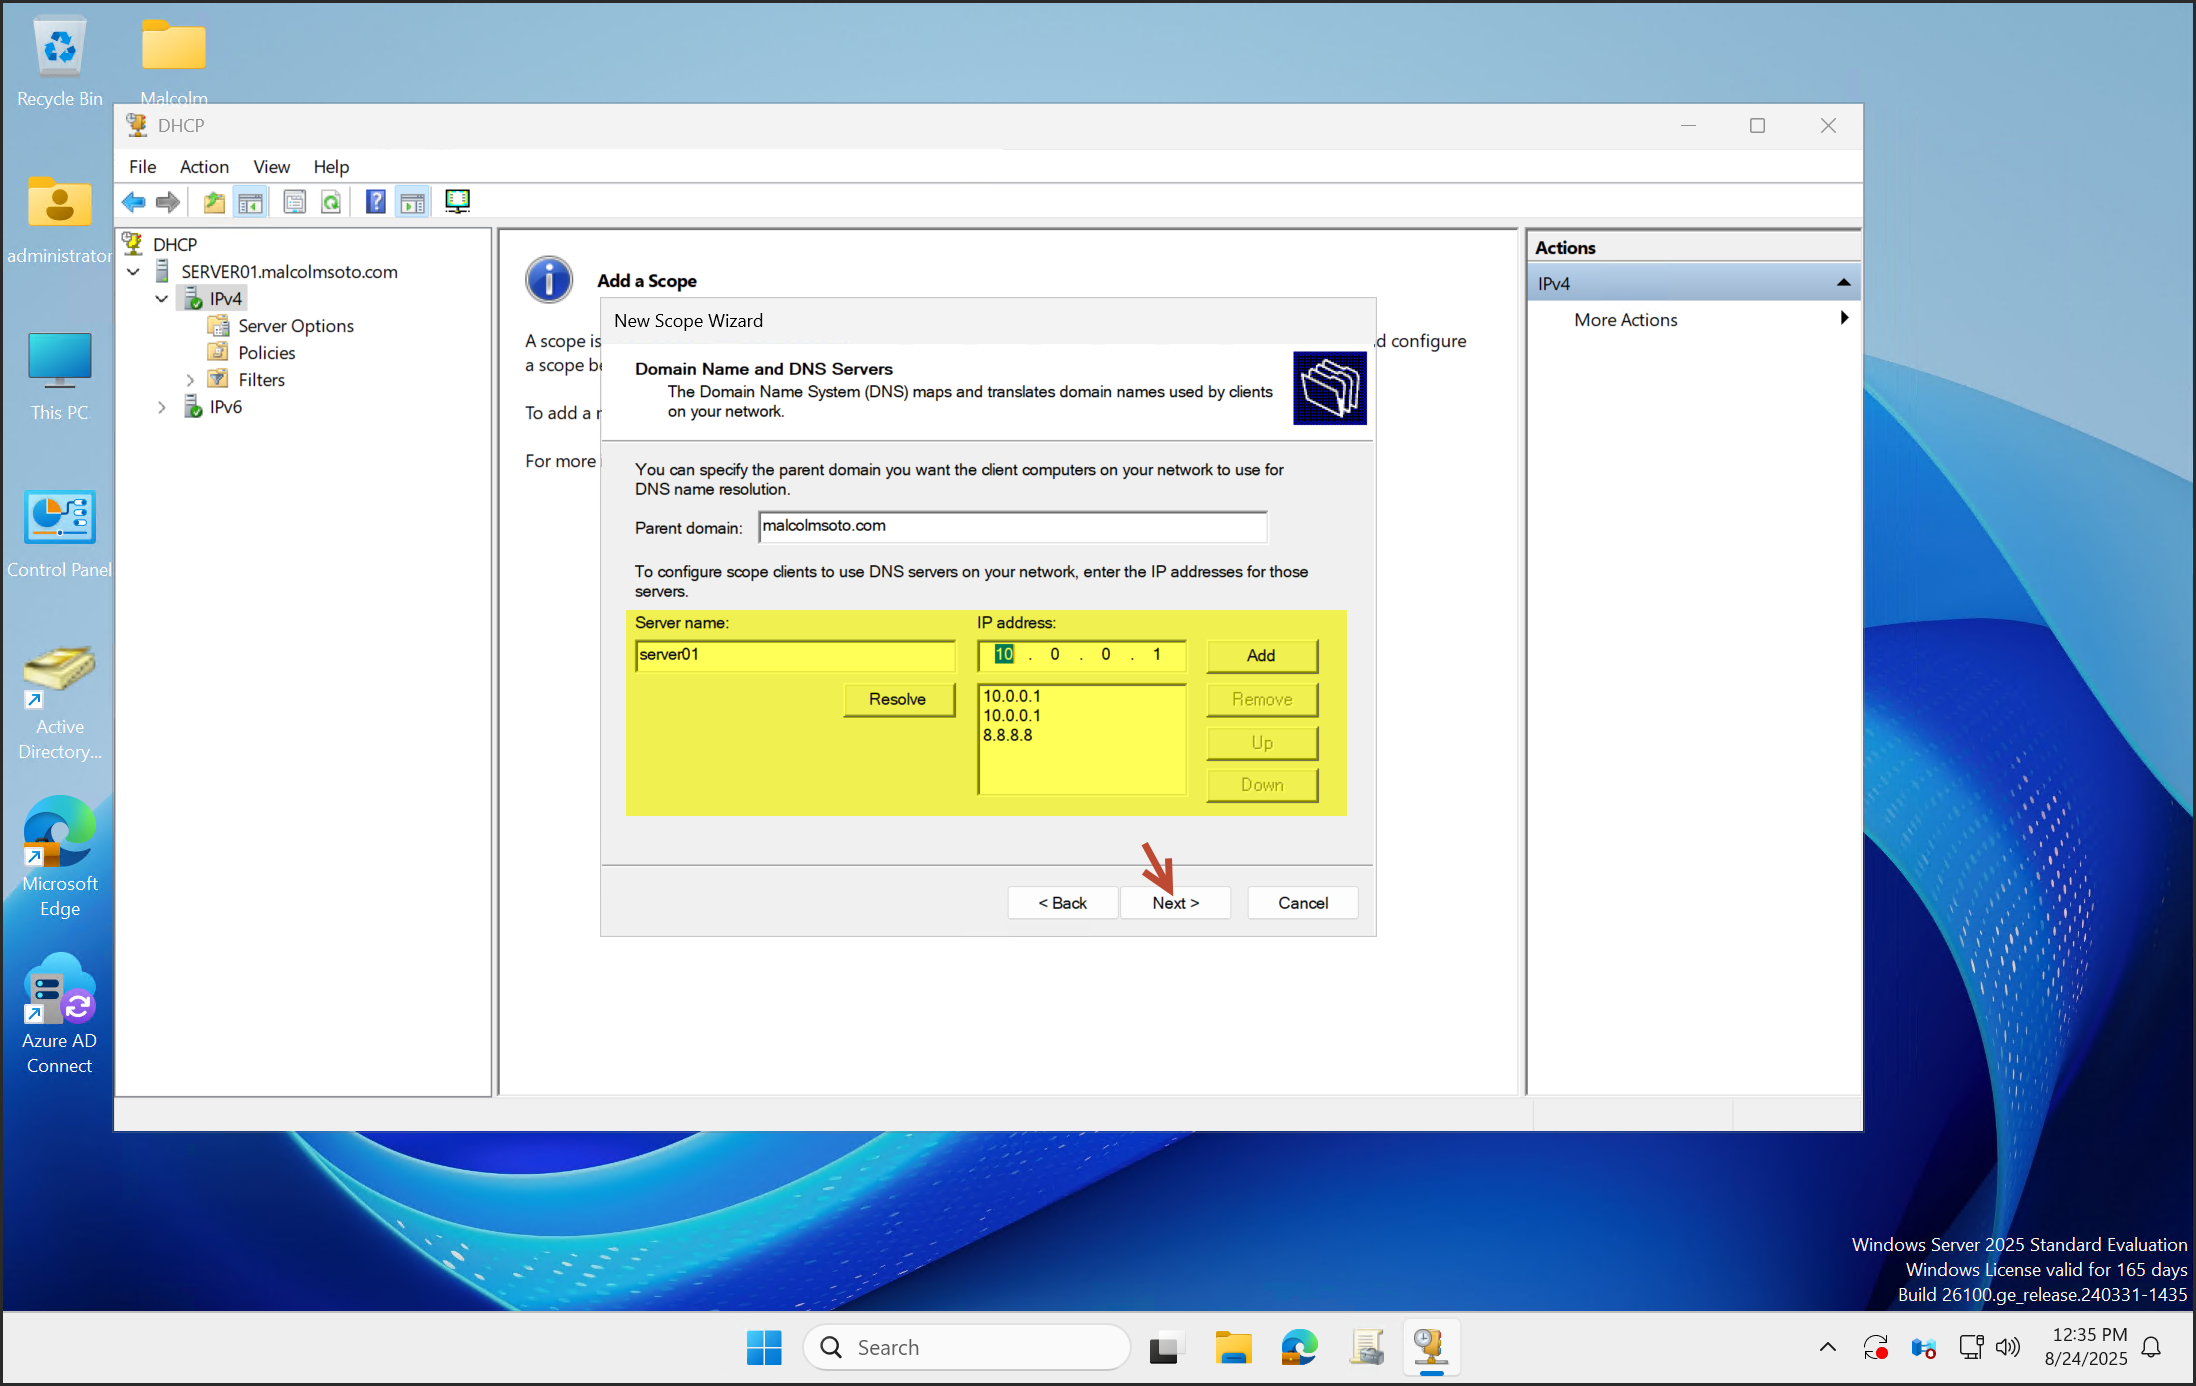
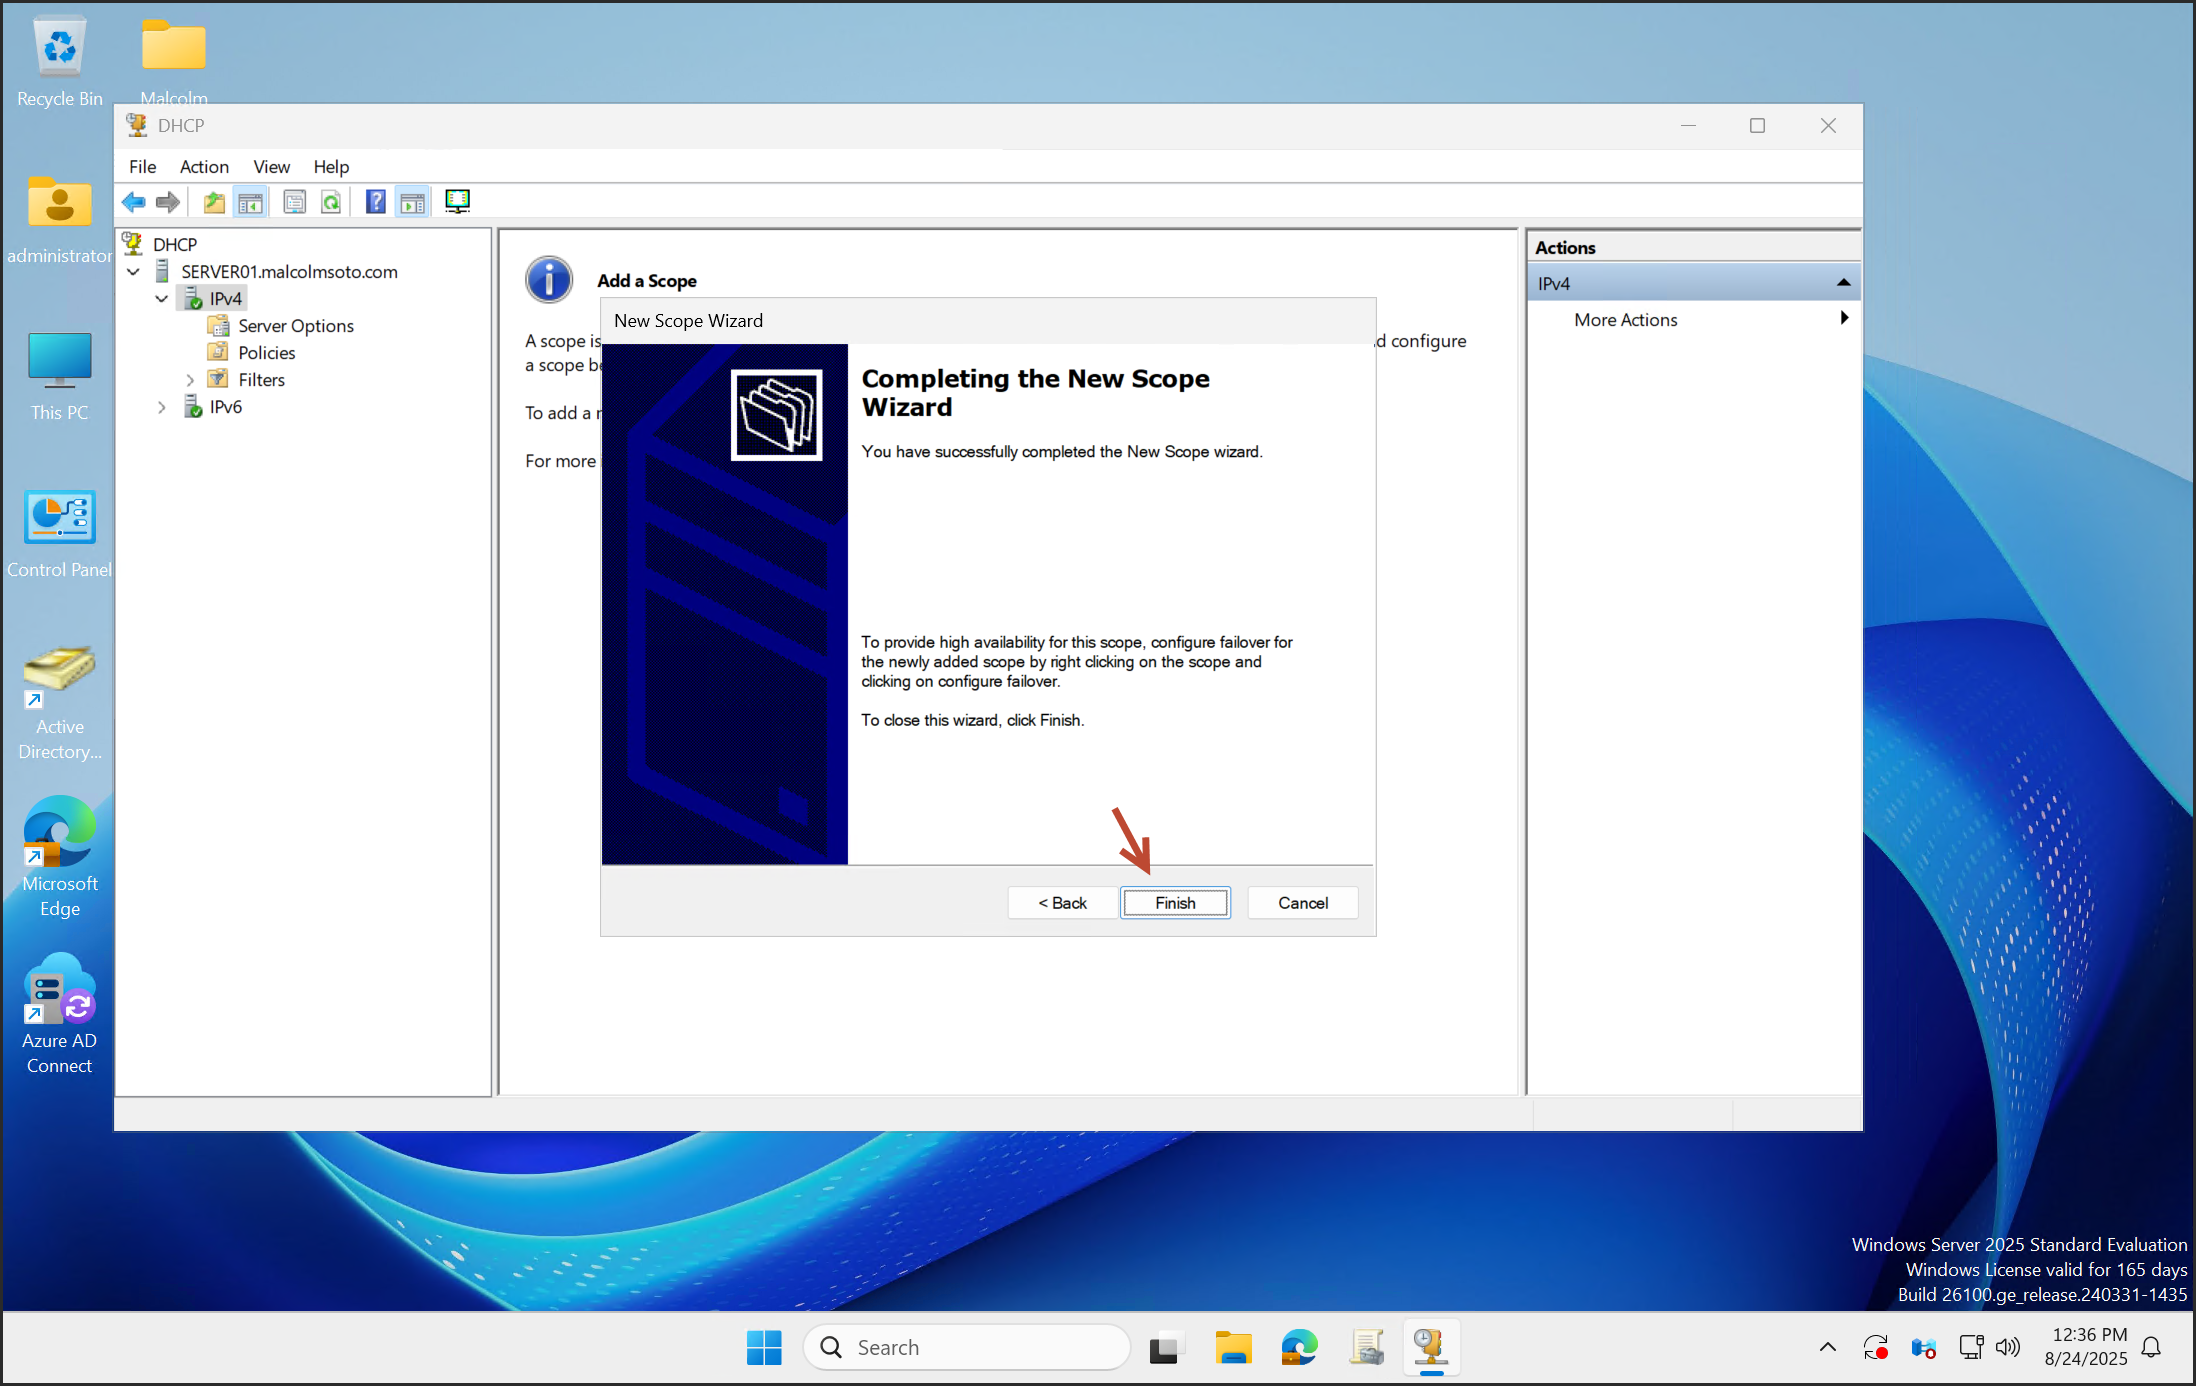
Click Next and Finish to complete the scope setup.
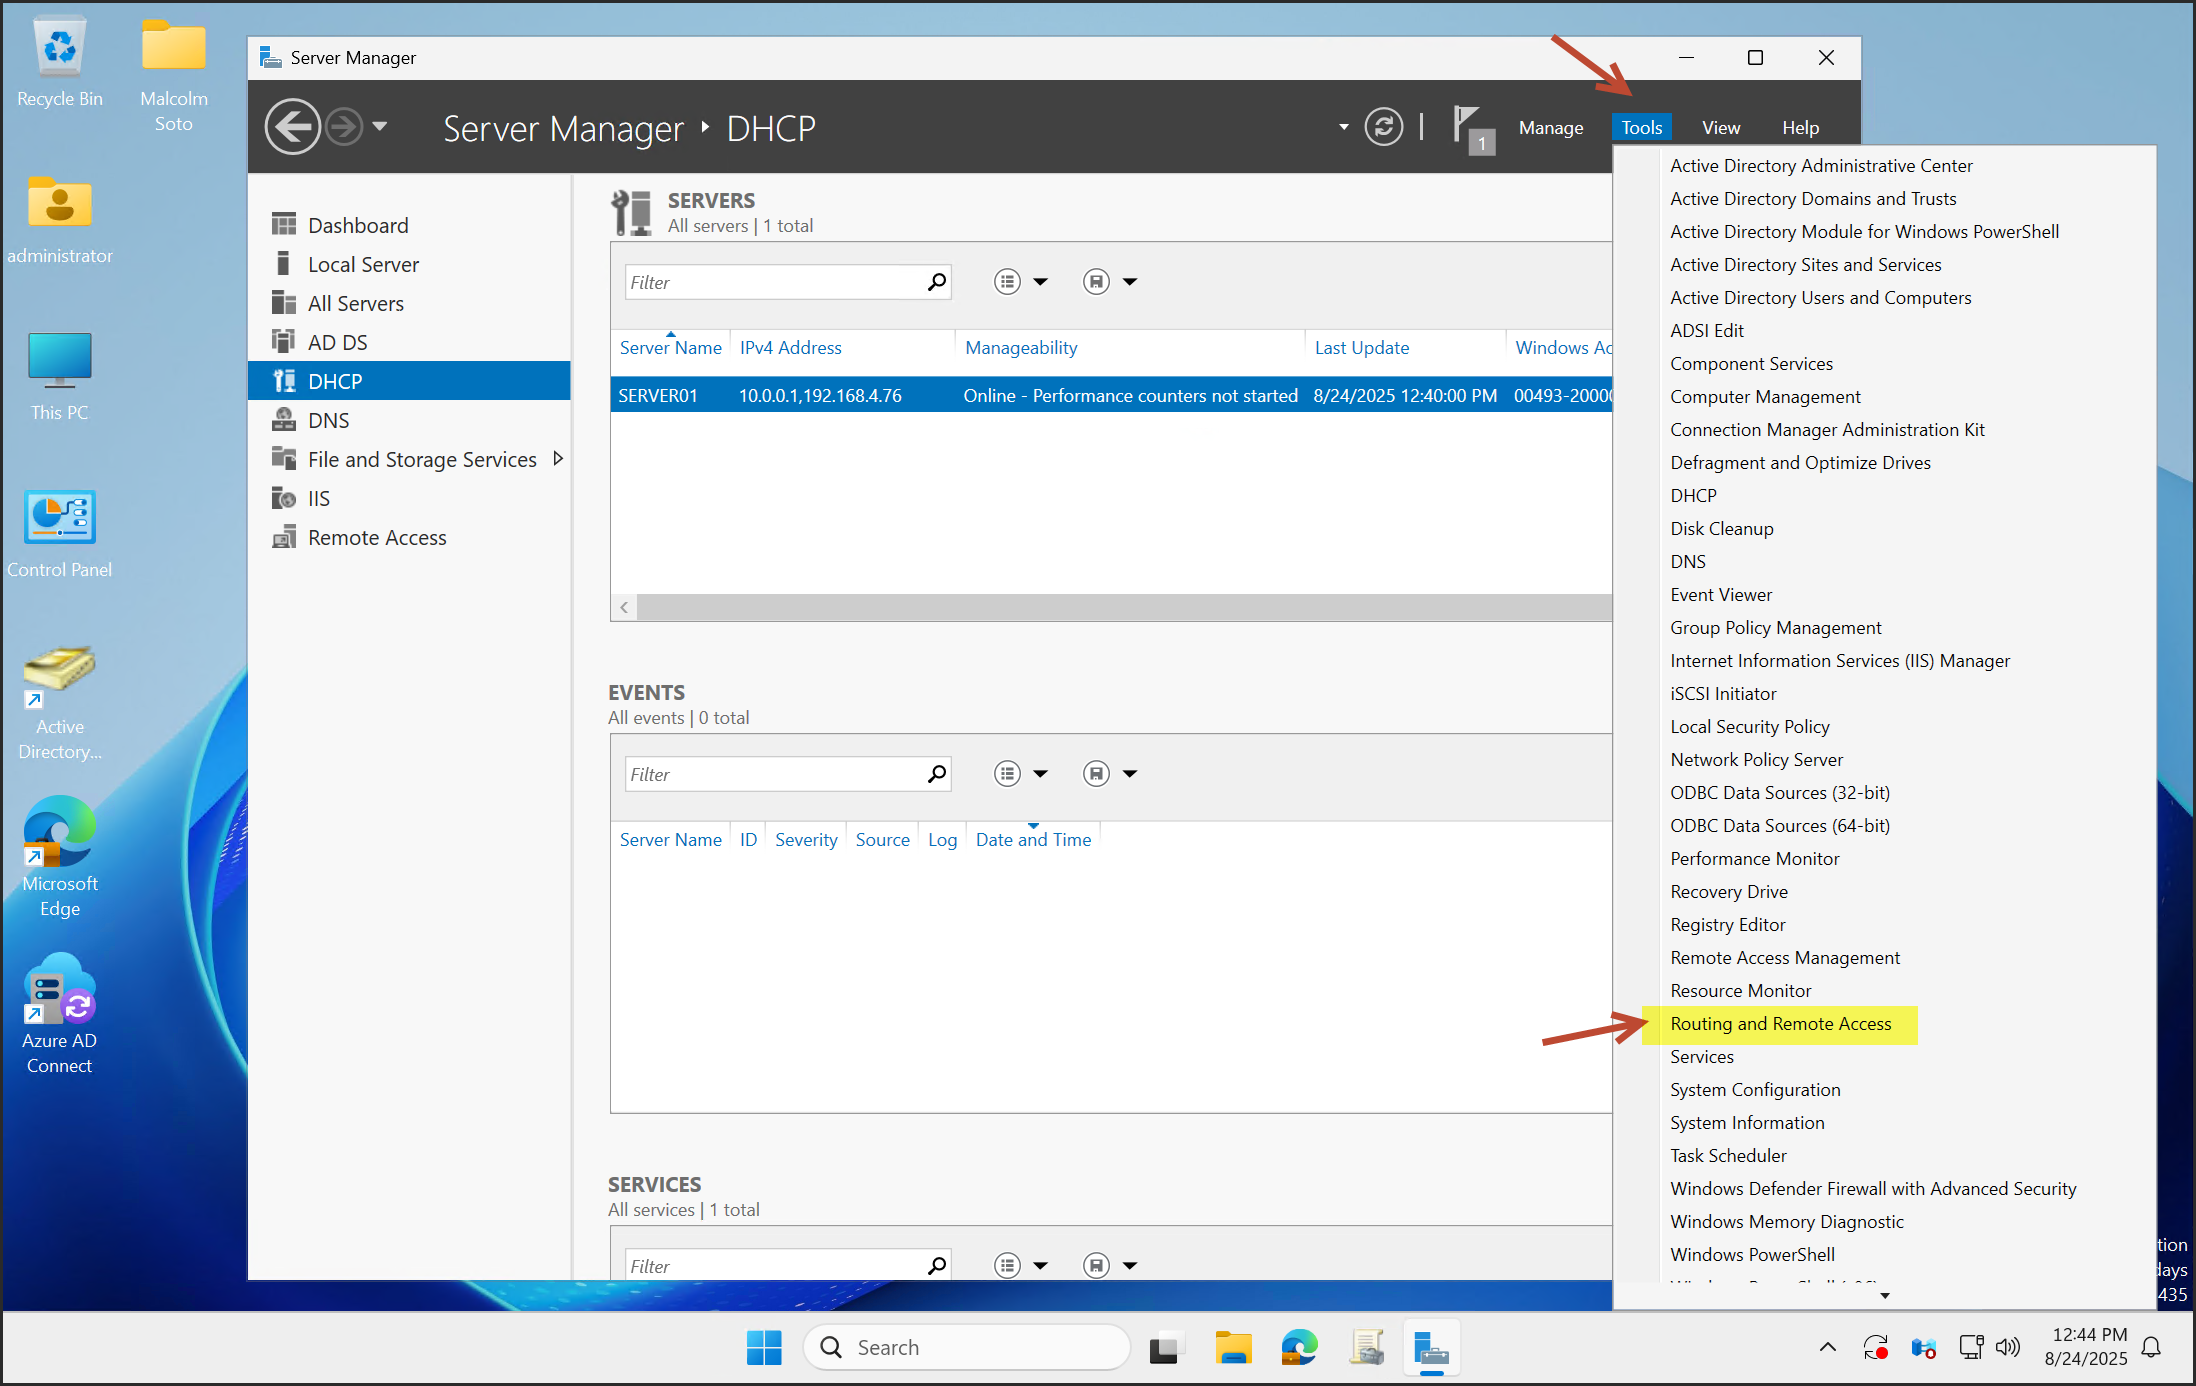
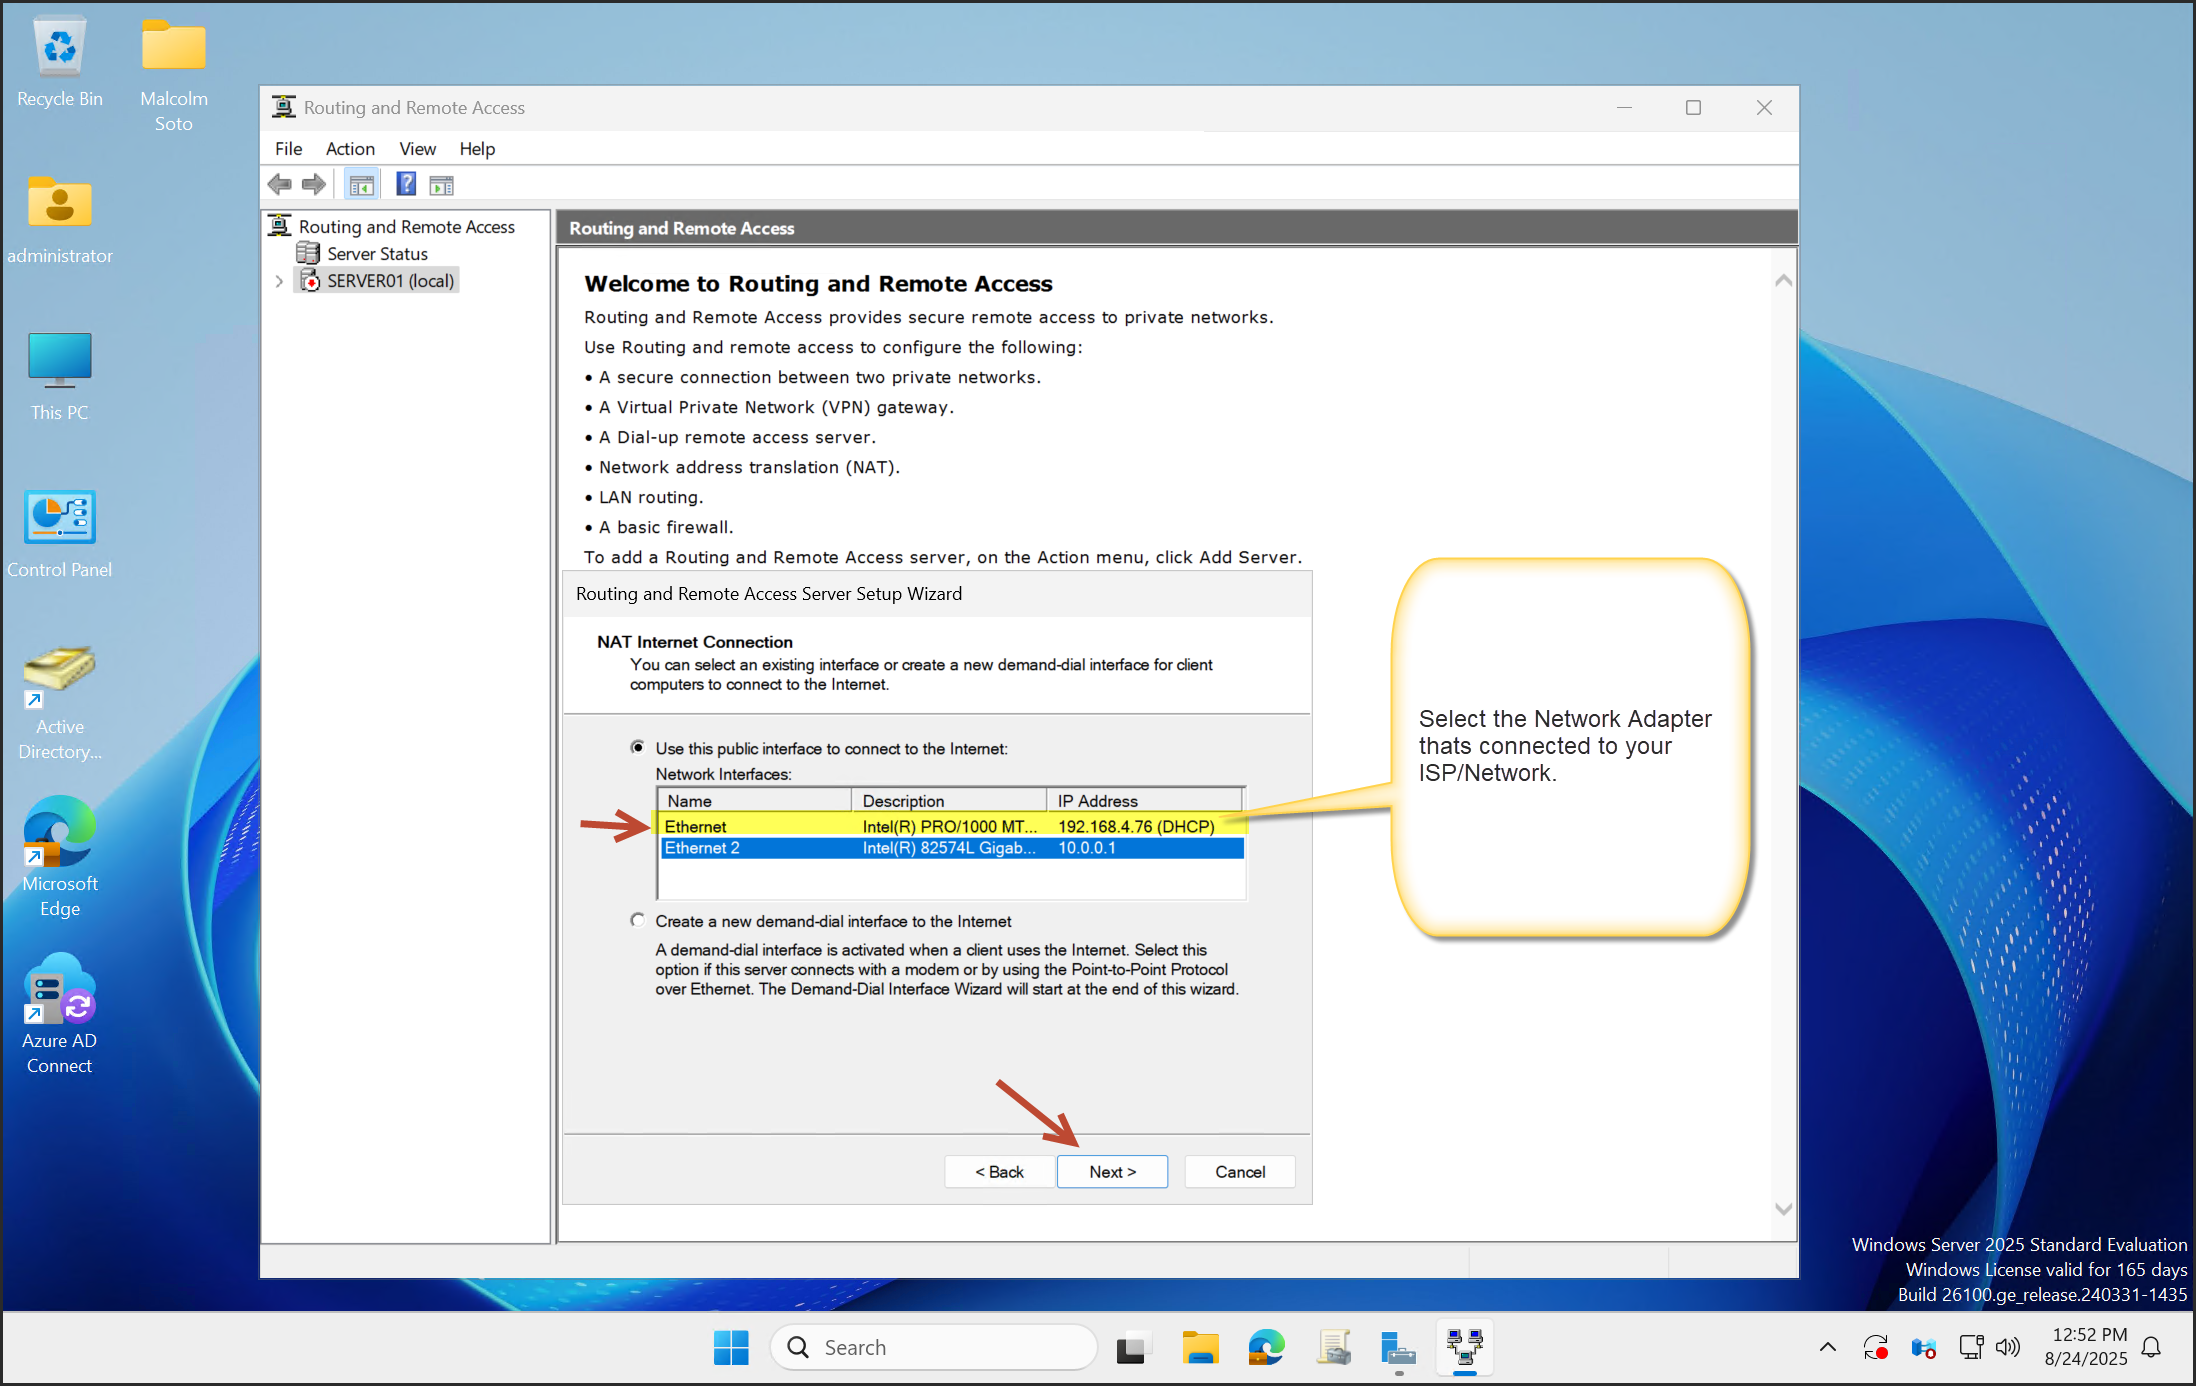
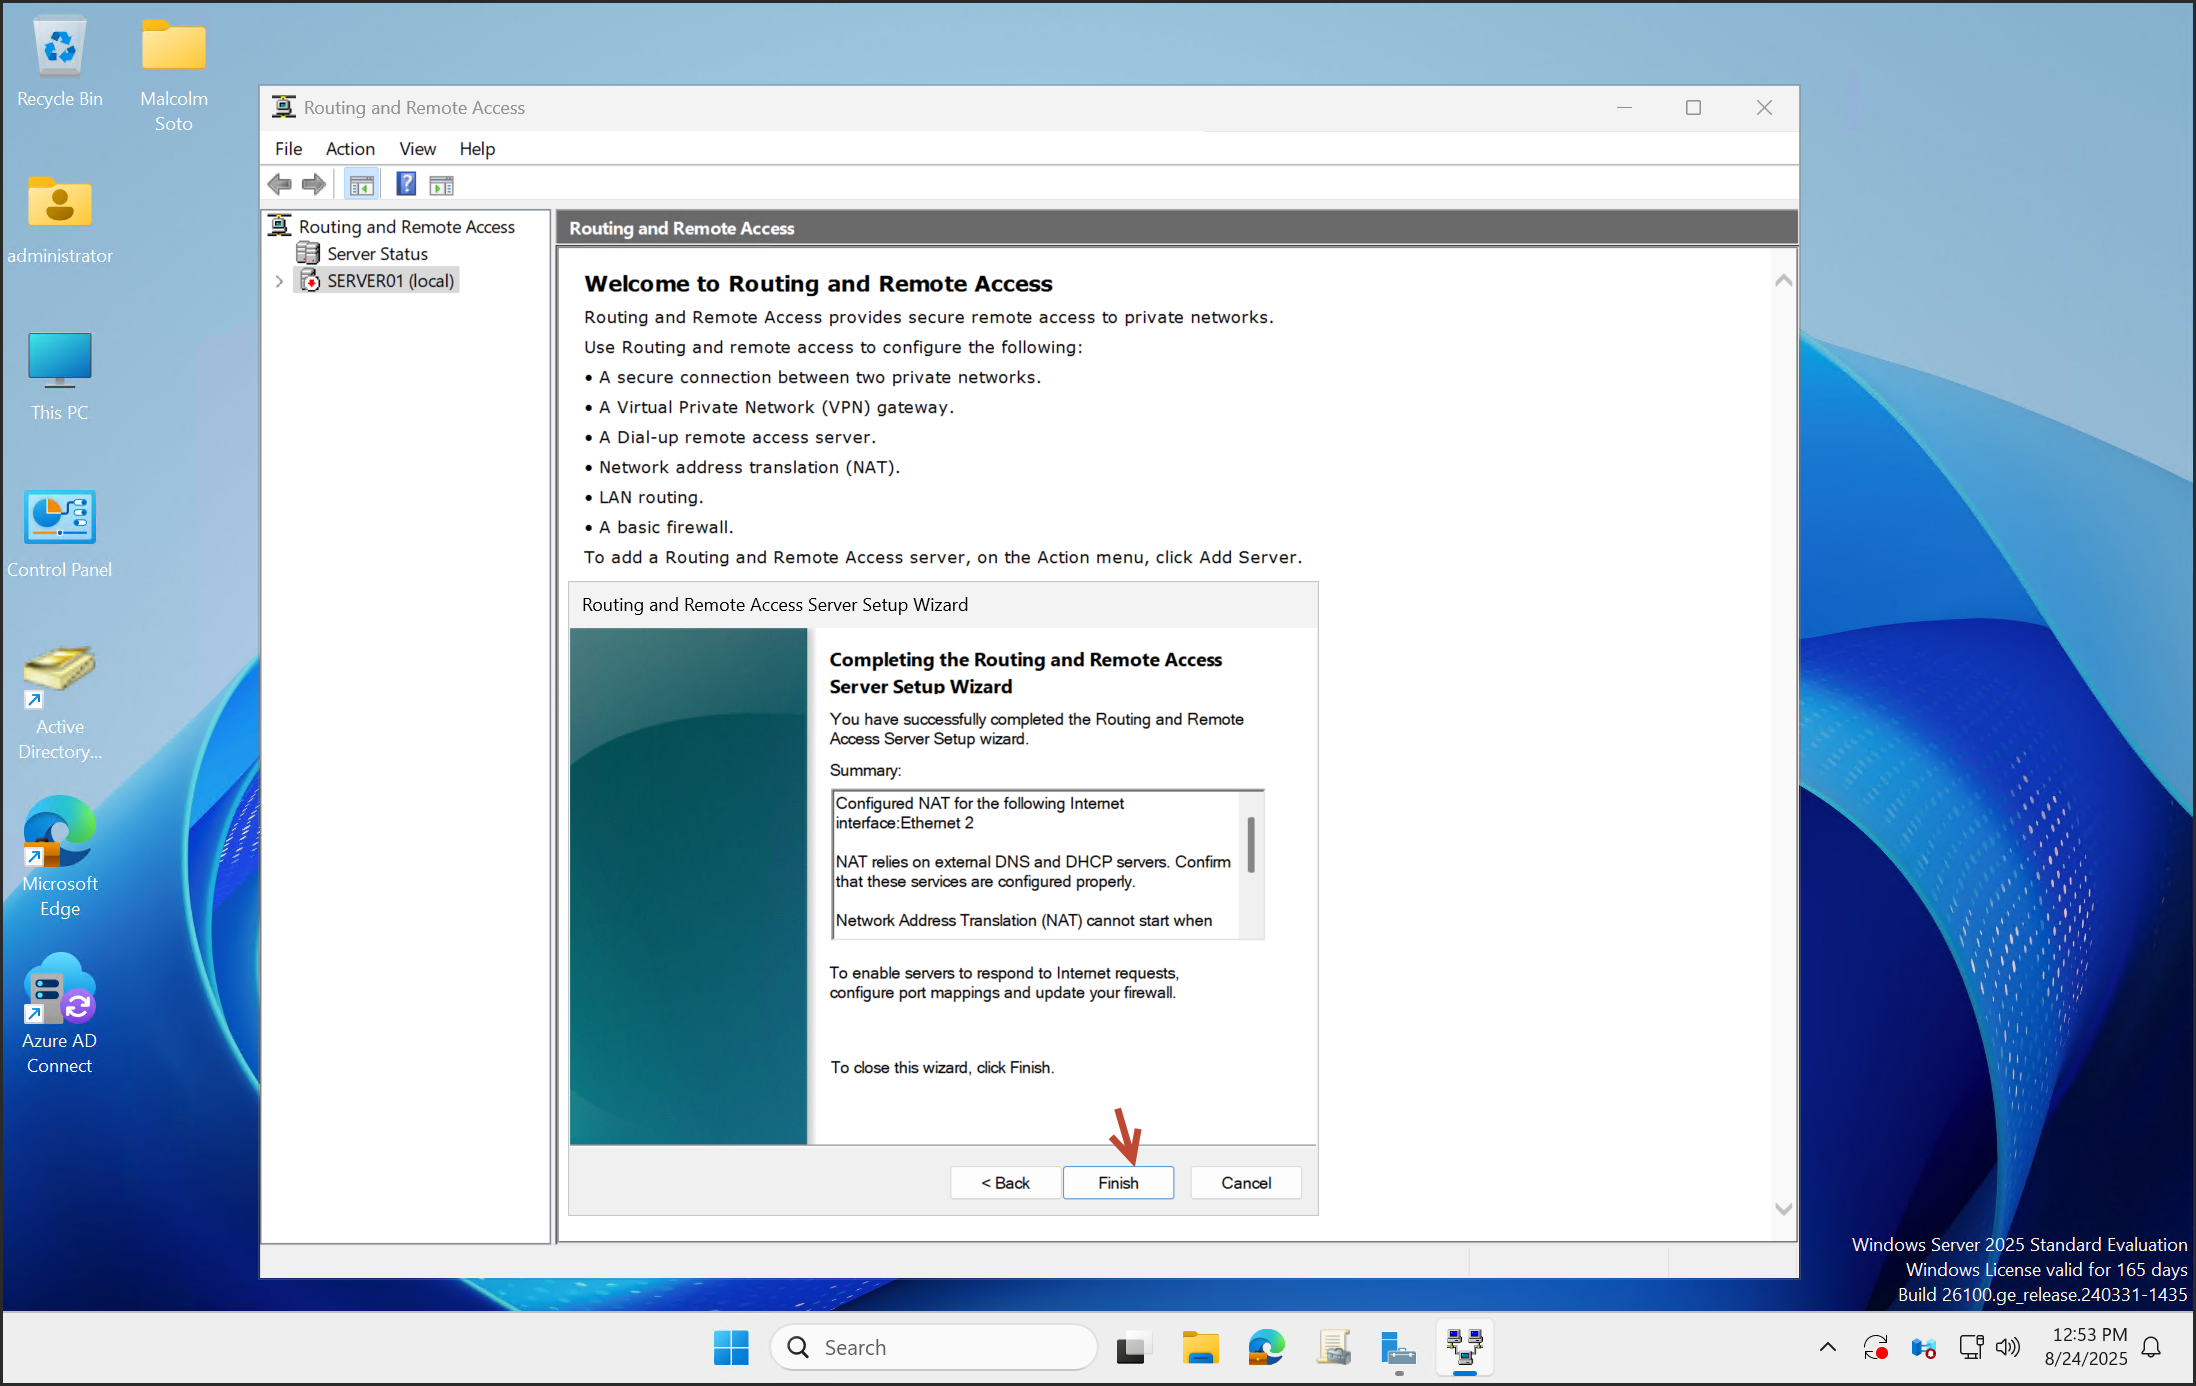
Routing and Remote Access Setup
Open Routing and Remote Access.
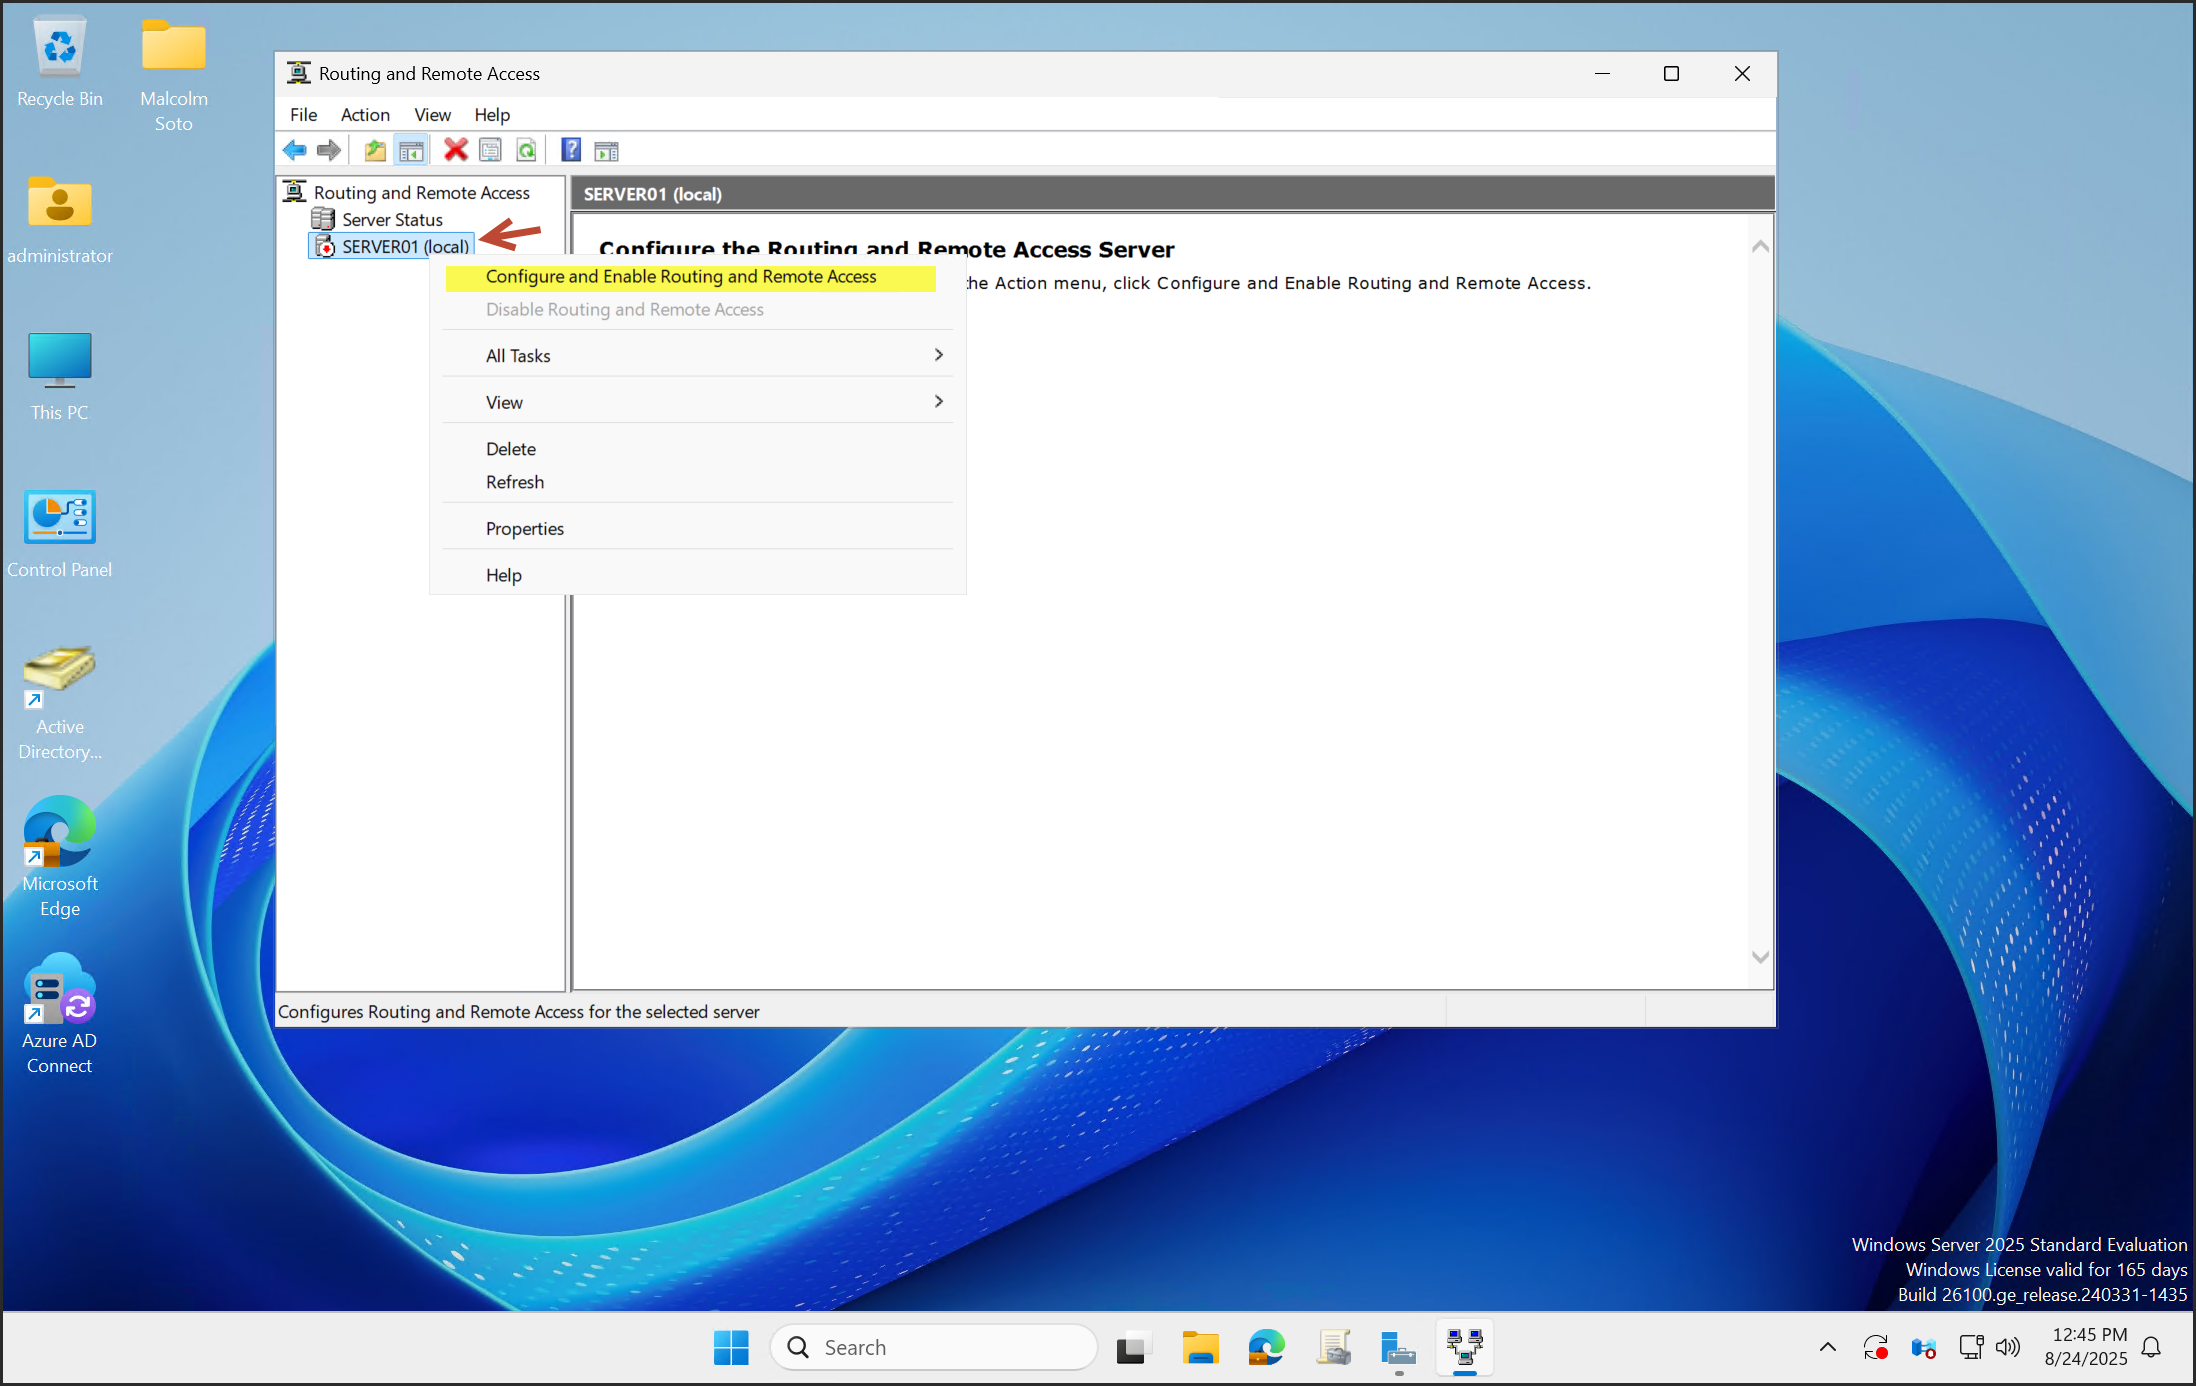
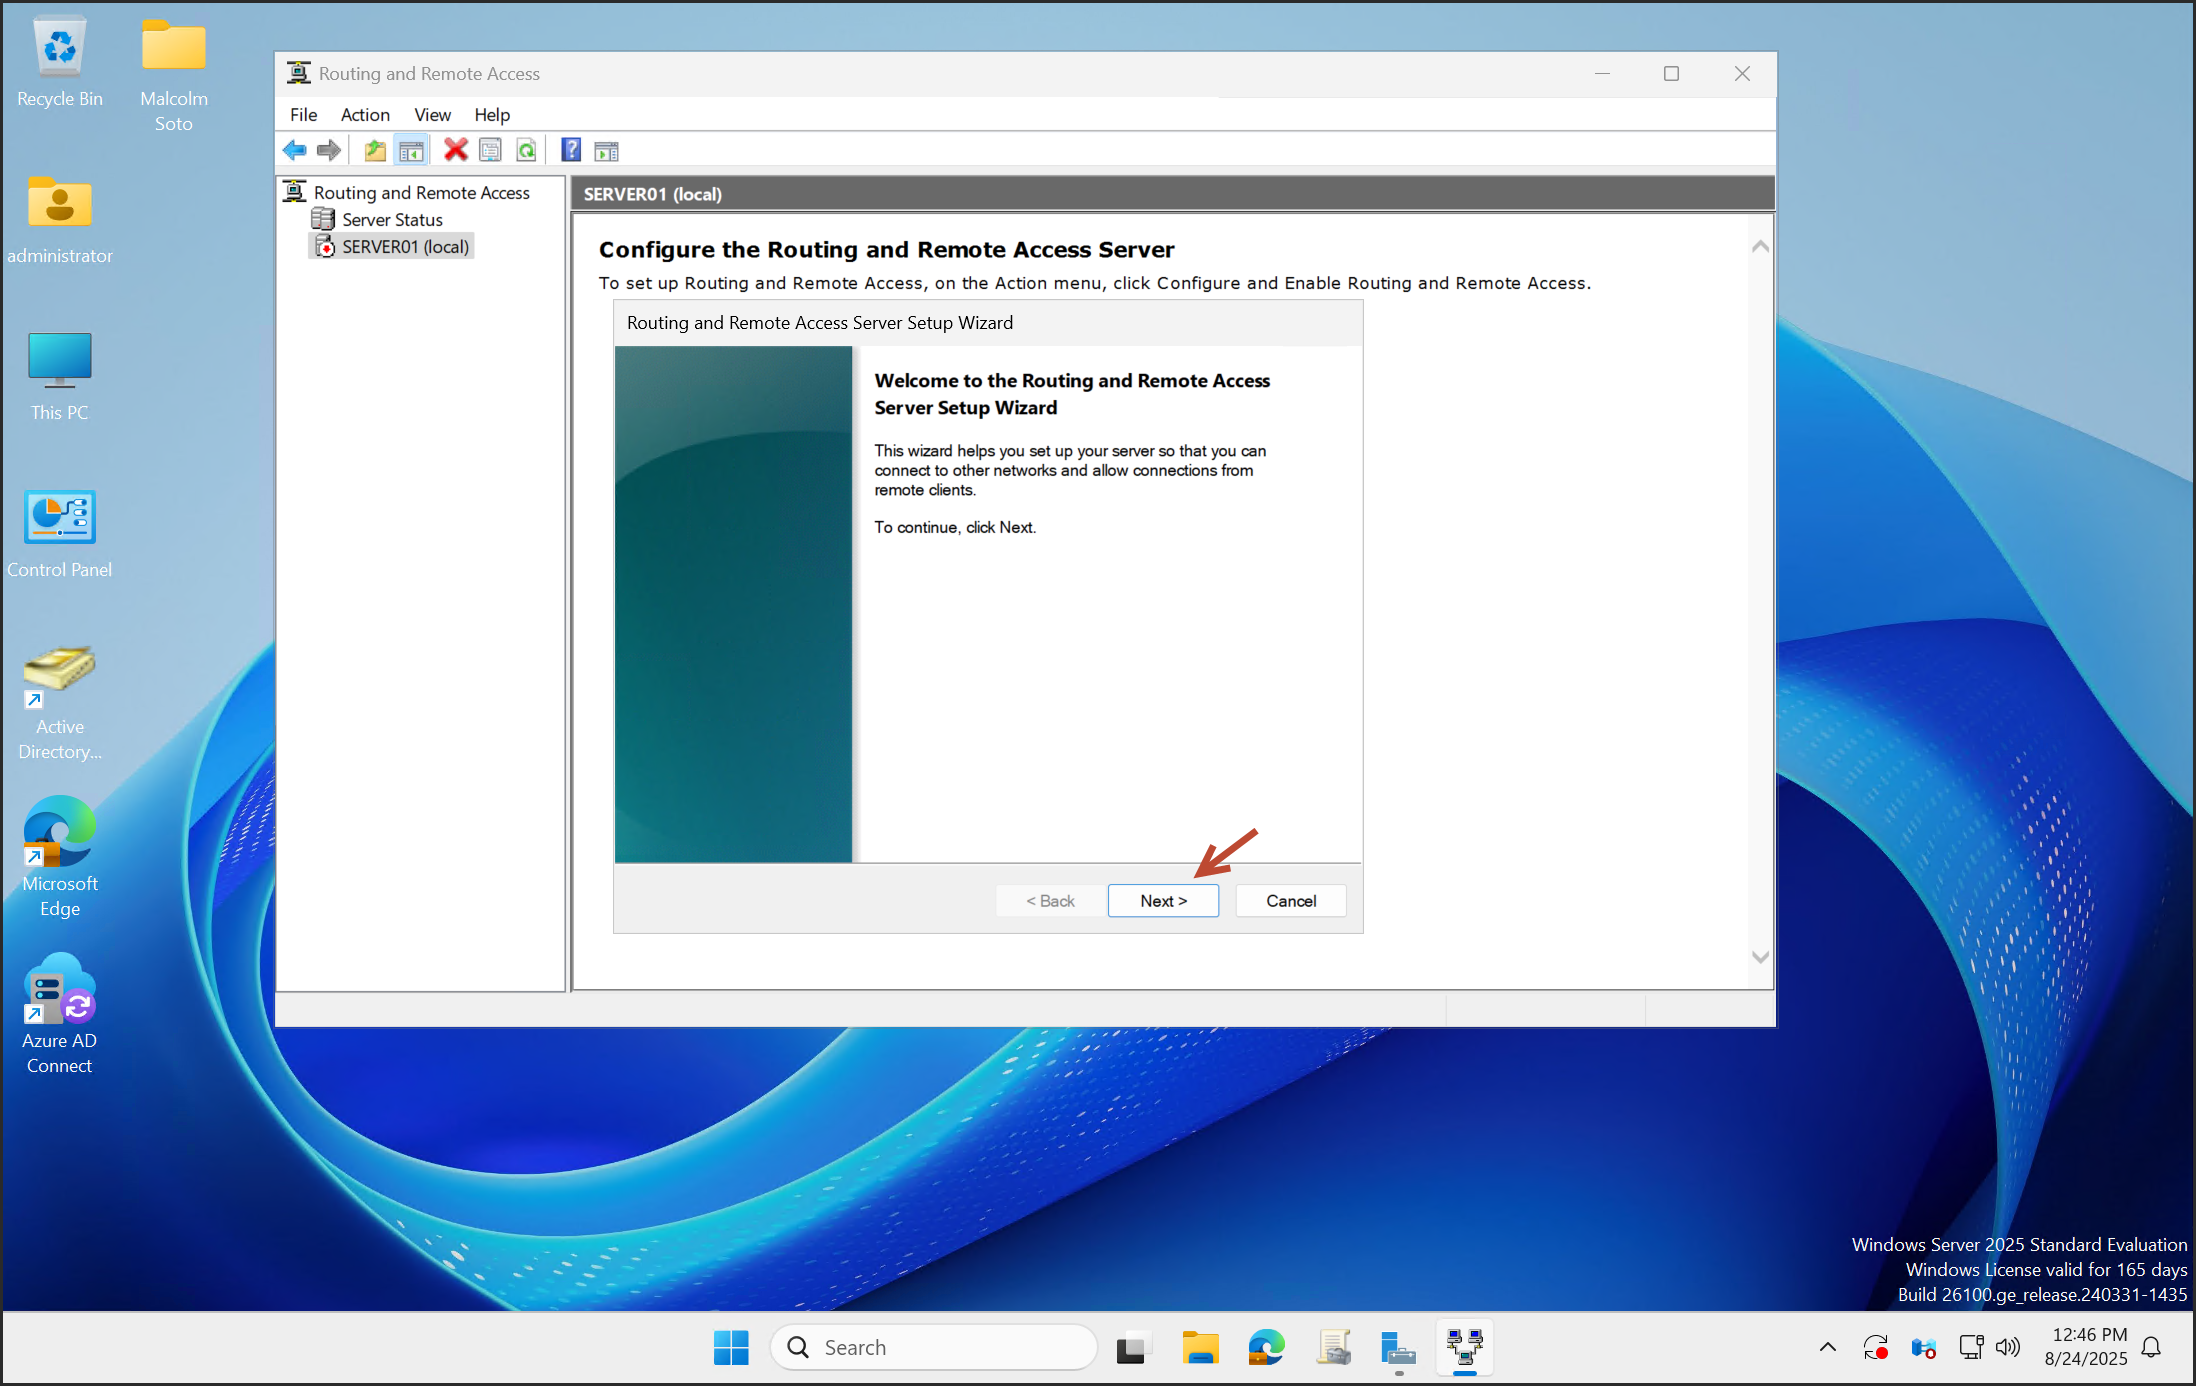
Right-click the server and select Configure and Enable Routing and Remote Access.
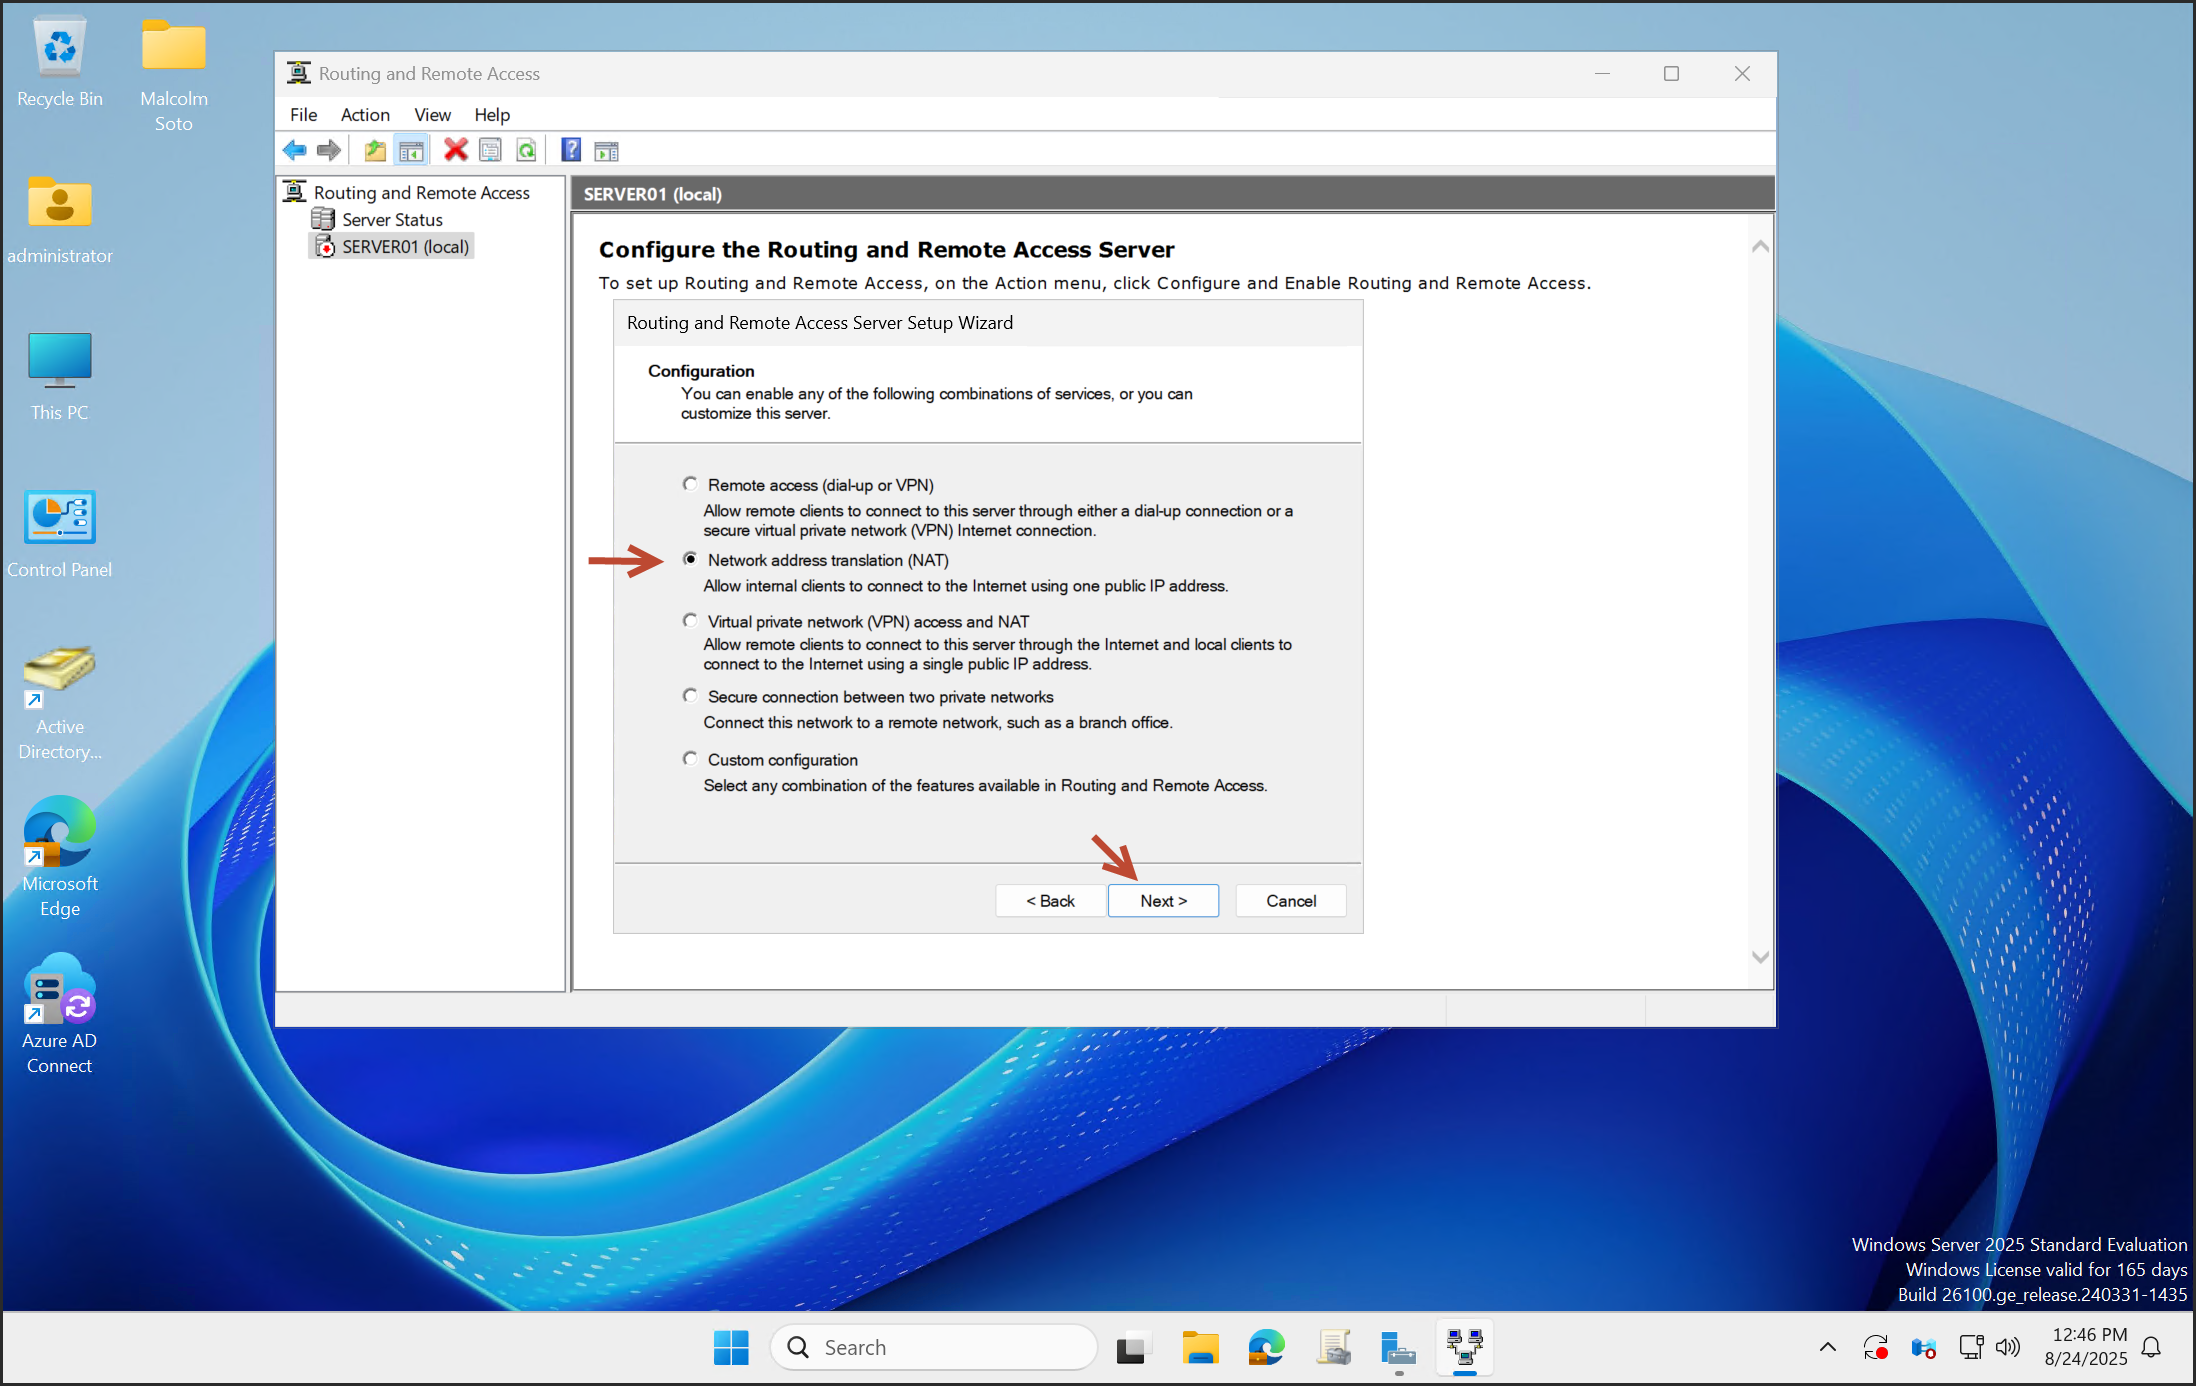
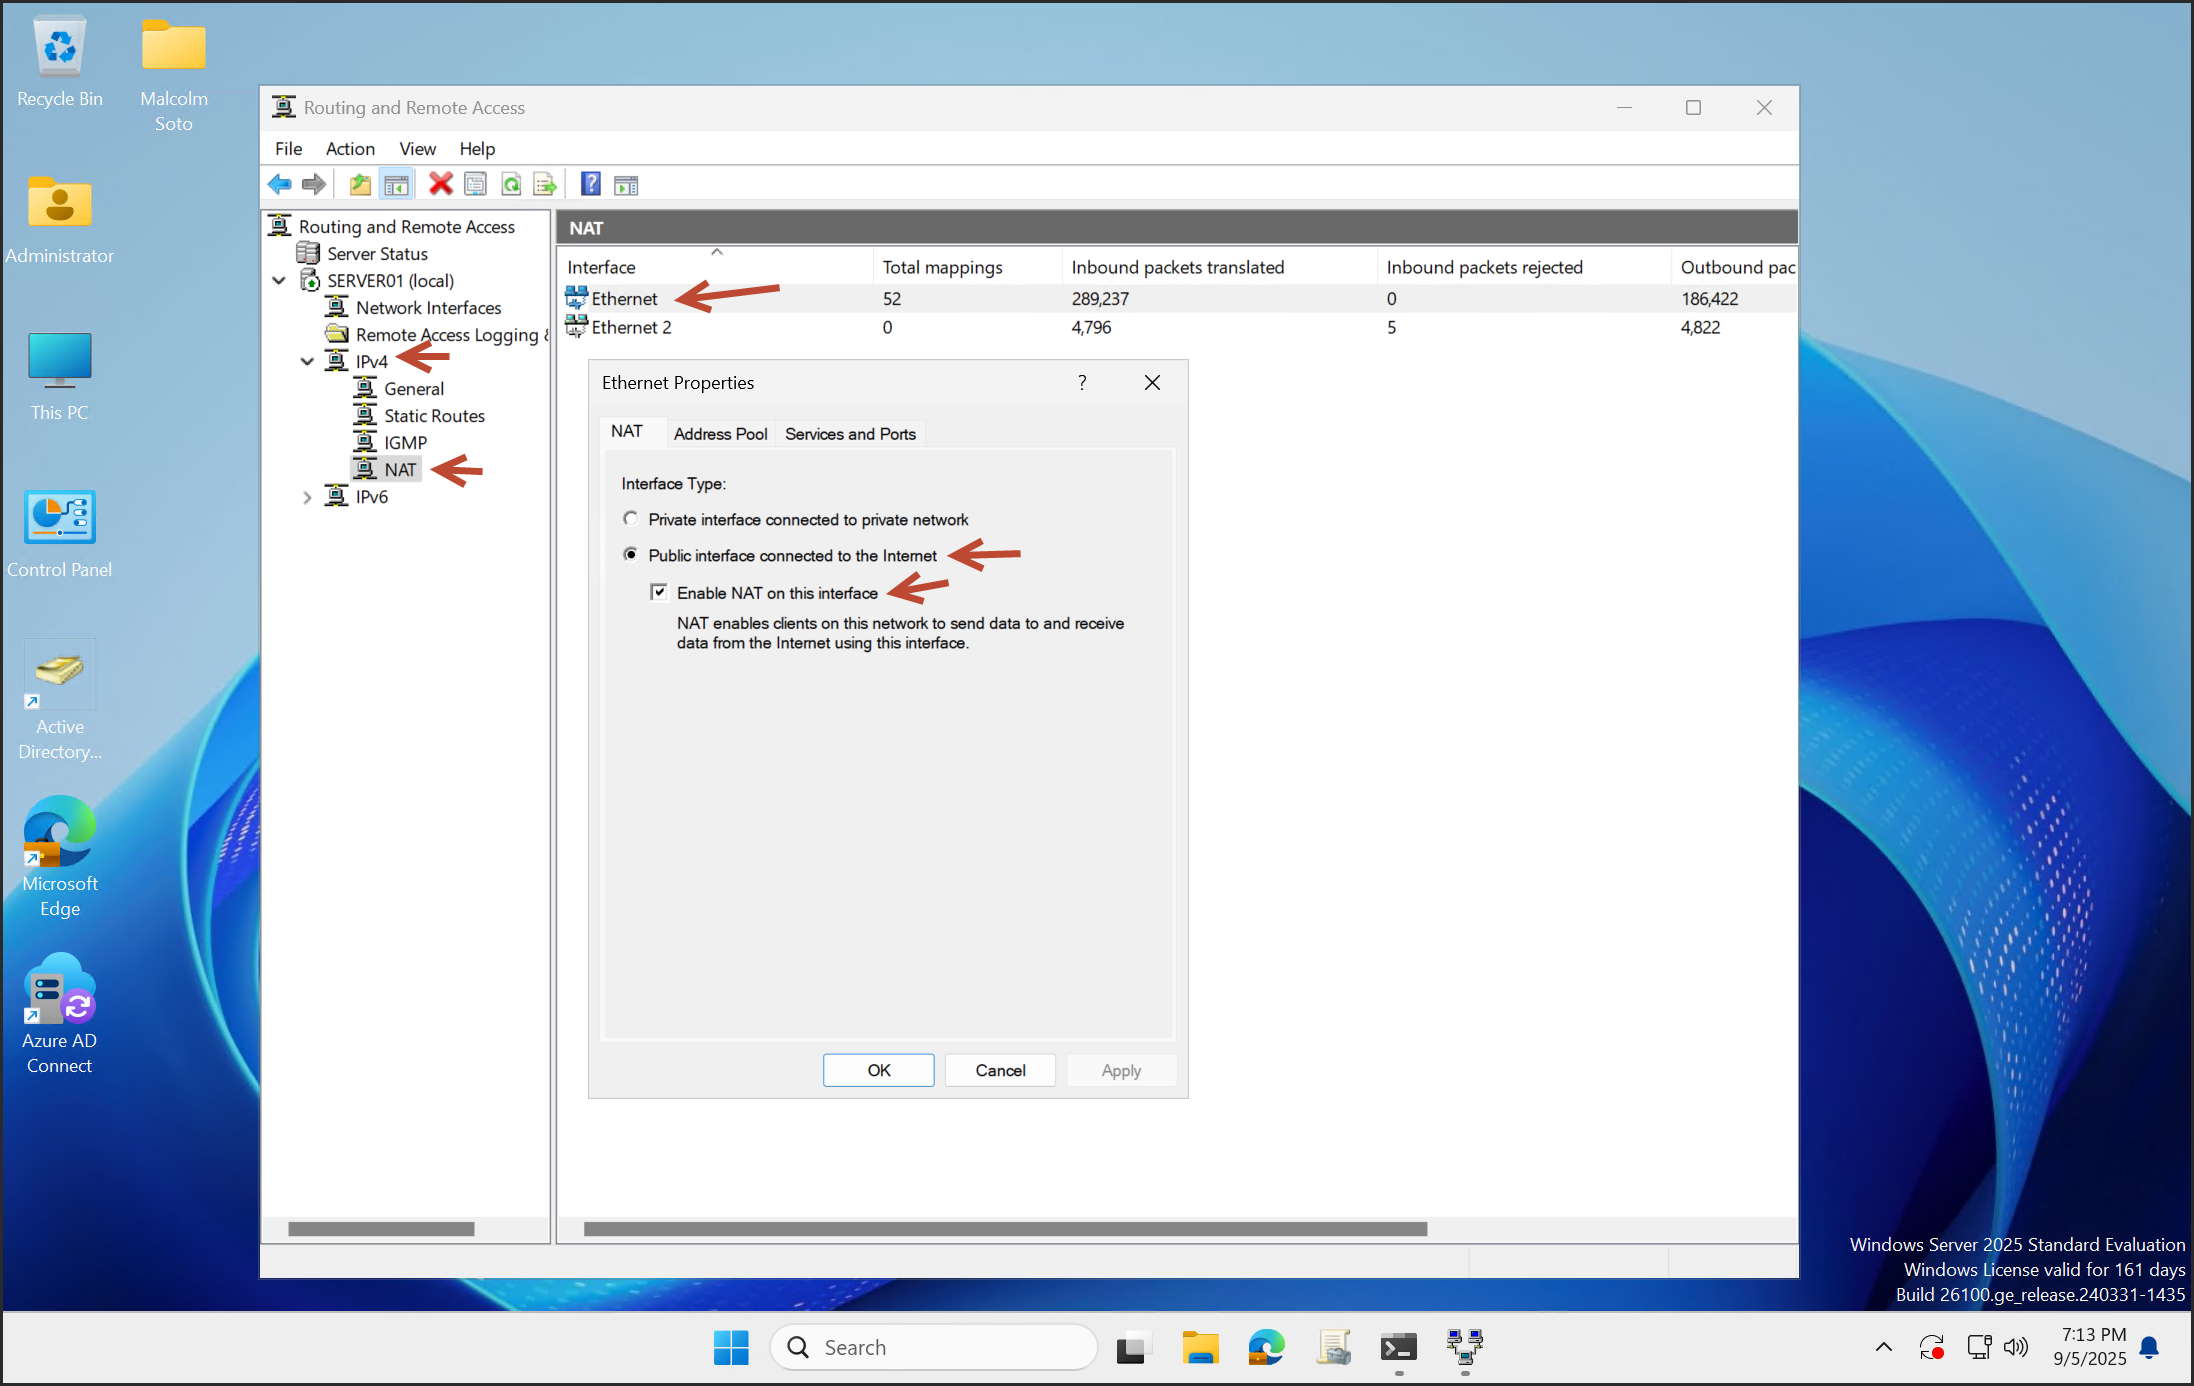
Select NAT and choose the correct NIC.
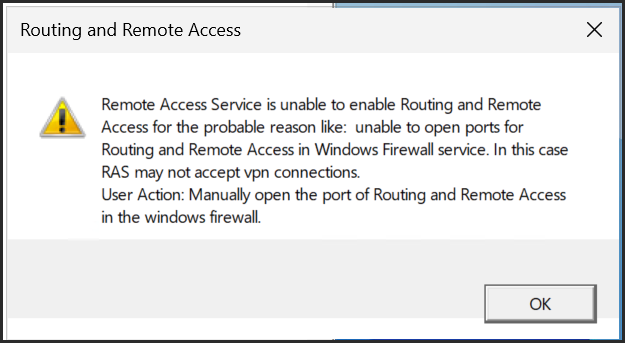
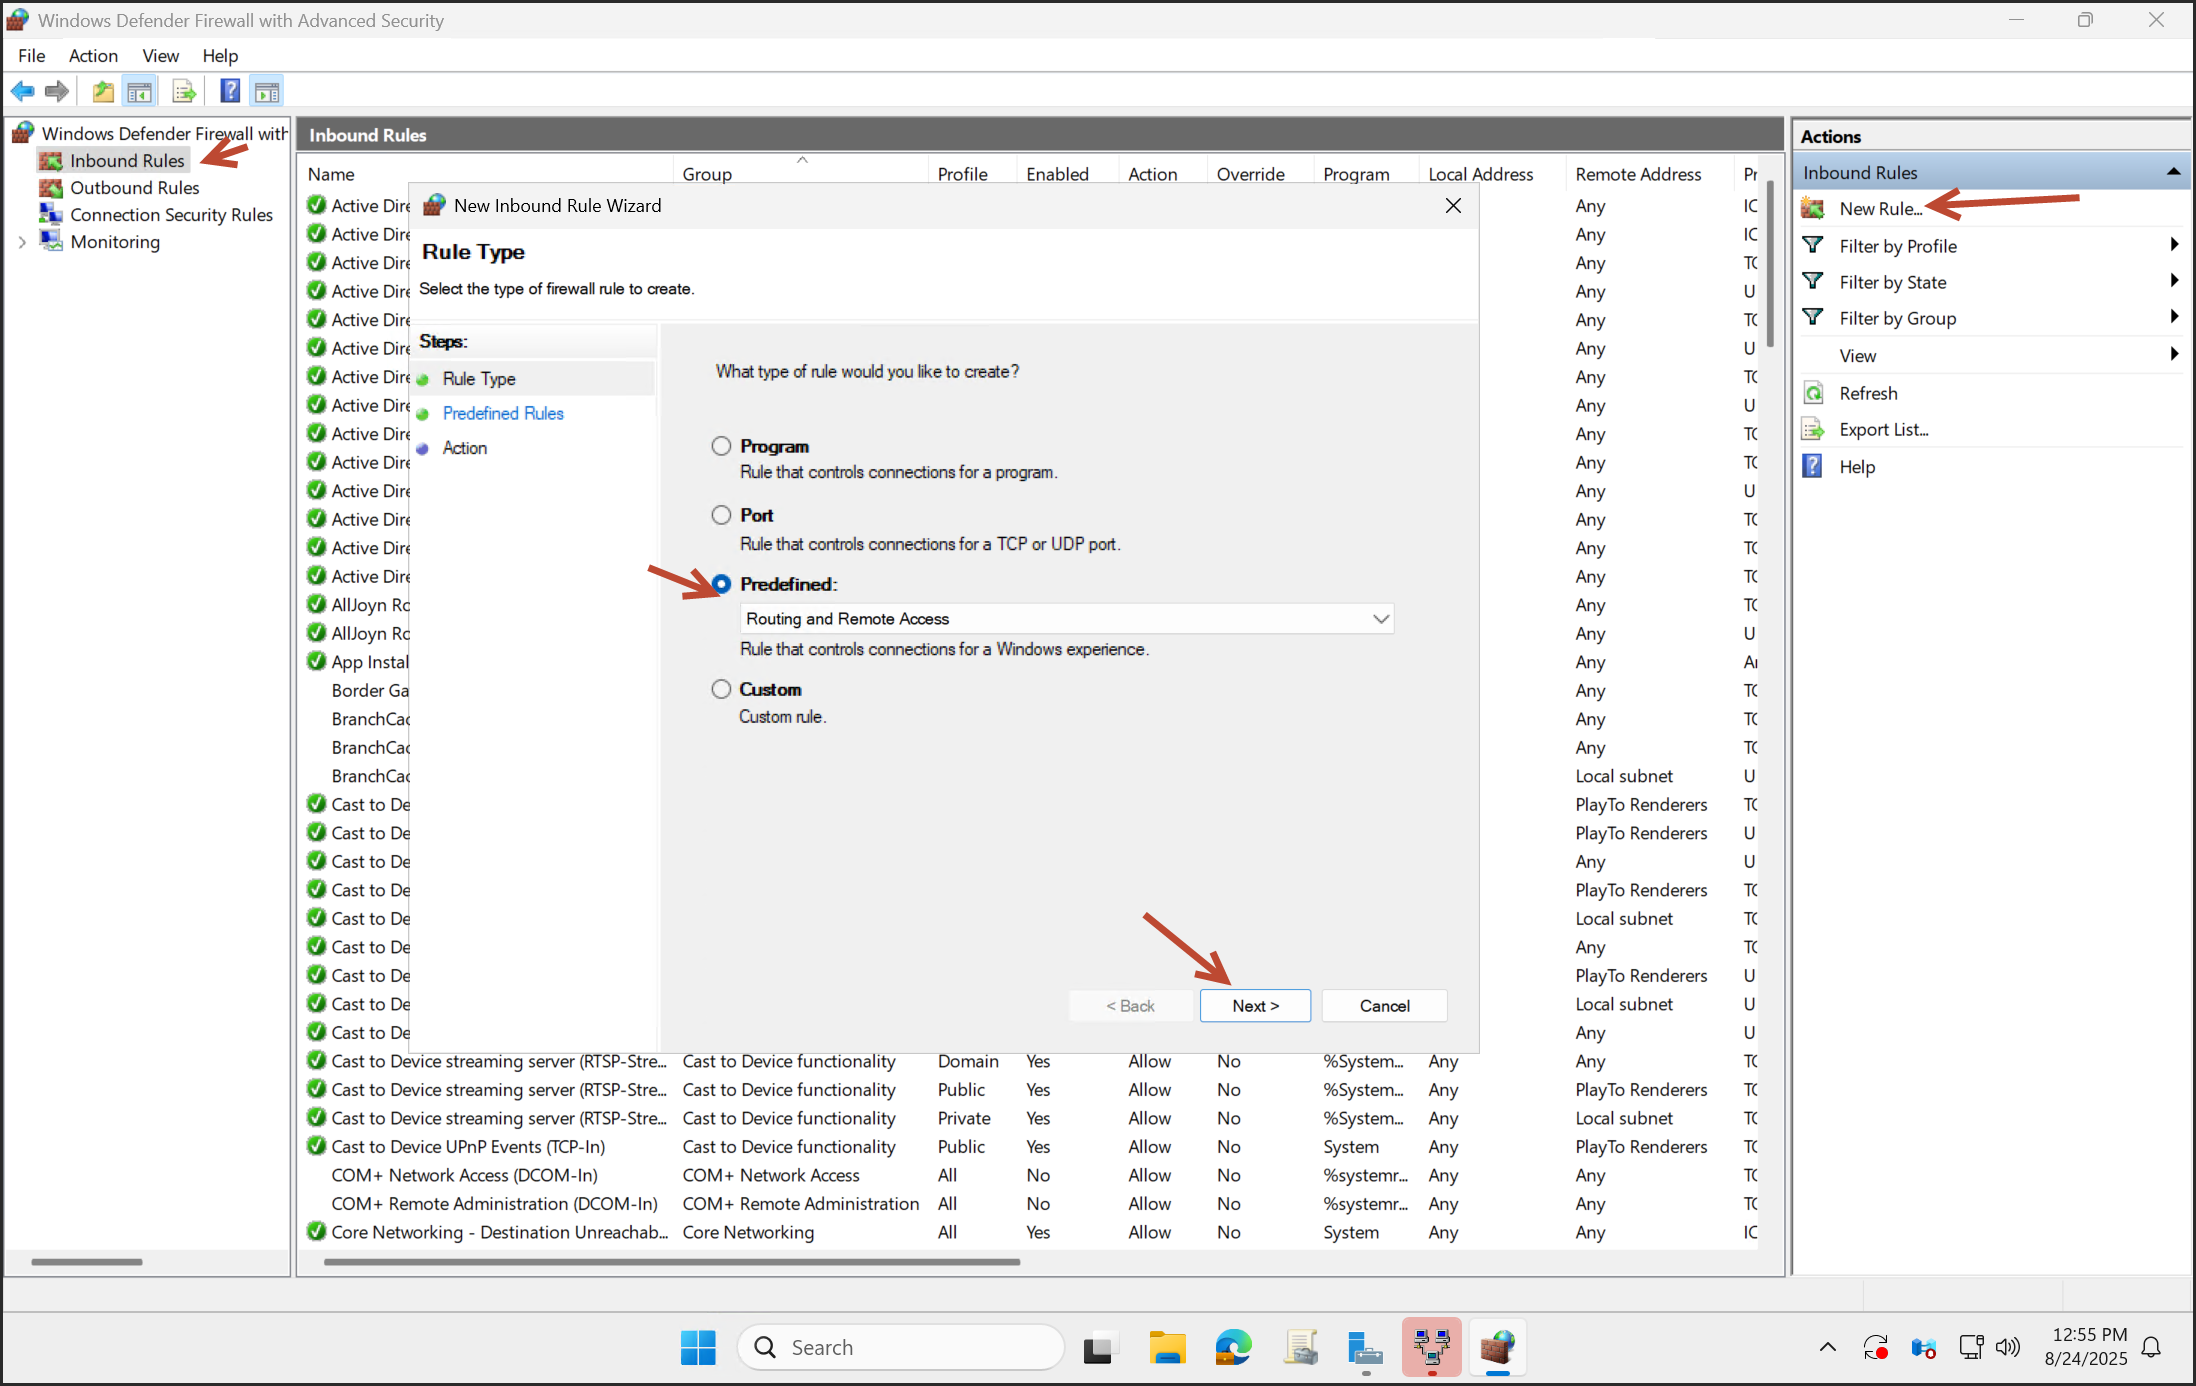
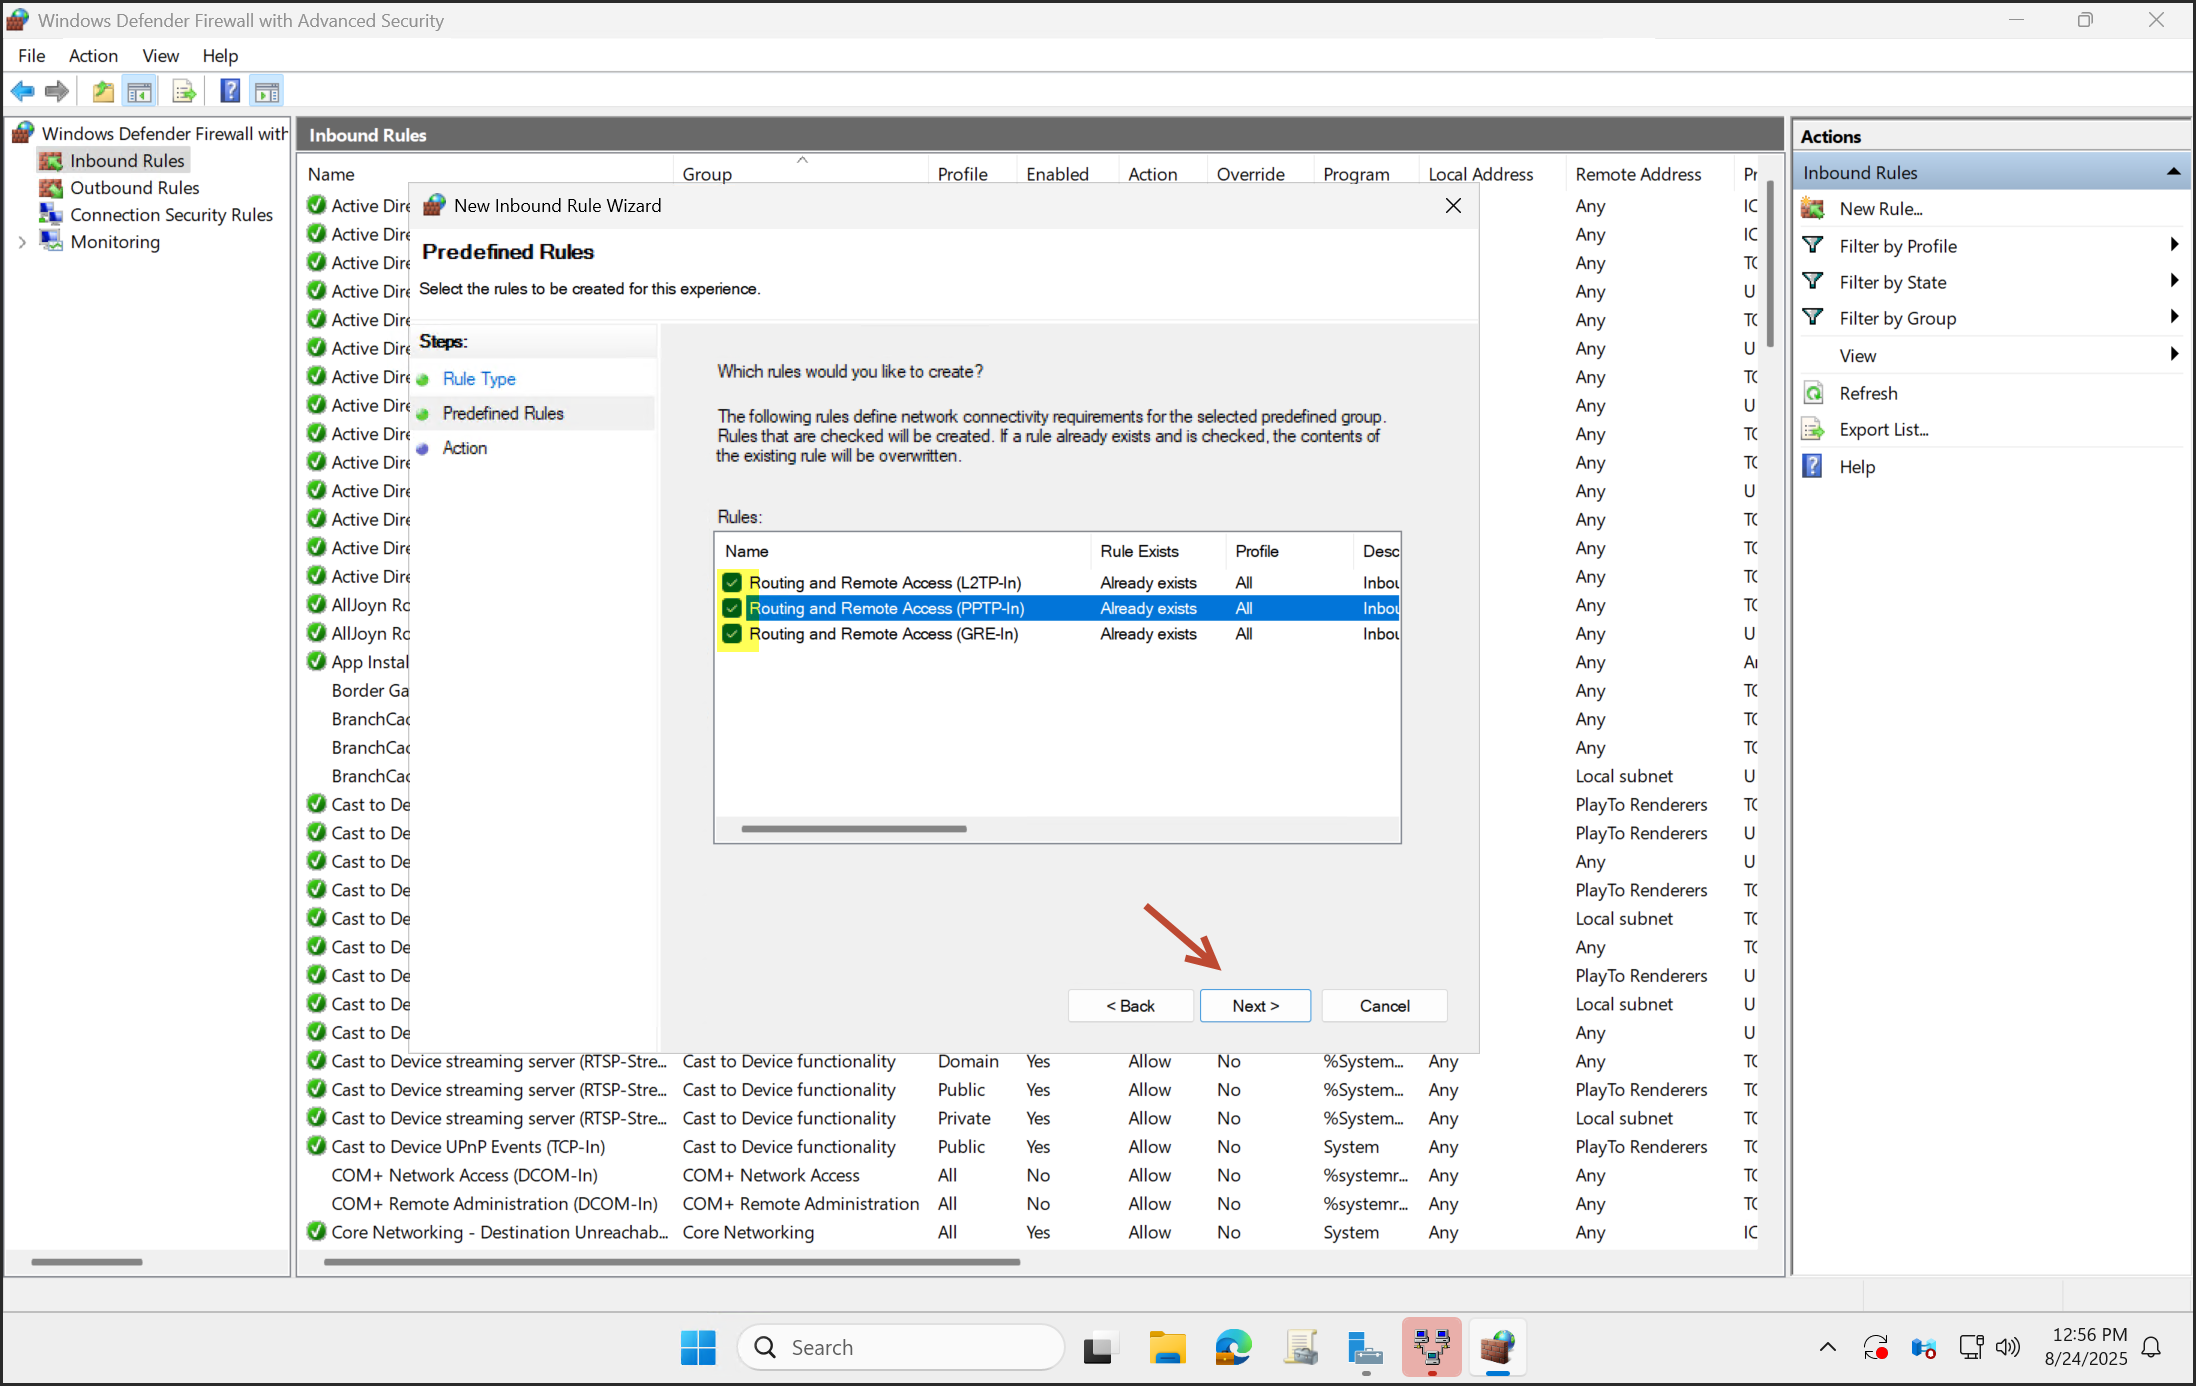
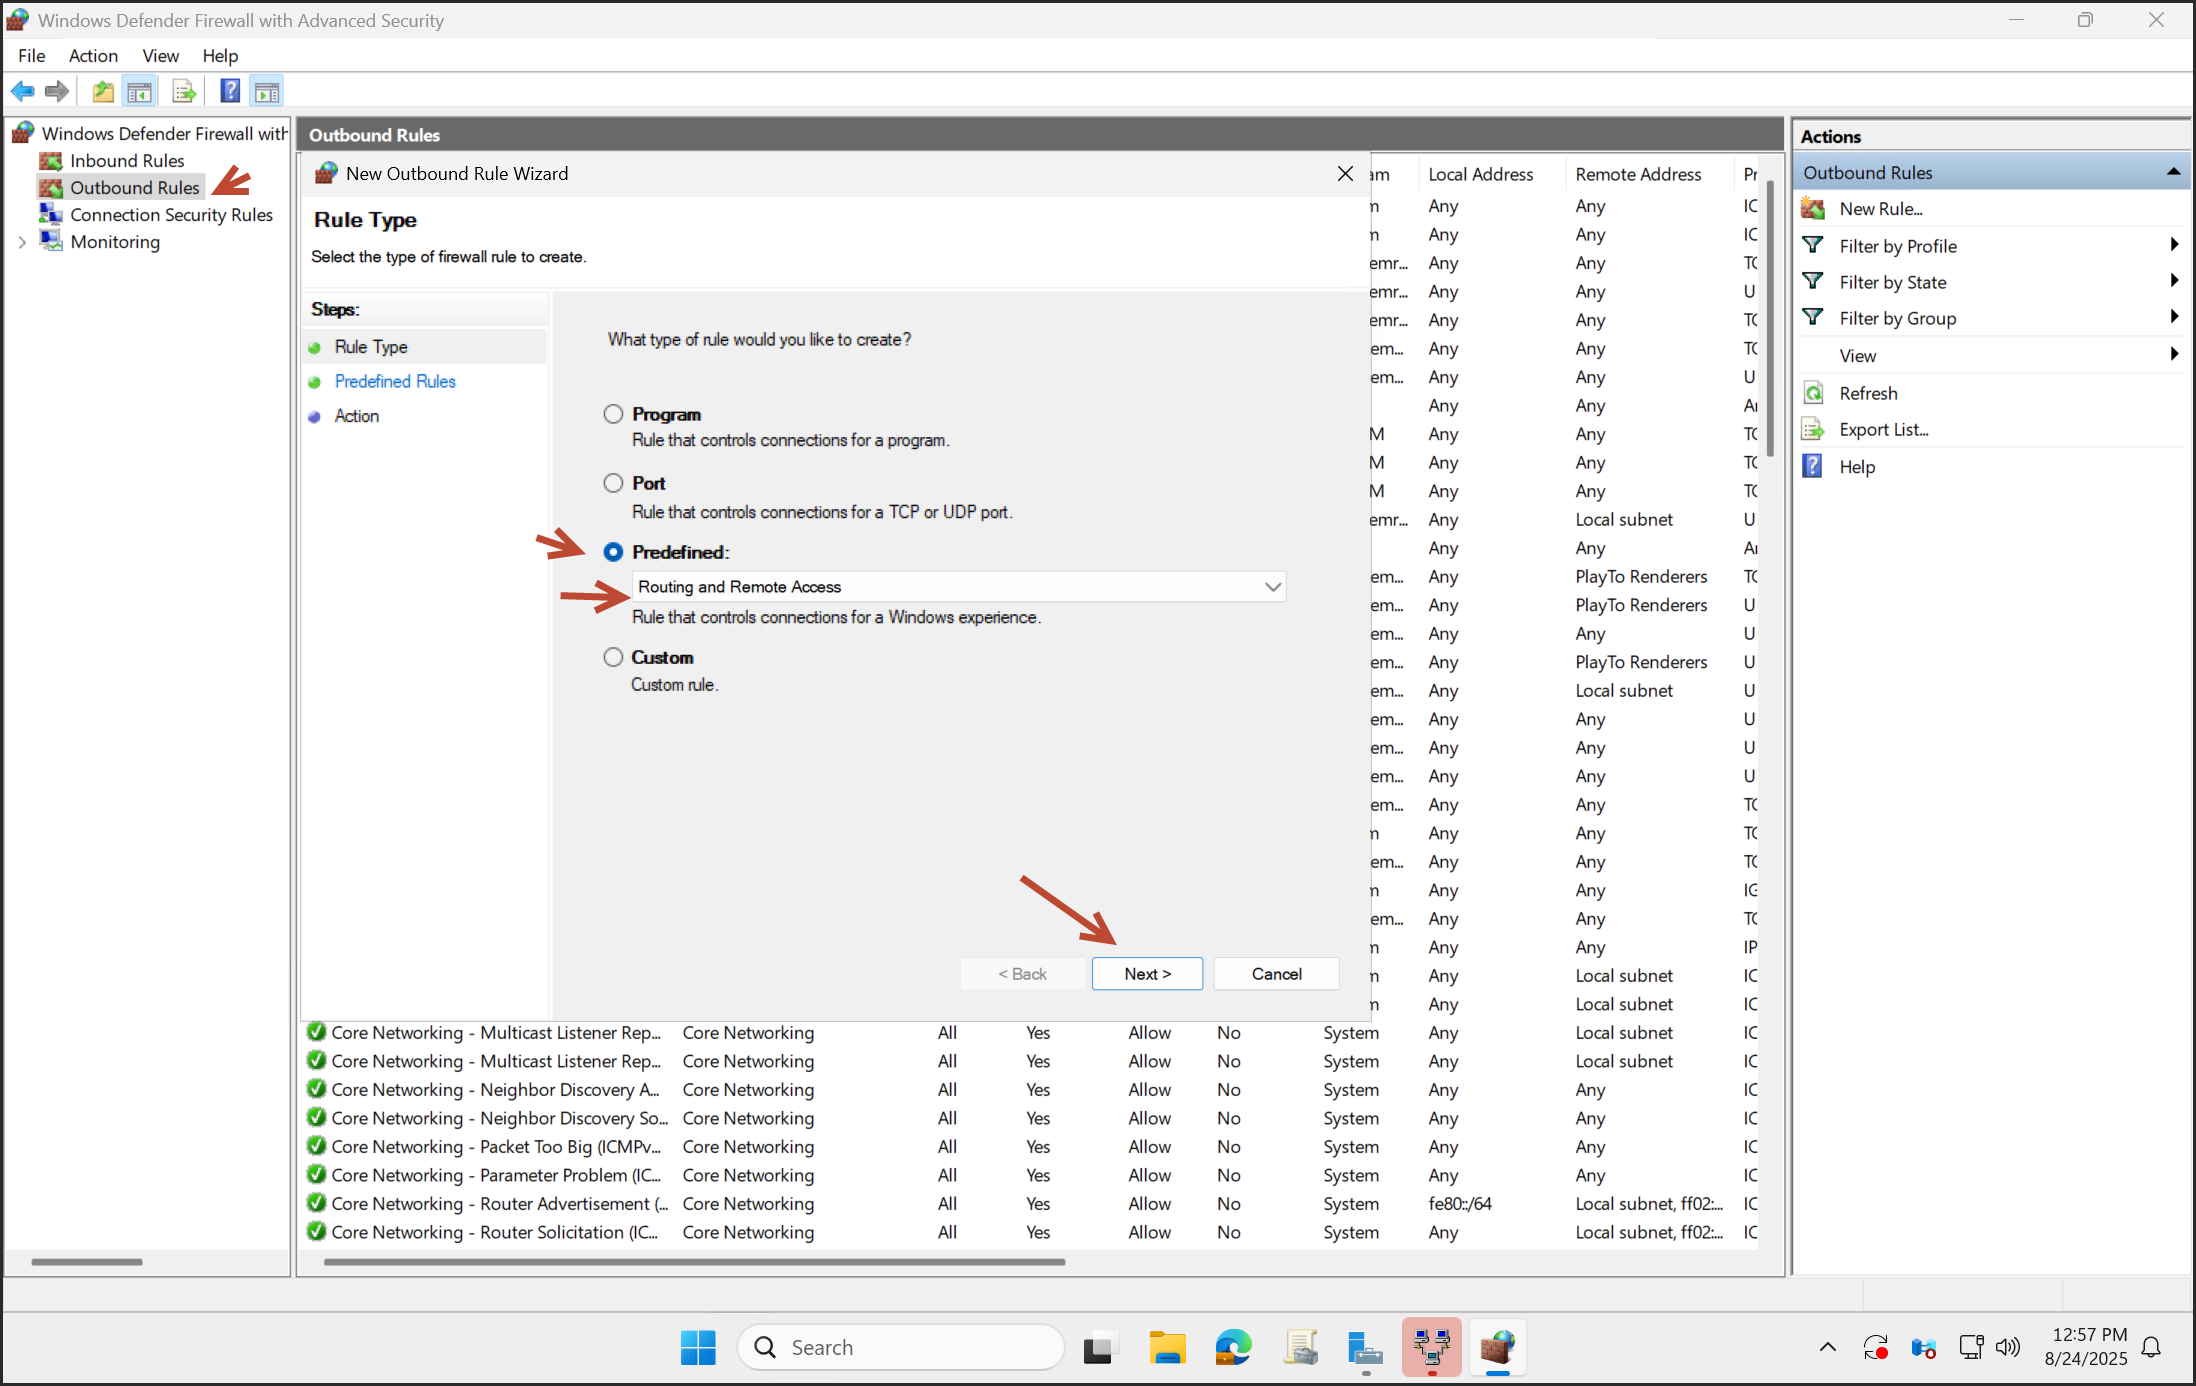
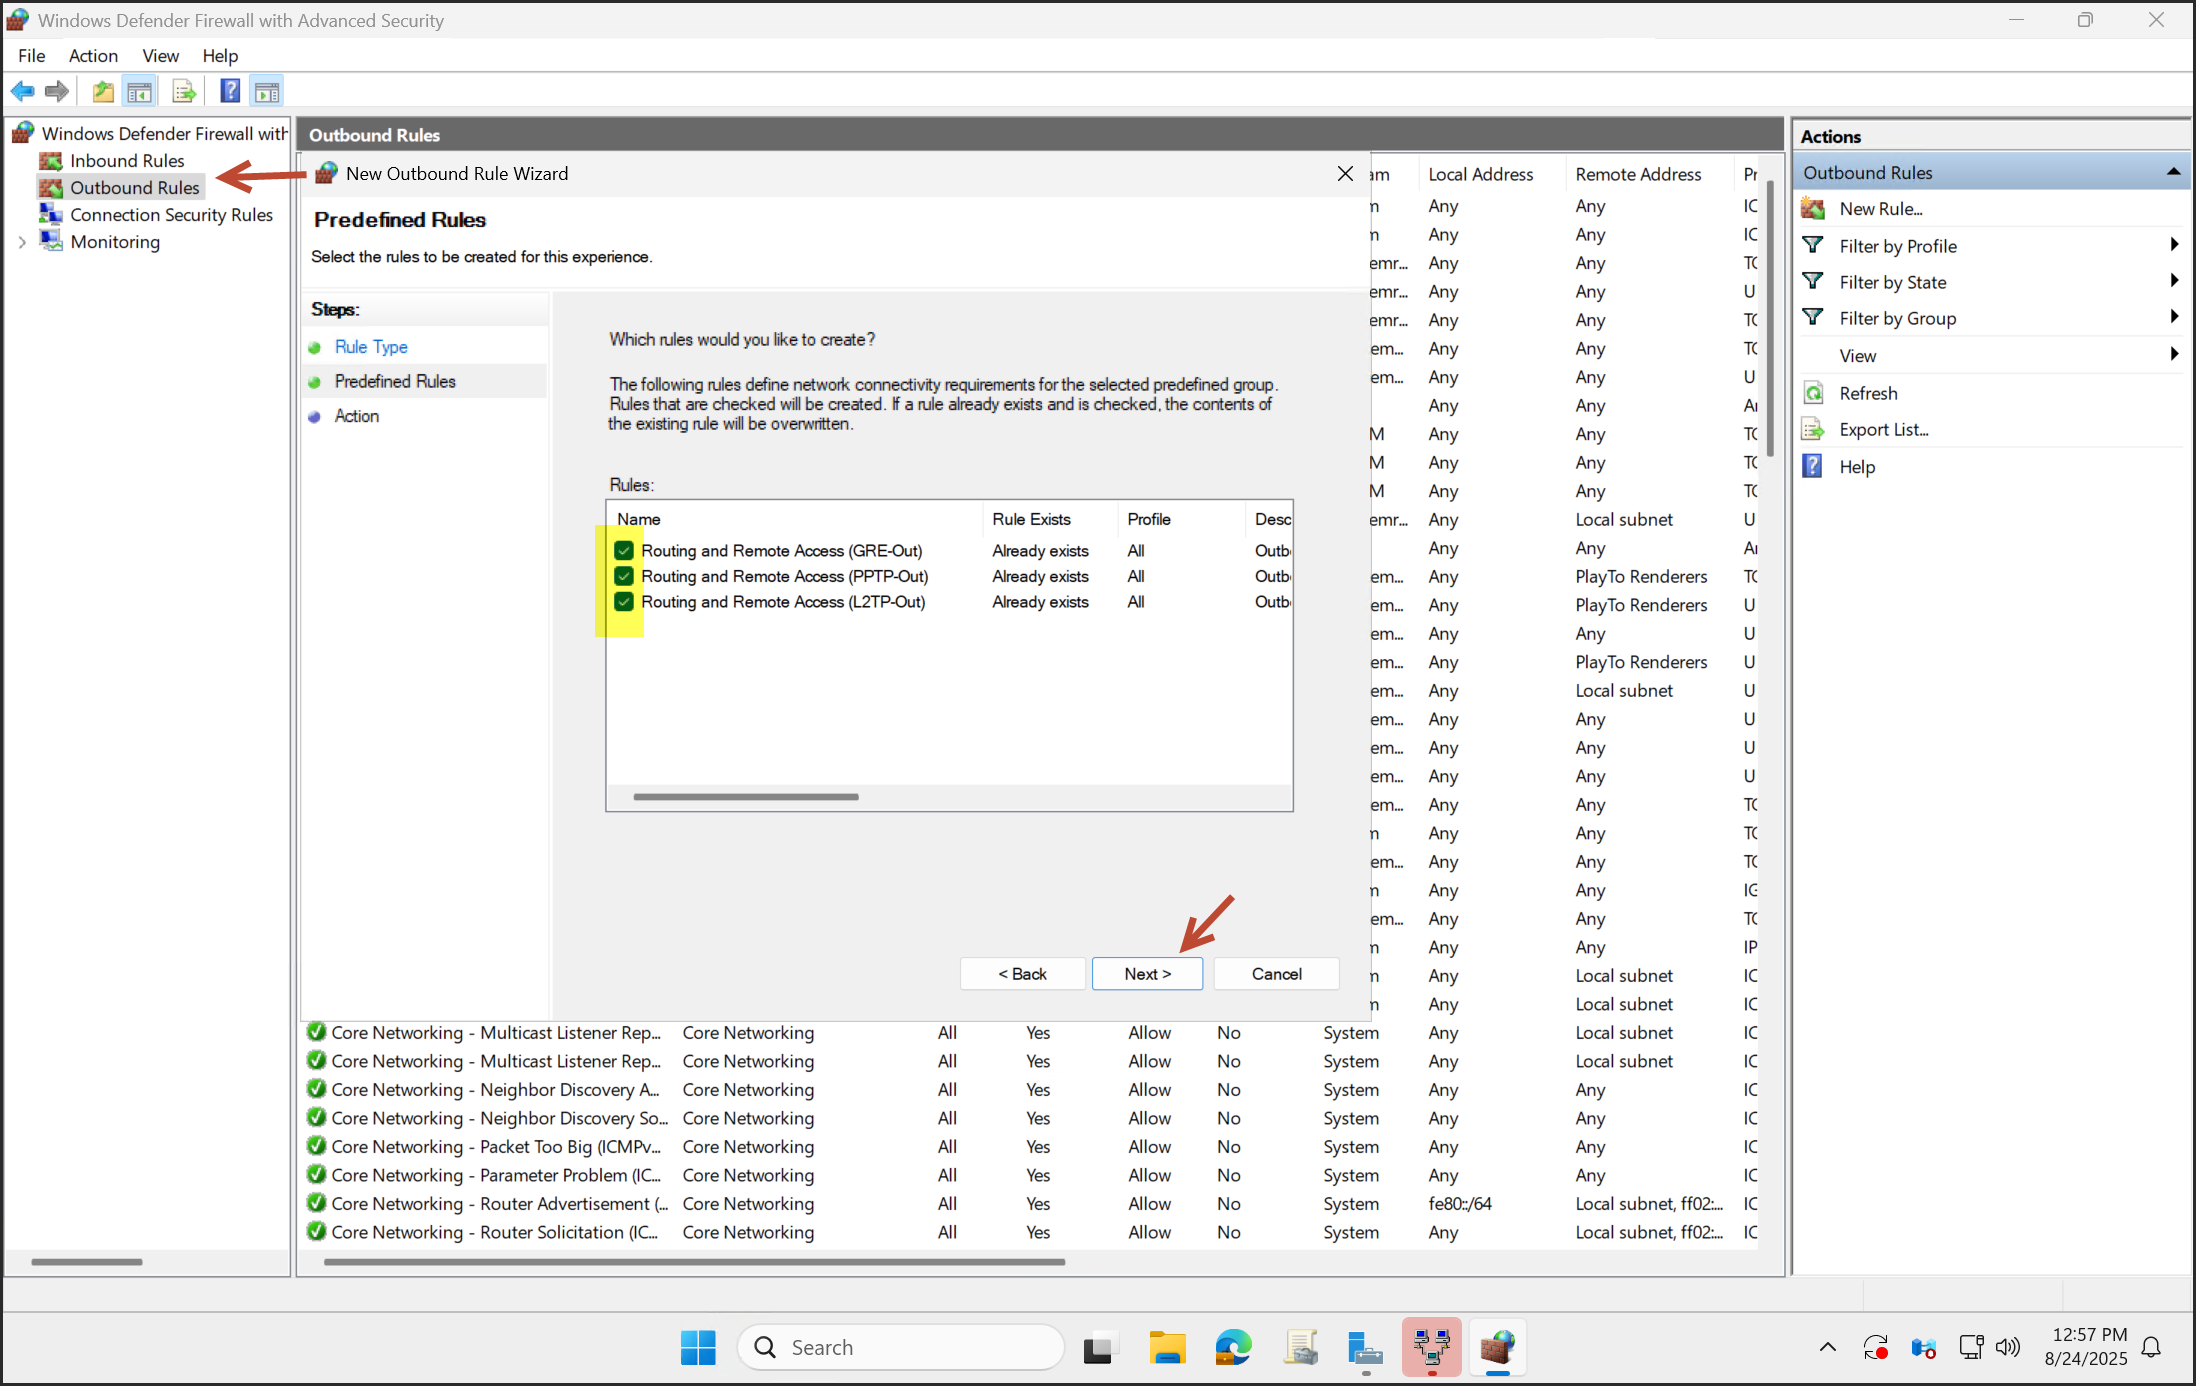
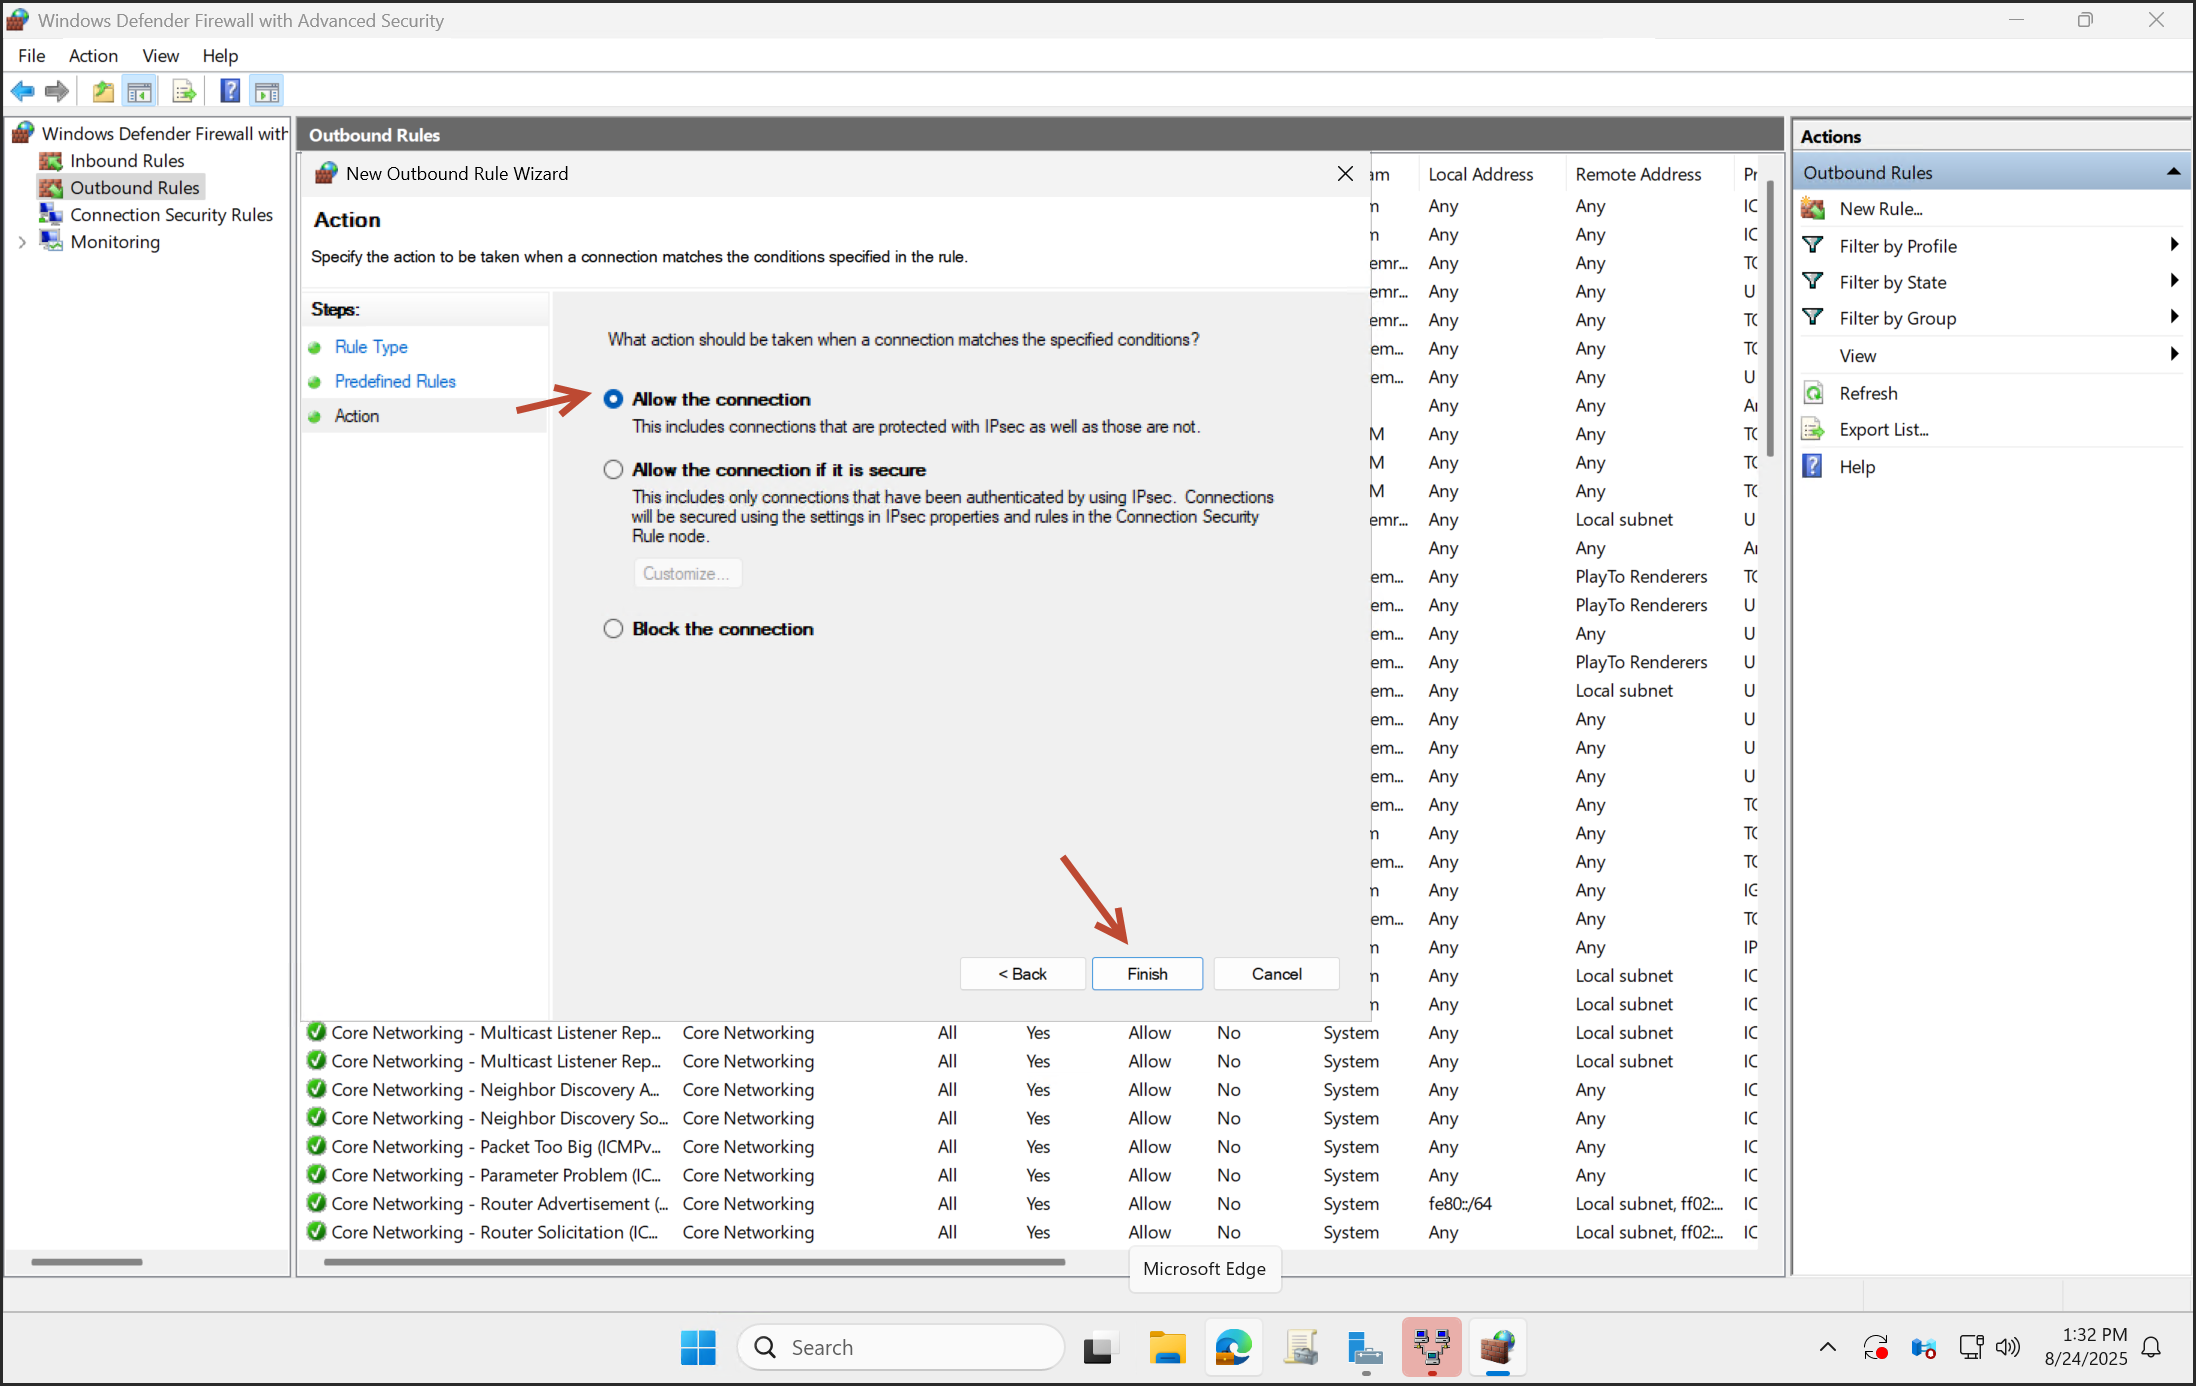
Firewall Configuration
If you encounter a firewall error, apply the necessary rule changes.
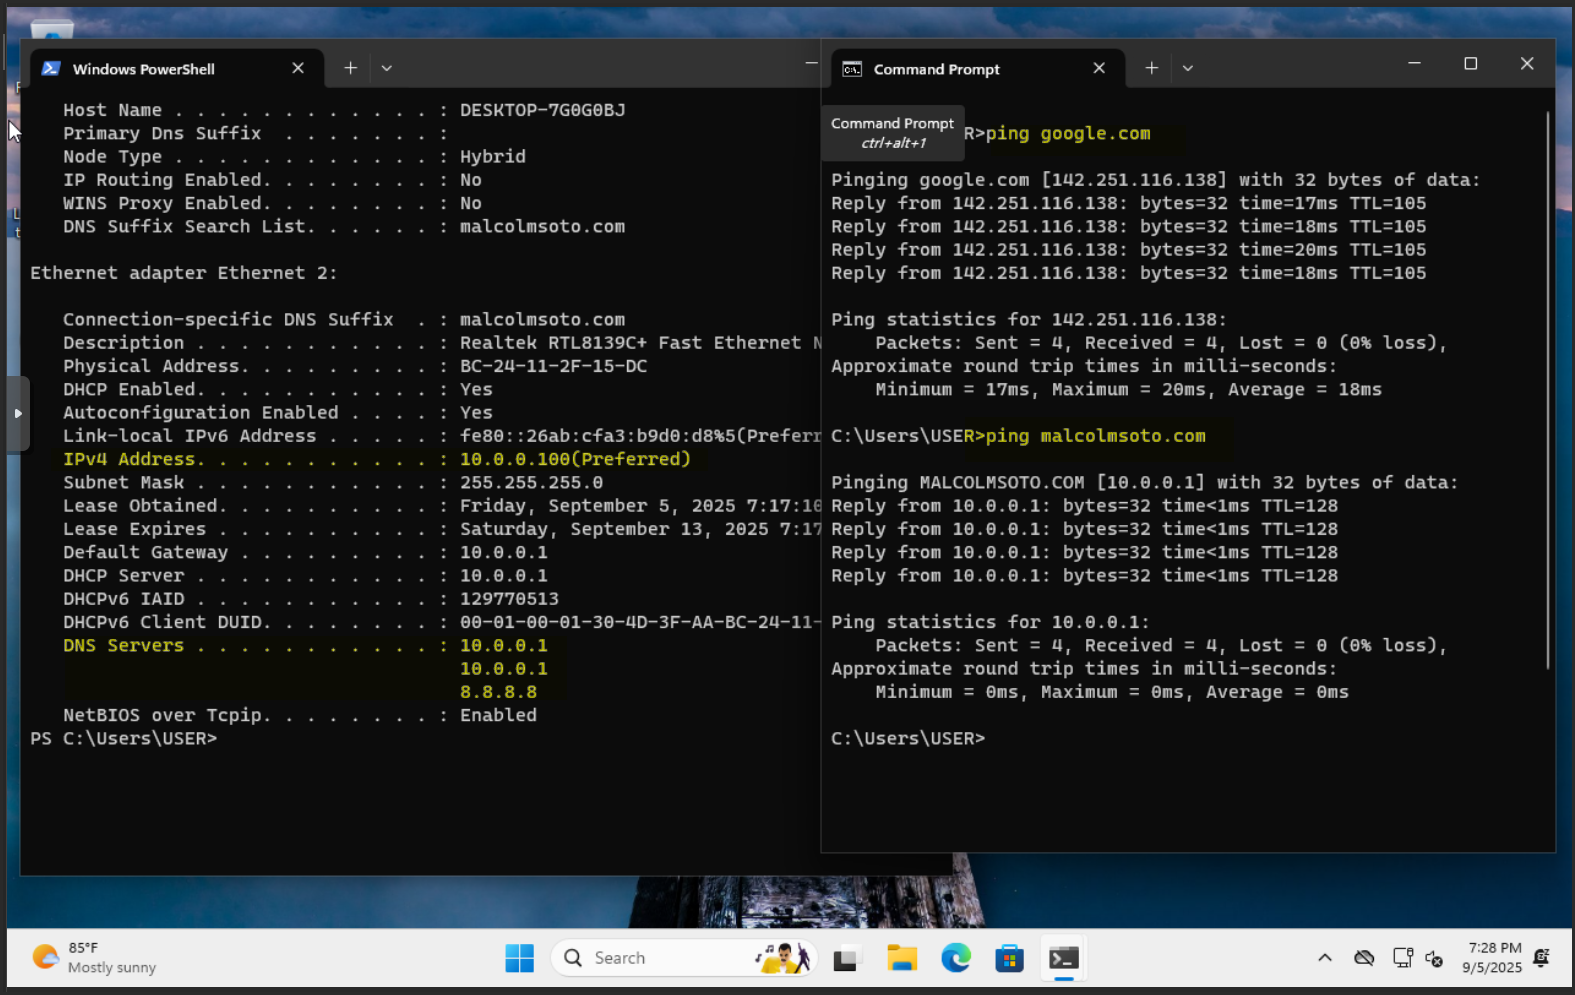
Validation
On your desktop client, confirm DHCP IP assignment, DNS resolution, and internet access.