Microsoft Intune Remote Help
Microsoft Intune Remote Help provides secure assistance for managed devices.
To use Microsoft Intune Remote Help, you need a valid Remote Help license, Intune tenant configuration, Microsoft Entra ID authentication, and proper role-based access control (RBAC) assignments. Both helpers (support staff) and sharers (end users) must sign in with organizational accounts.
Key Prerequisites for Intune Remote Help
1. Licensing
- Remote Help is a paid add-on to Microsoft Intune.
- Licenses must be purchased and assigned to both helpers (support staff) and sharers (end users).
2. Tenant Configuration
- Remote Help must be enabled in the Intune tenant.
- Once enabled, it applies tenant-wide (cannot be scoped to specific groups).
- Remote Help is part of the Intune Suite add-on capabilities.
3. Authentication
- Both helpers and sharers must sign in using Microsoft Entra ID (Azure AD) organizational accounts.
- This prevents impersonation and ensures secure, authenticated sessions.
4. Role-Based Access Control (RBAC)
- Helpers must be assigned the Remote Help permissions via Intune RBAC.
- RBAC defines who can provide support and what level of access they have (view-only vs. full control).
5. Device Requirements
- Remote Help works with Intune-enrolled devices.
- Optionally, admins can enable support for unenrolled devices (useful for BYOD scenarios).
- Supported platforms include Windows 10/11 devices managed by Intune.
6. Network & Security
- Remote Help requires internet connectivity to Microsoft cloud services.
- Ensure firewall/proxy settings allow communication with Remote Help endpoints.
- Sessions are encrypted end-to-end for compliance and security.
Network Considerations
Both the helpdesk and the end user must be able to reach specific endpoints over port 443. For more information, see Network endpoints for Remote Help .
Remote Help communicates over port 443 (HTTPS) and connects to the Remote Assistance Service at remotehelp.microsoft.com using the Remote Desktop Protocol (RDP). All traffic is encrypted with TLS 1.2.
Test Network Access using PowerShell
Test-NetConnection remotehelp.microsoft.com -Port 443
Reference Documentation
Implementation Steps
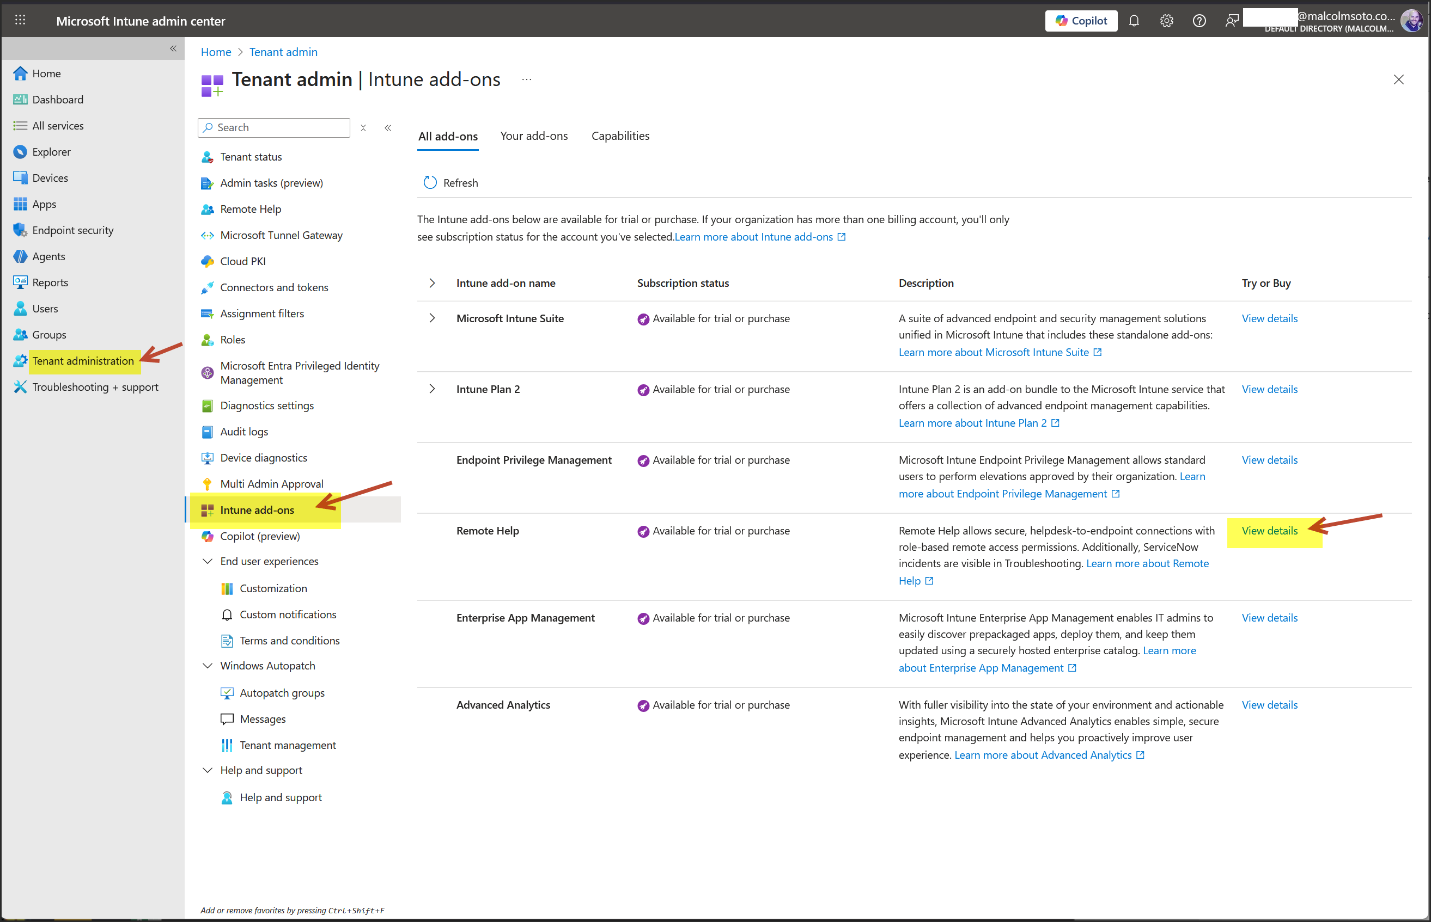
1. Setting up Remote Help
- Log in to intune.microsoft.com.
- Navigate to Tenant administration.
- Select Intune add-ons.
- Click View details for the Remote Help

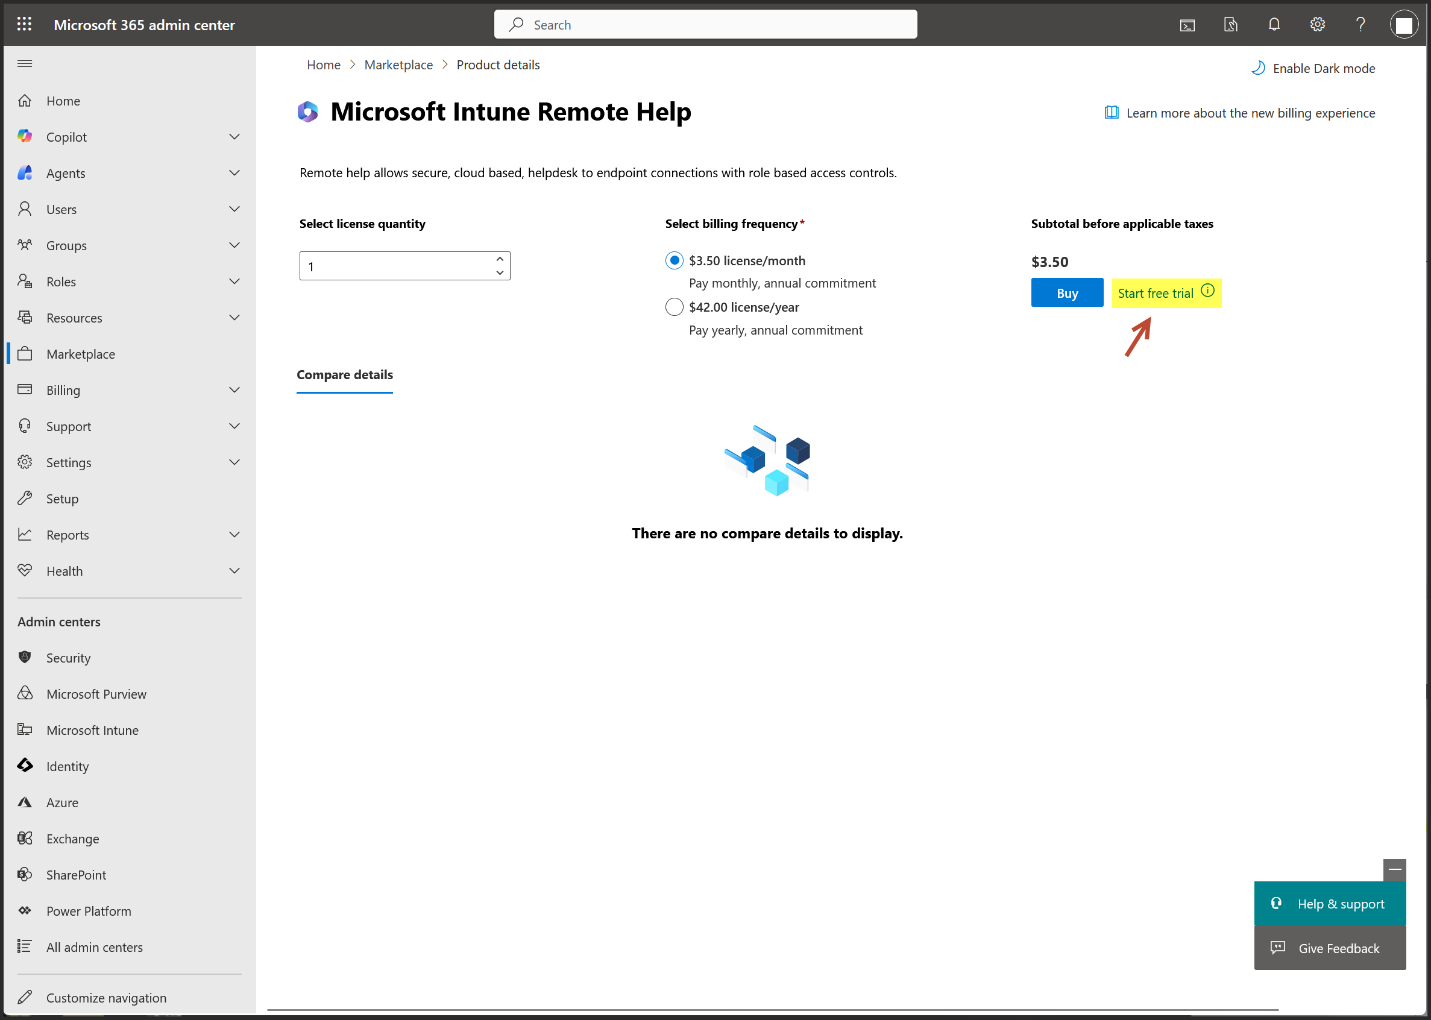
Trial Behavior
- When you start a trial (usually 30 days), you get full access to the add on features for the users you assign.
- At the end of the trial, it does not automatically convert to paid unless you explicitly purchase licenses and assign them.
- If you don’t buy licenses, the features simply stop working once the trial expires.
- Microsoft will usually notify you in the Microsoft 365 admin center before the trial ends, giving you the option to convert to paid.
What to Expect
- No surprise billing — you must actively purchase licenses to continue.
- If you decide to keep the add on, you can assign licenses to specific users (e.g., only your support staff for Remote Help).
- If you don’t, the trial just lapses and the features are disabled.

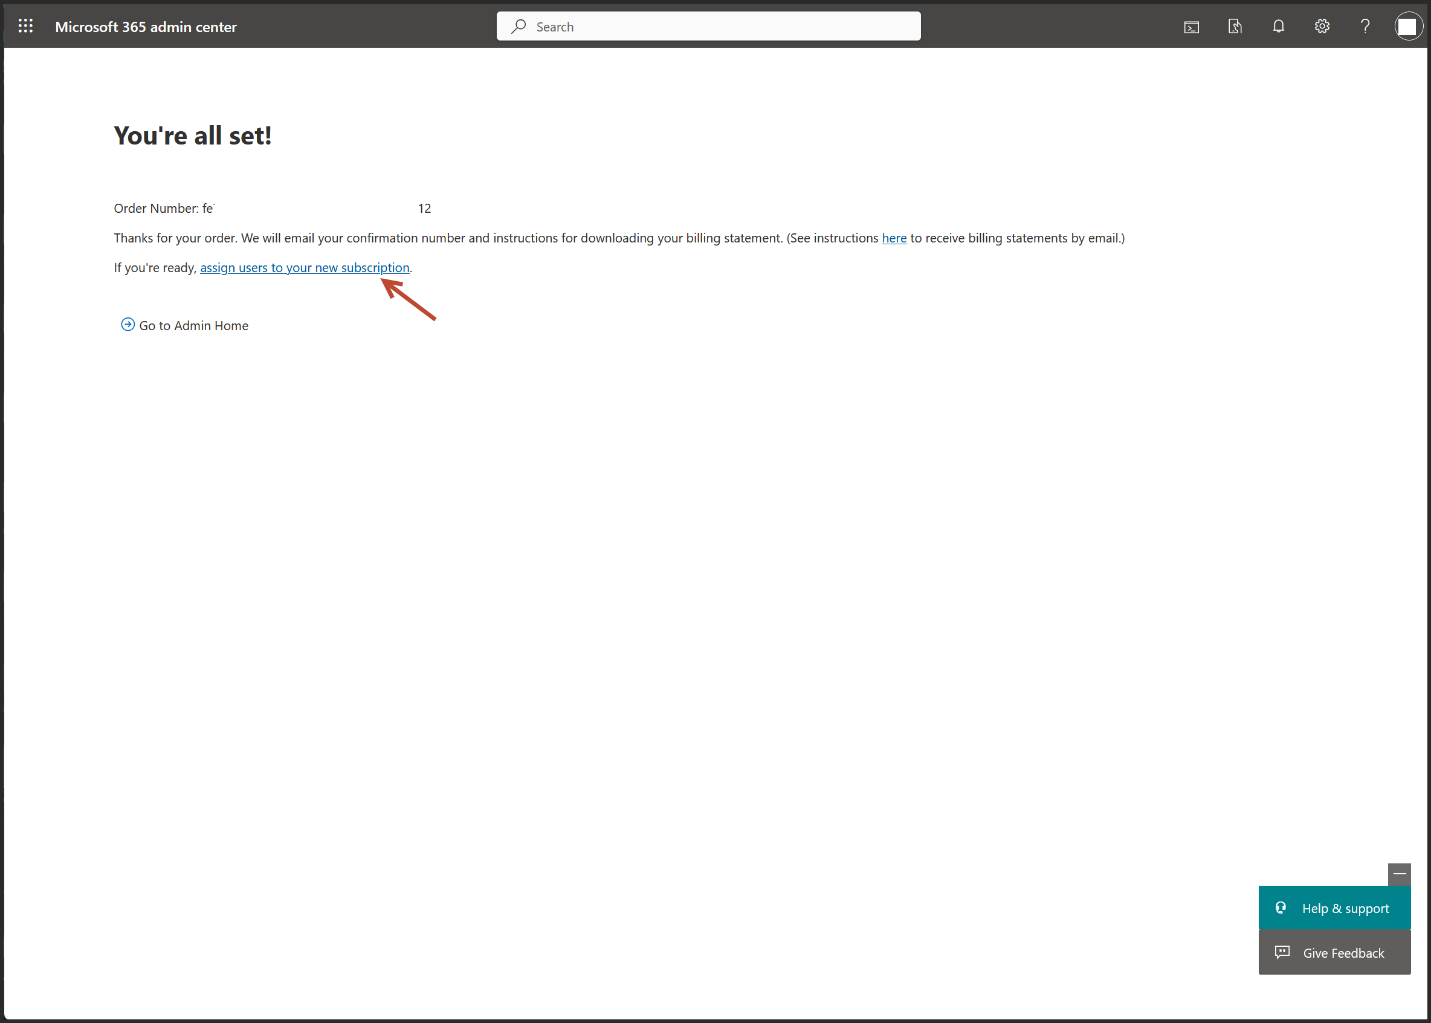
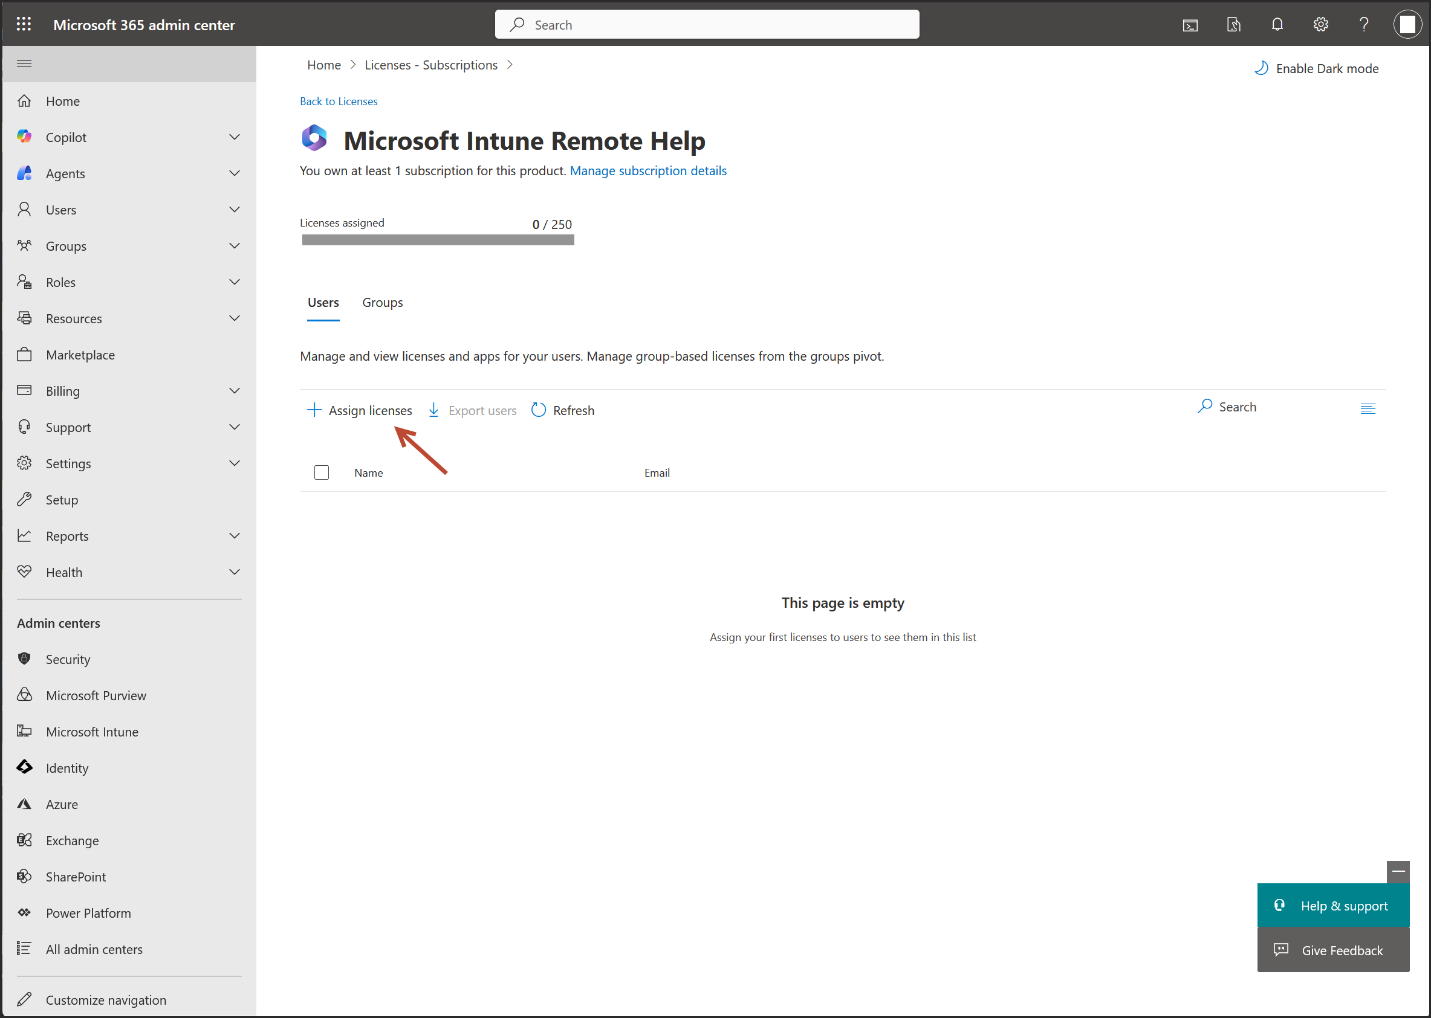
- Add your user
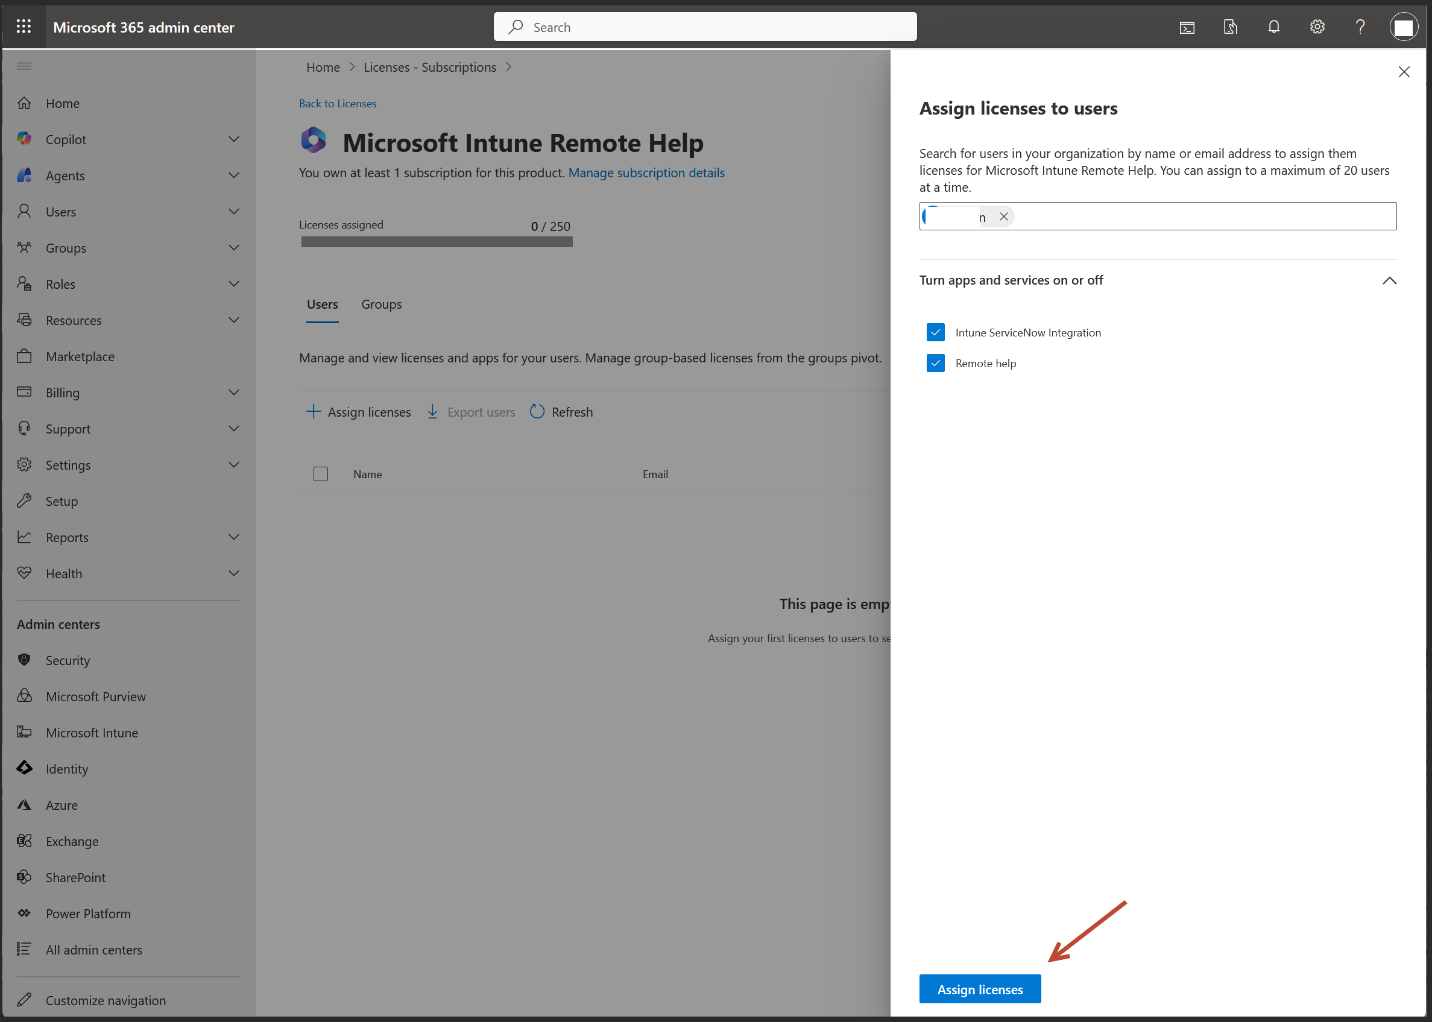
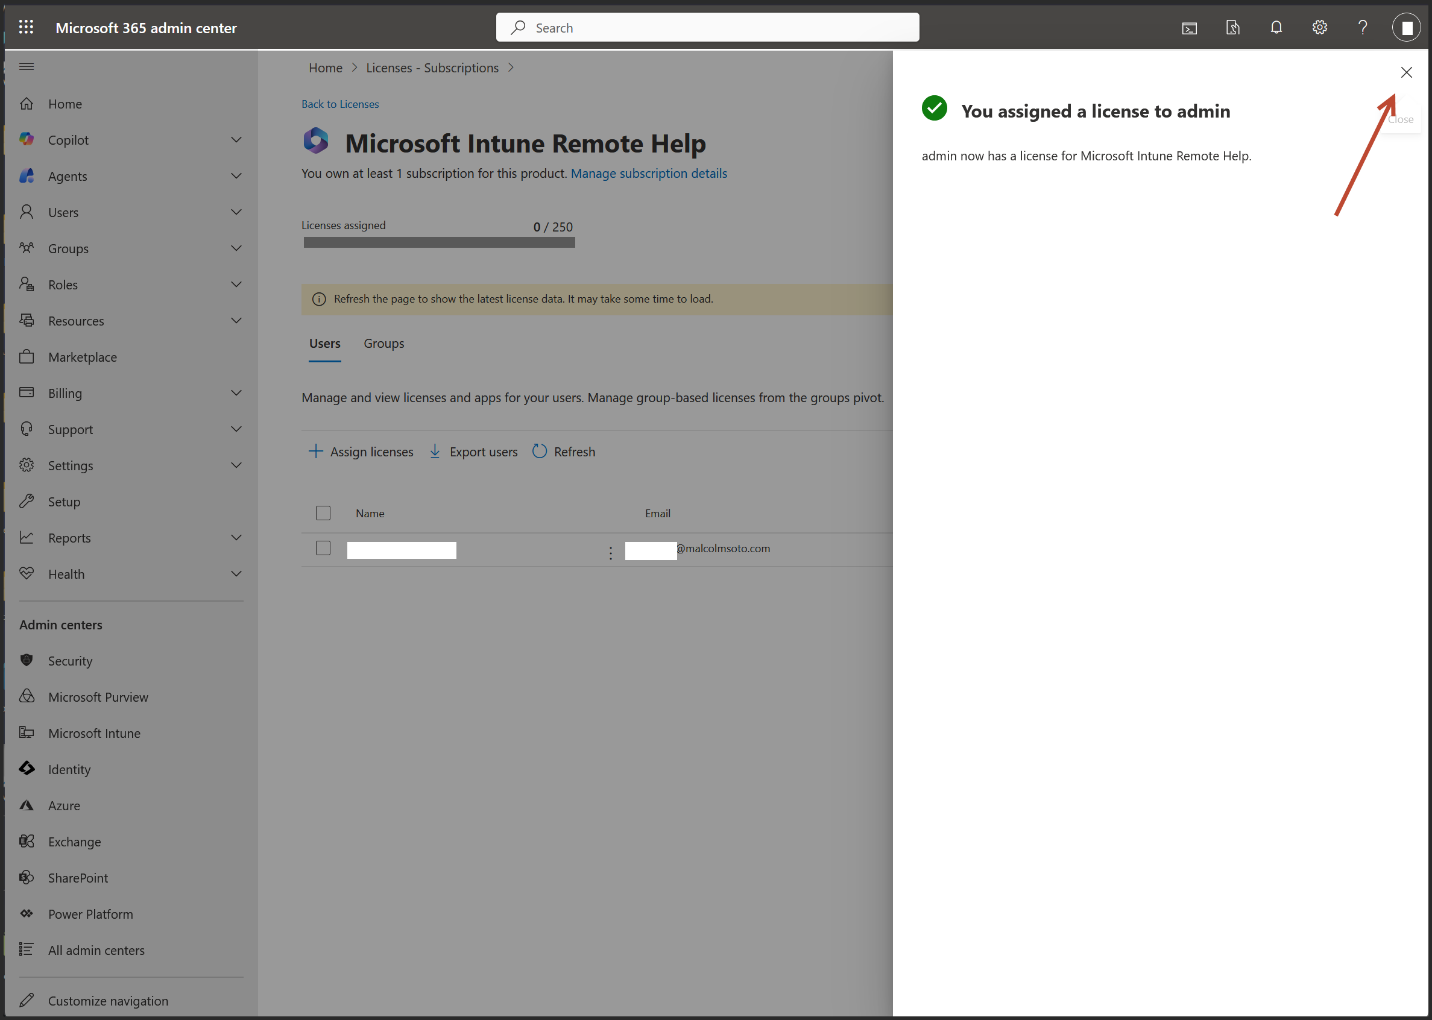
- Note: Activating licenses or starting a trial may take anywhere from 30 minutes to 8 hours.
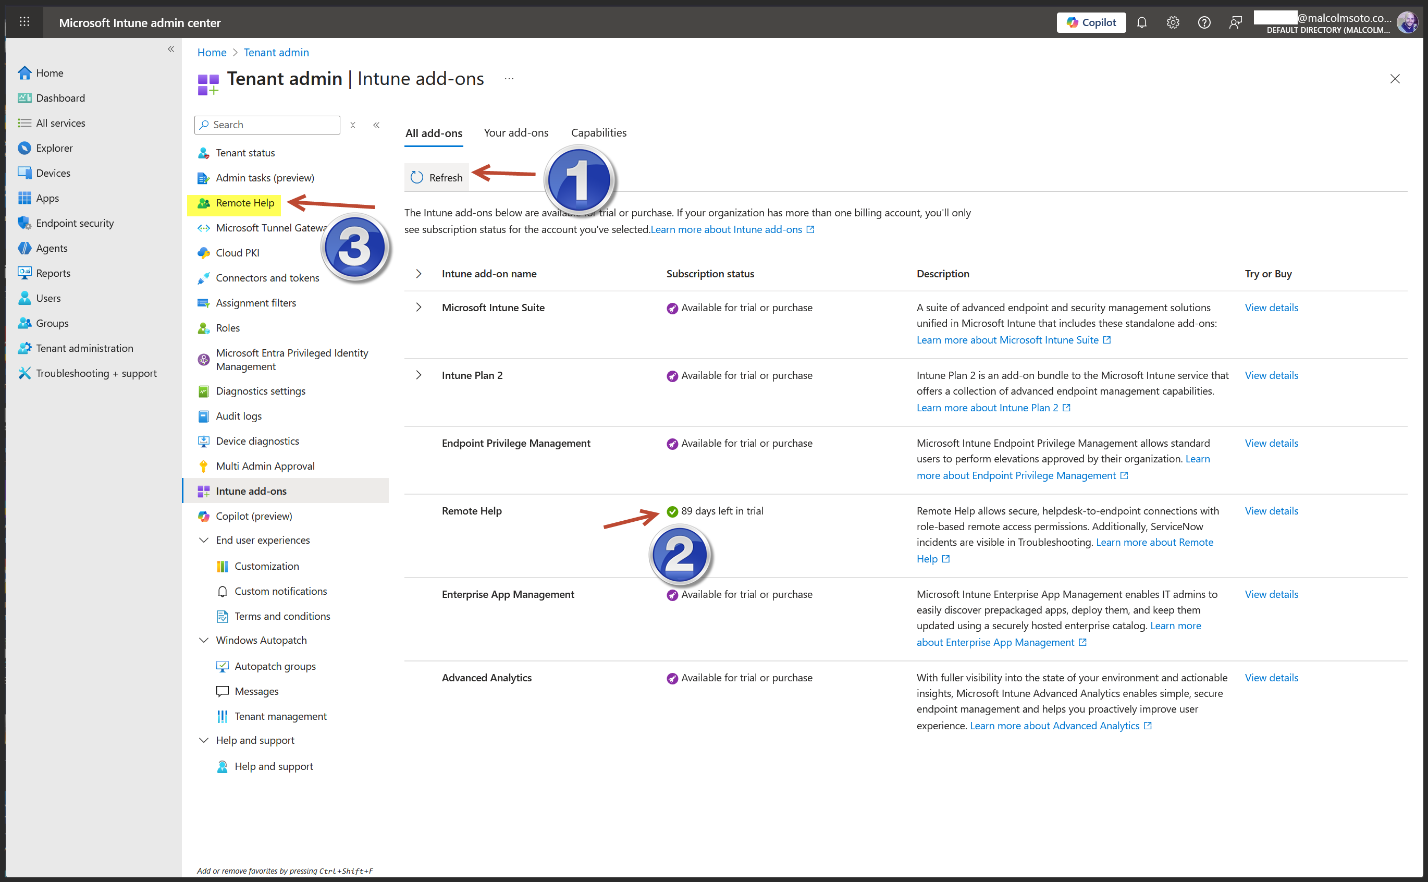
- Go back to the Intune Add-on page, and click refresh, look at the Remote Help addon, then Click Remote Help
- Click Settings > Configure
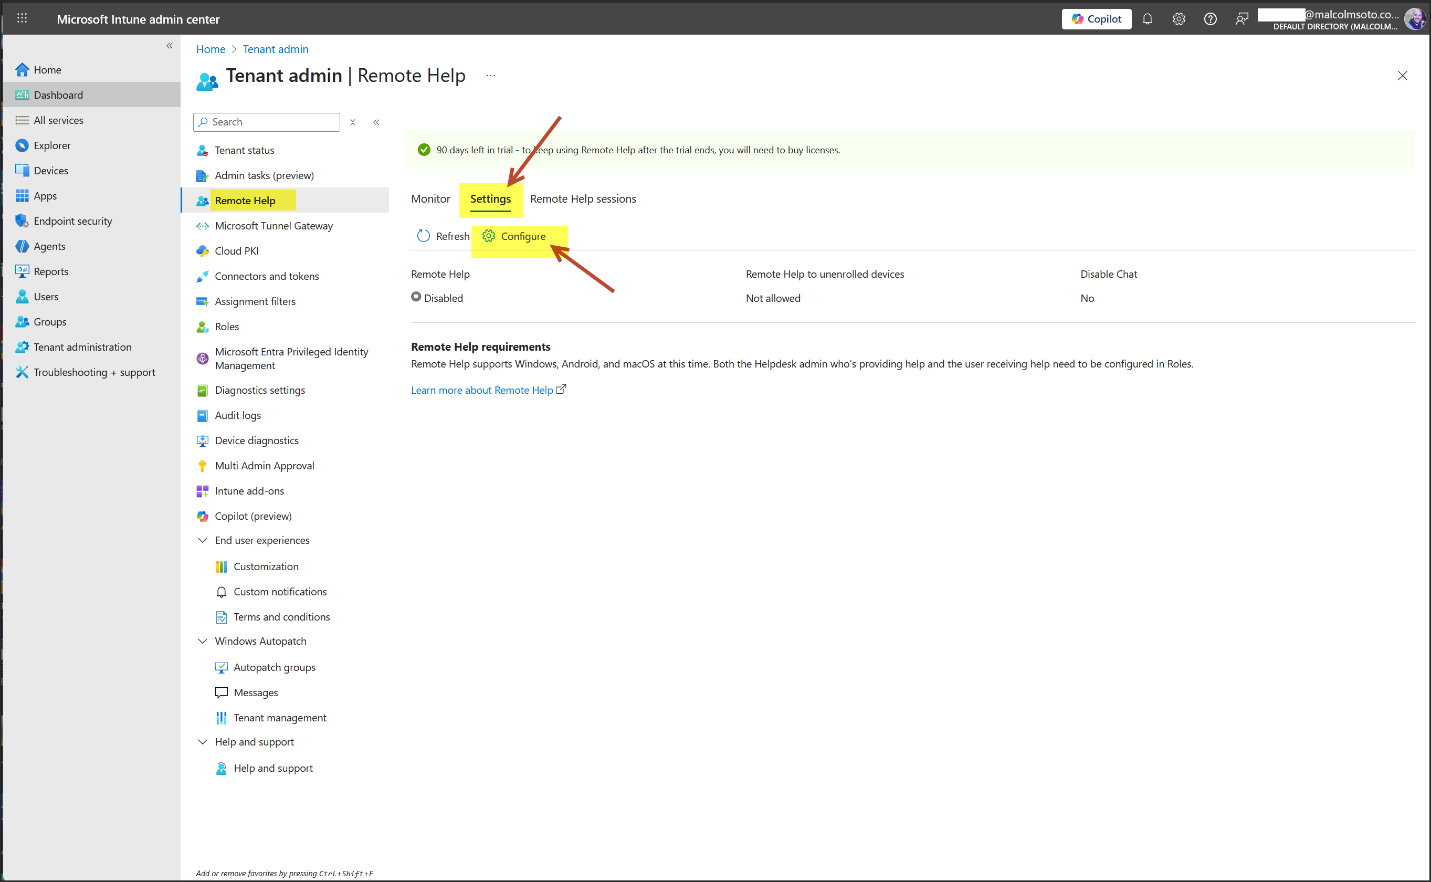
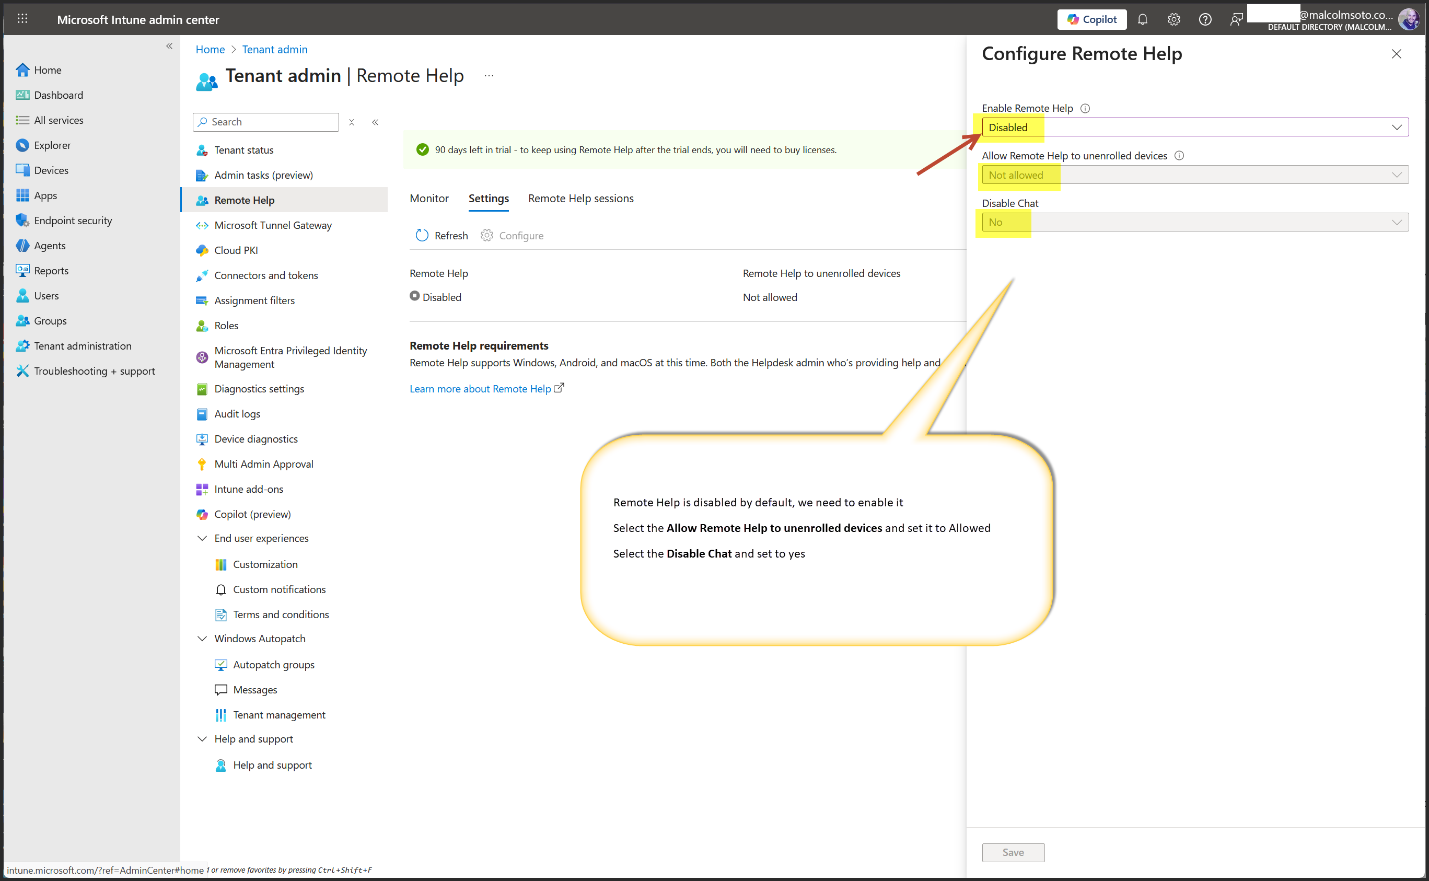
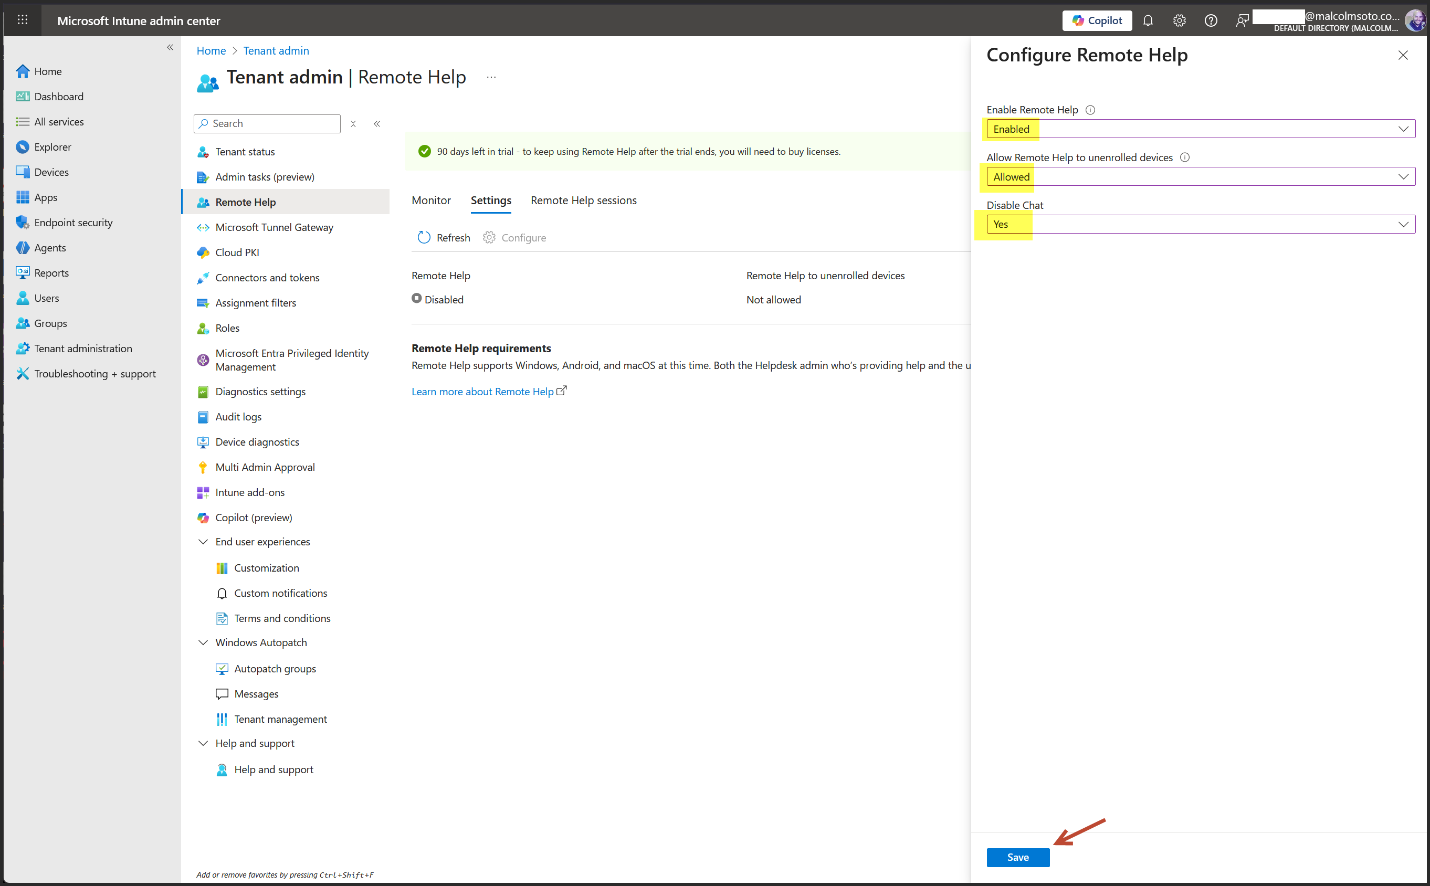
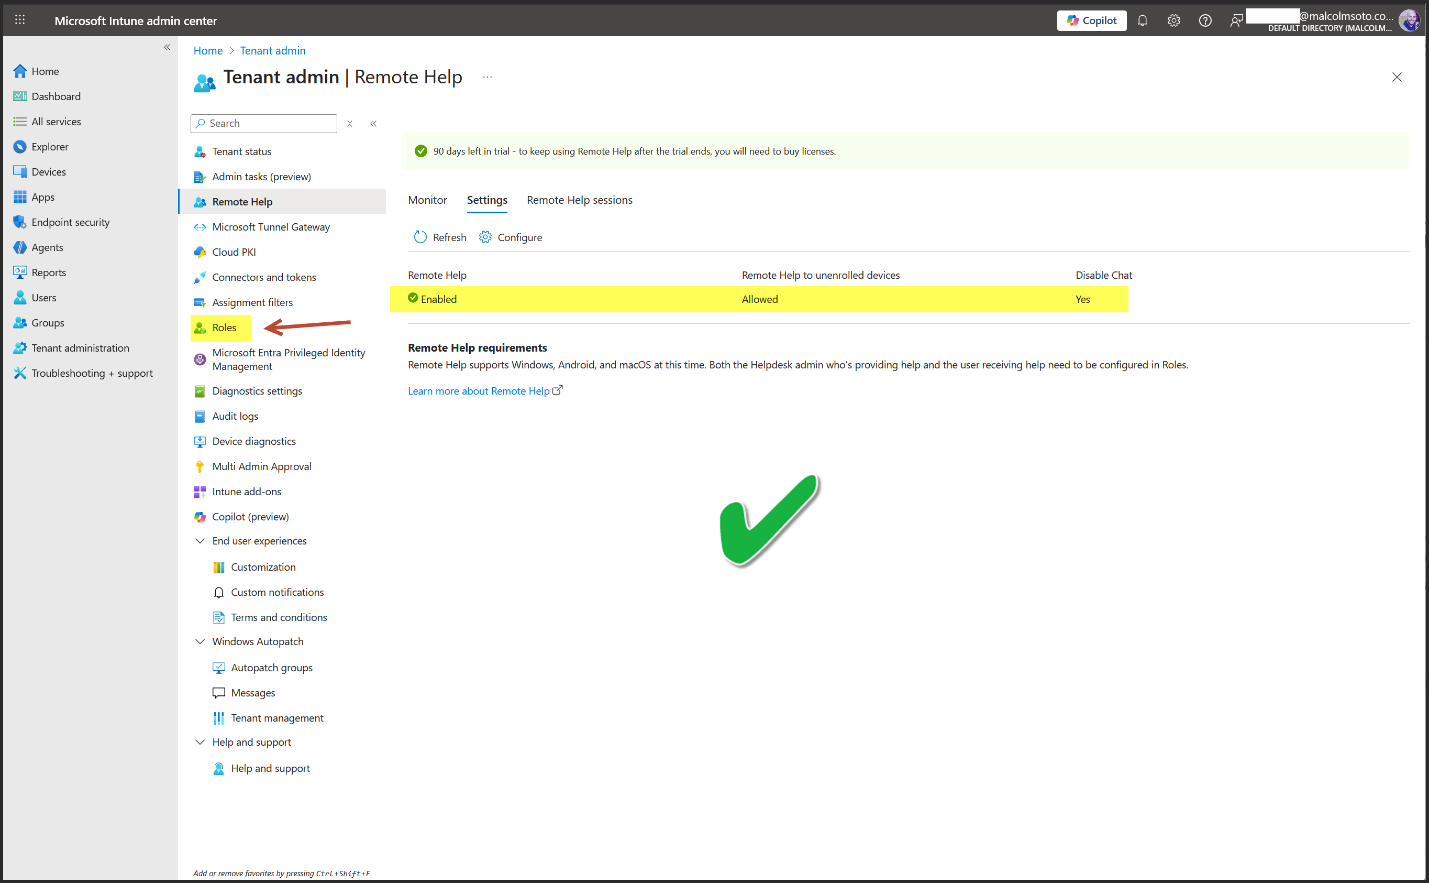
- We have successfully enabled Remote Help.
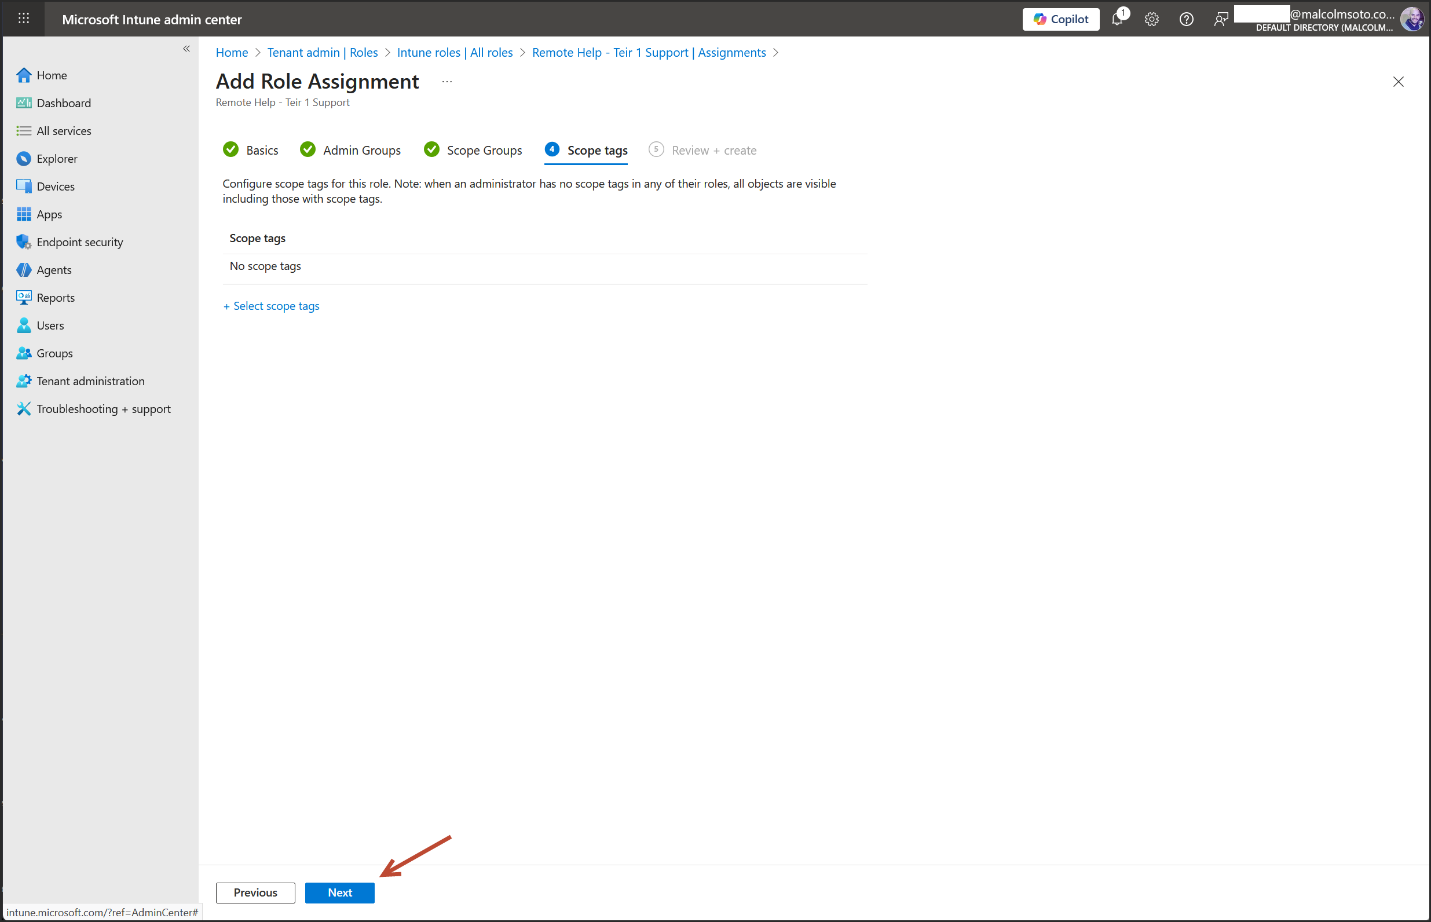
- The next step involves configuring permissions for Remote Help by defining roles.
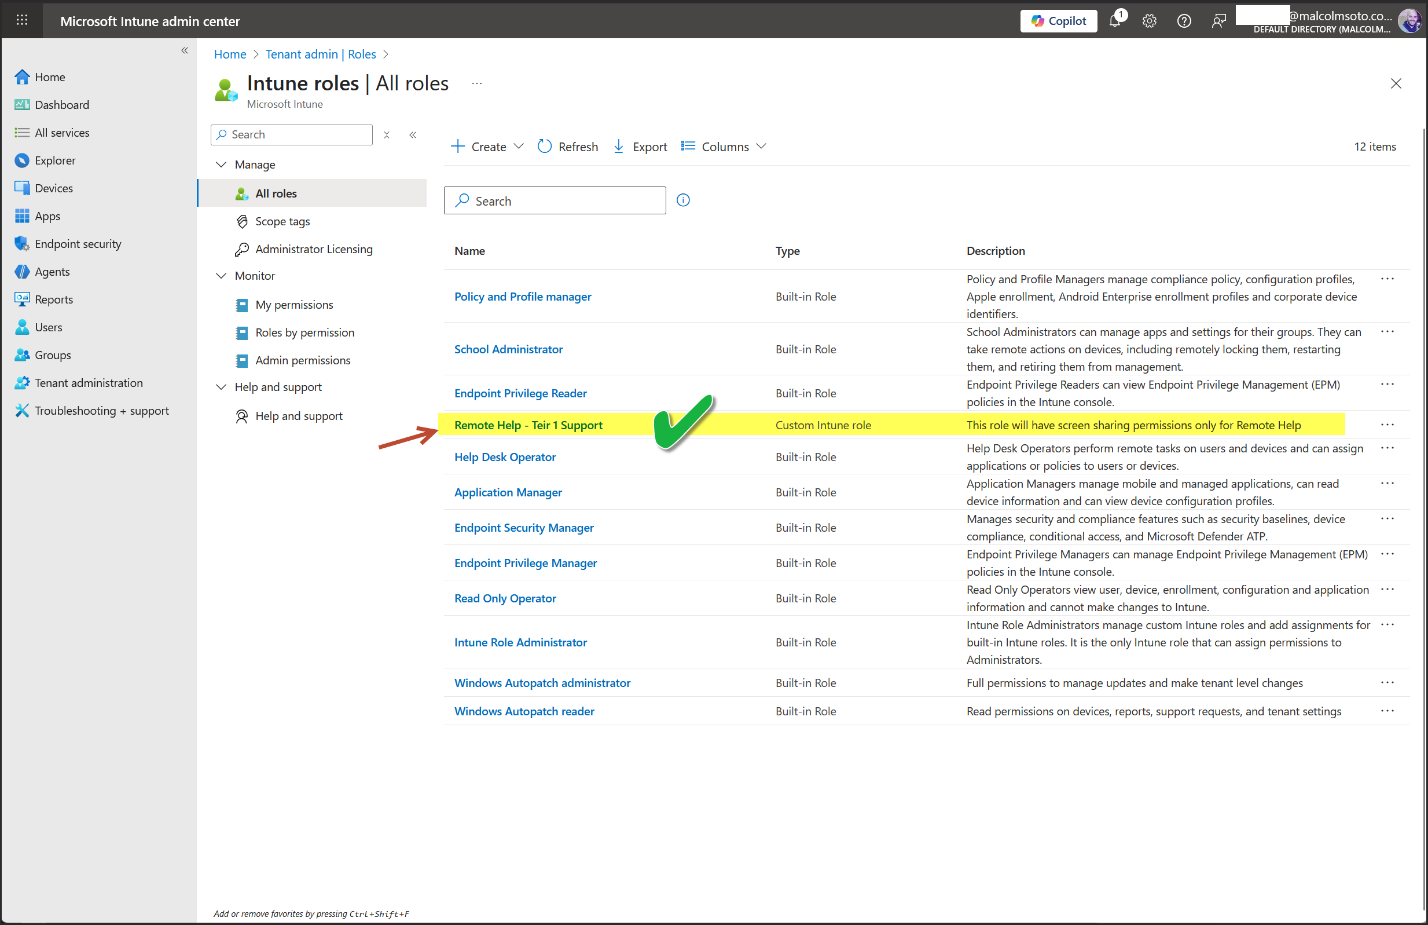
- Click Roles
- The Help Desk Operator is a built-in role in Intune, designed for individuals providing assistance with Remote Help, also known as helpers.
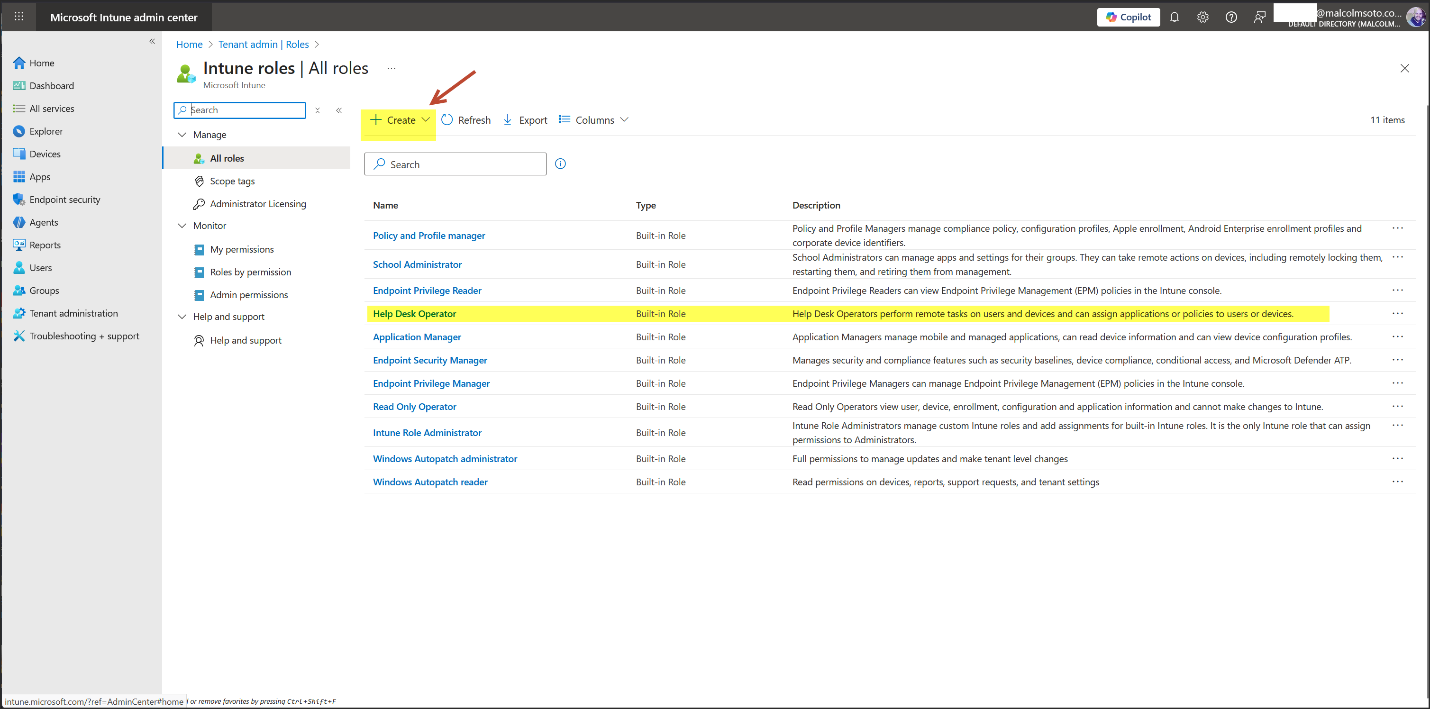
- But for Least Privilege, let’s make a custom role.
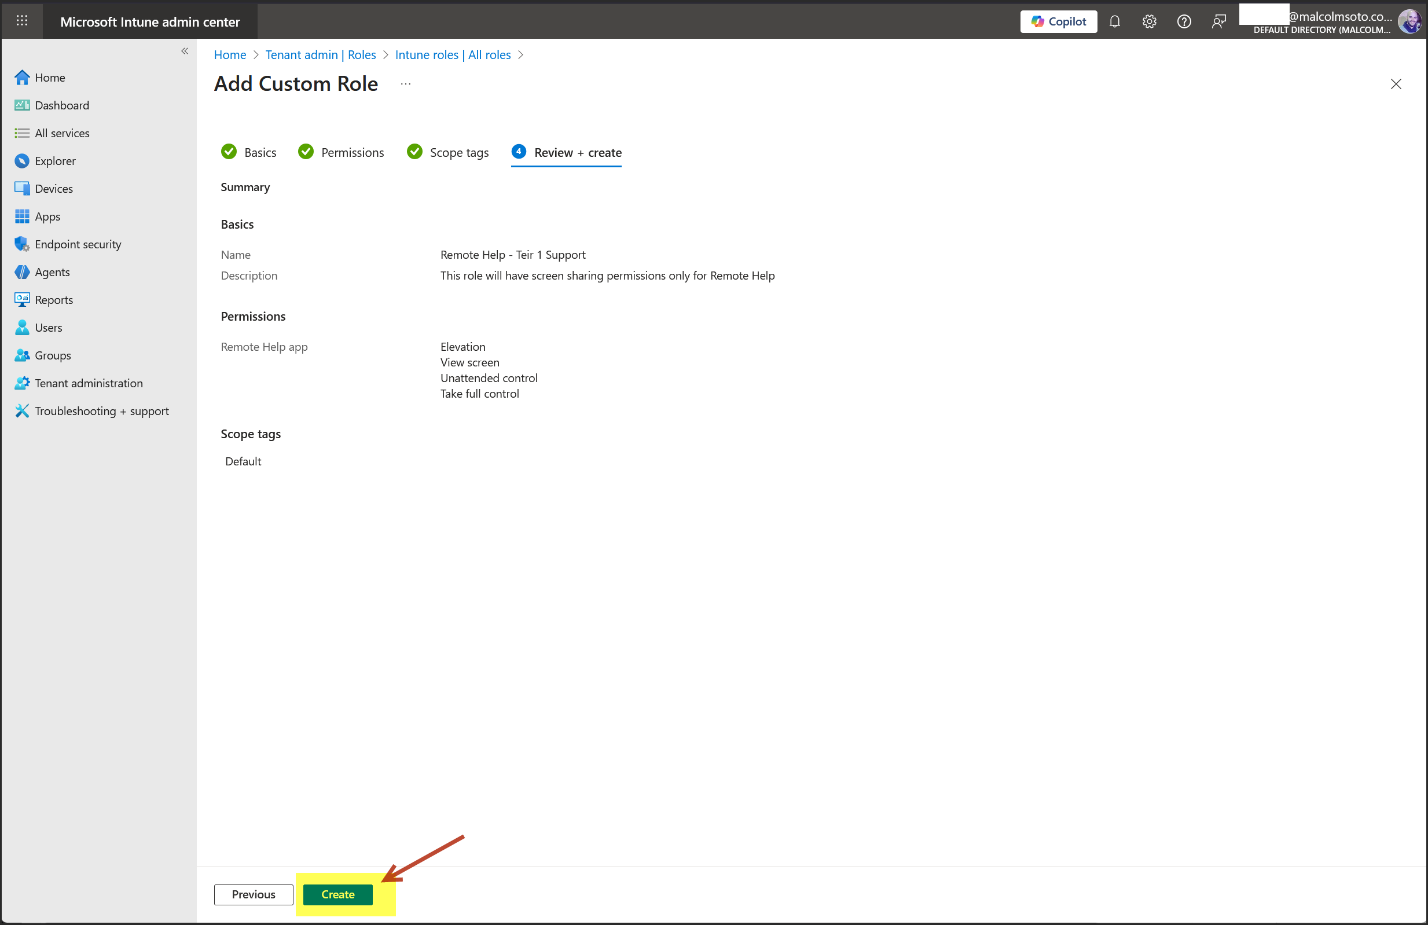
- Click create > Intune role
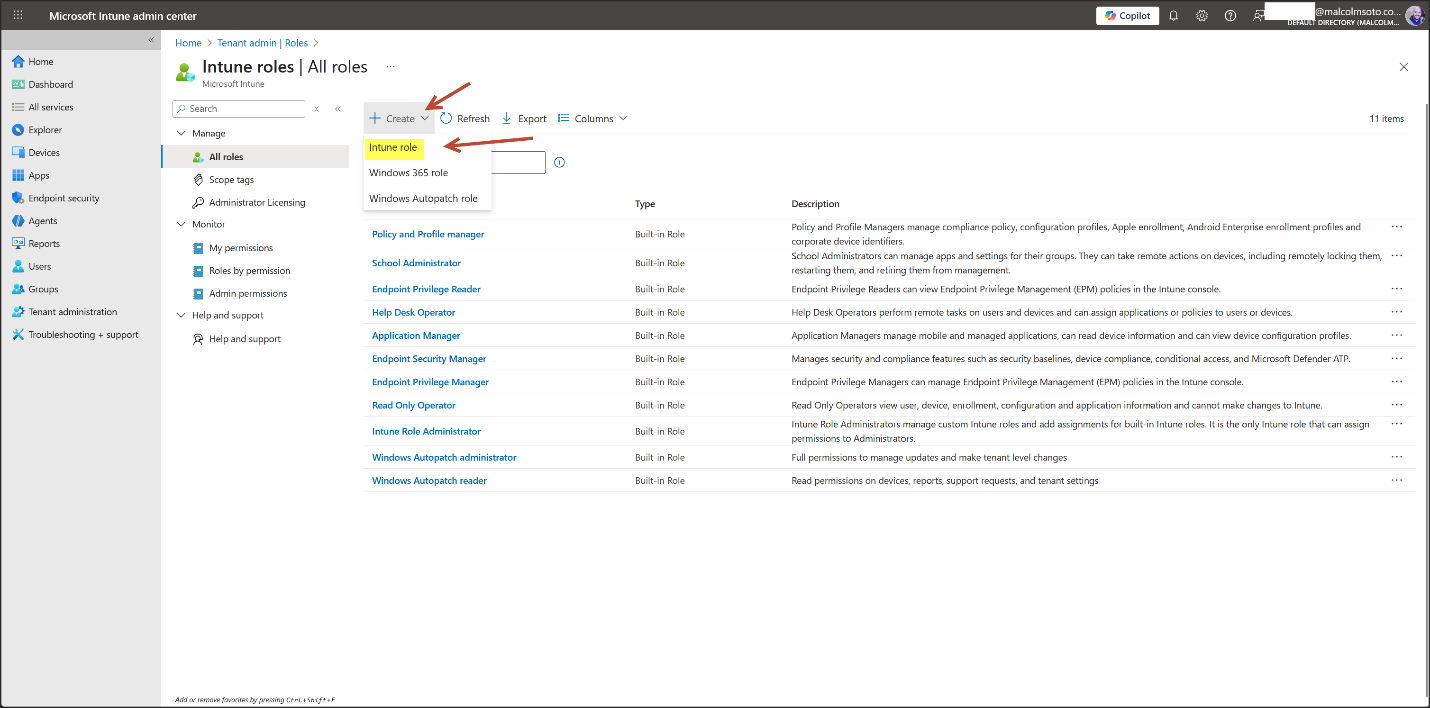
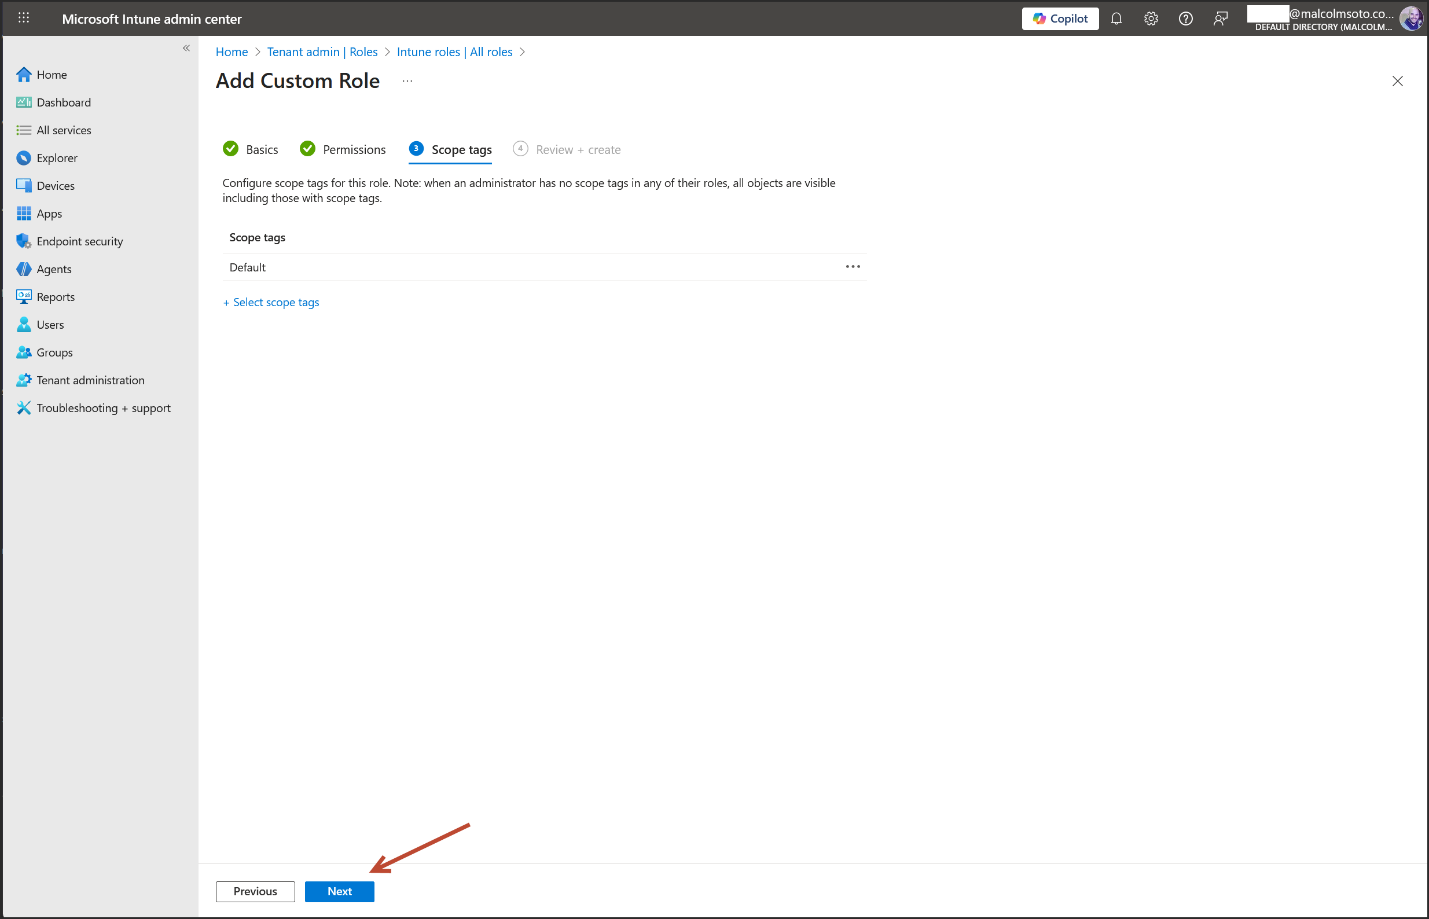
- Give it a Name and Description
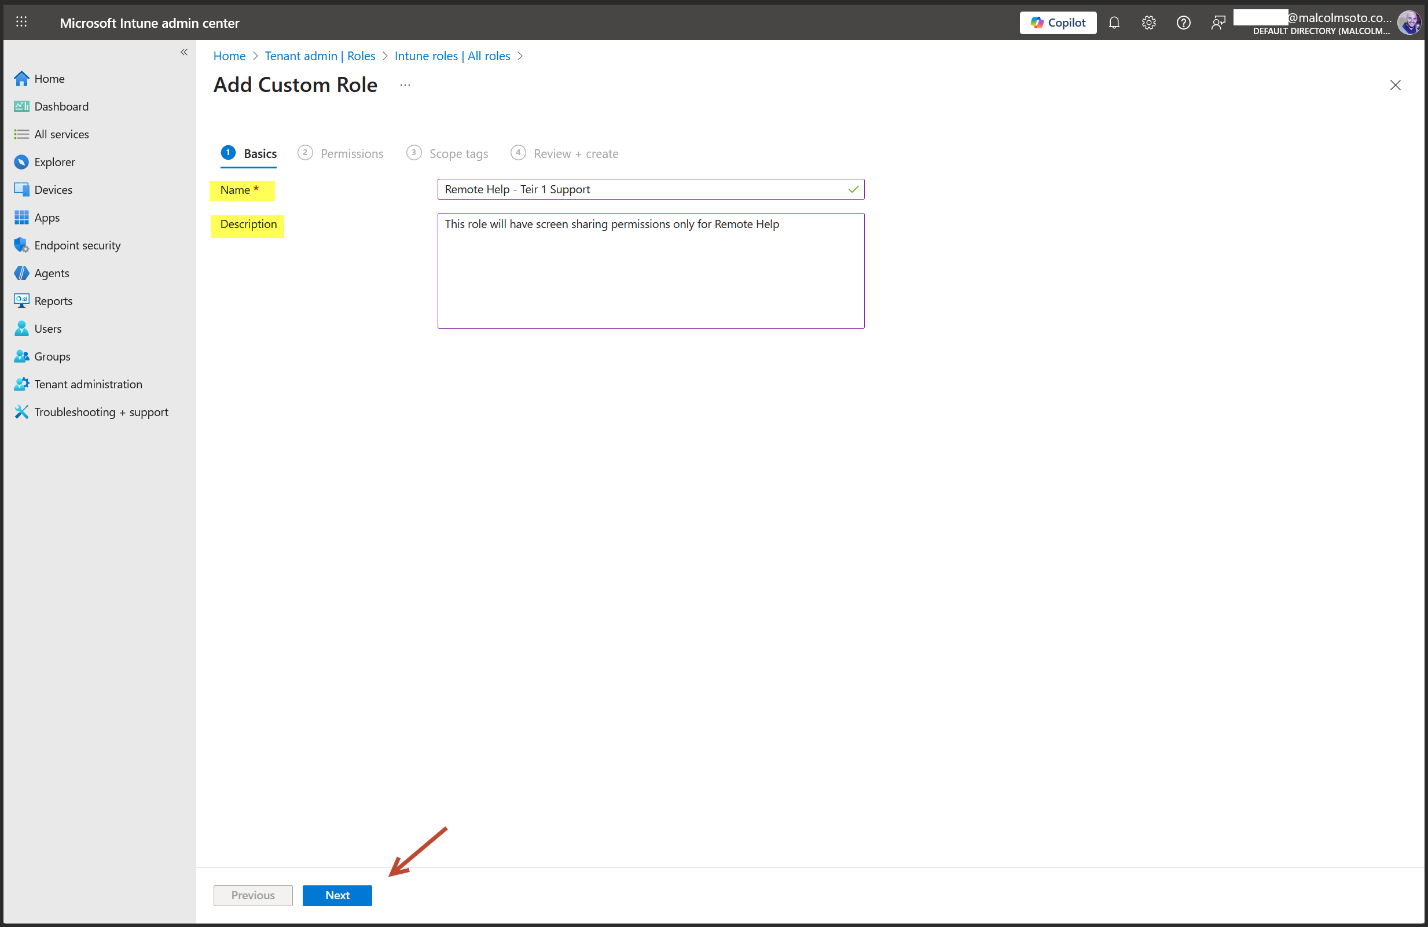
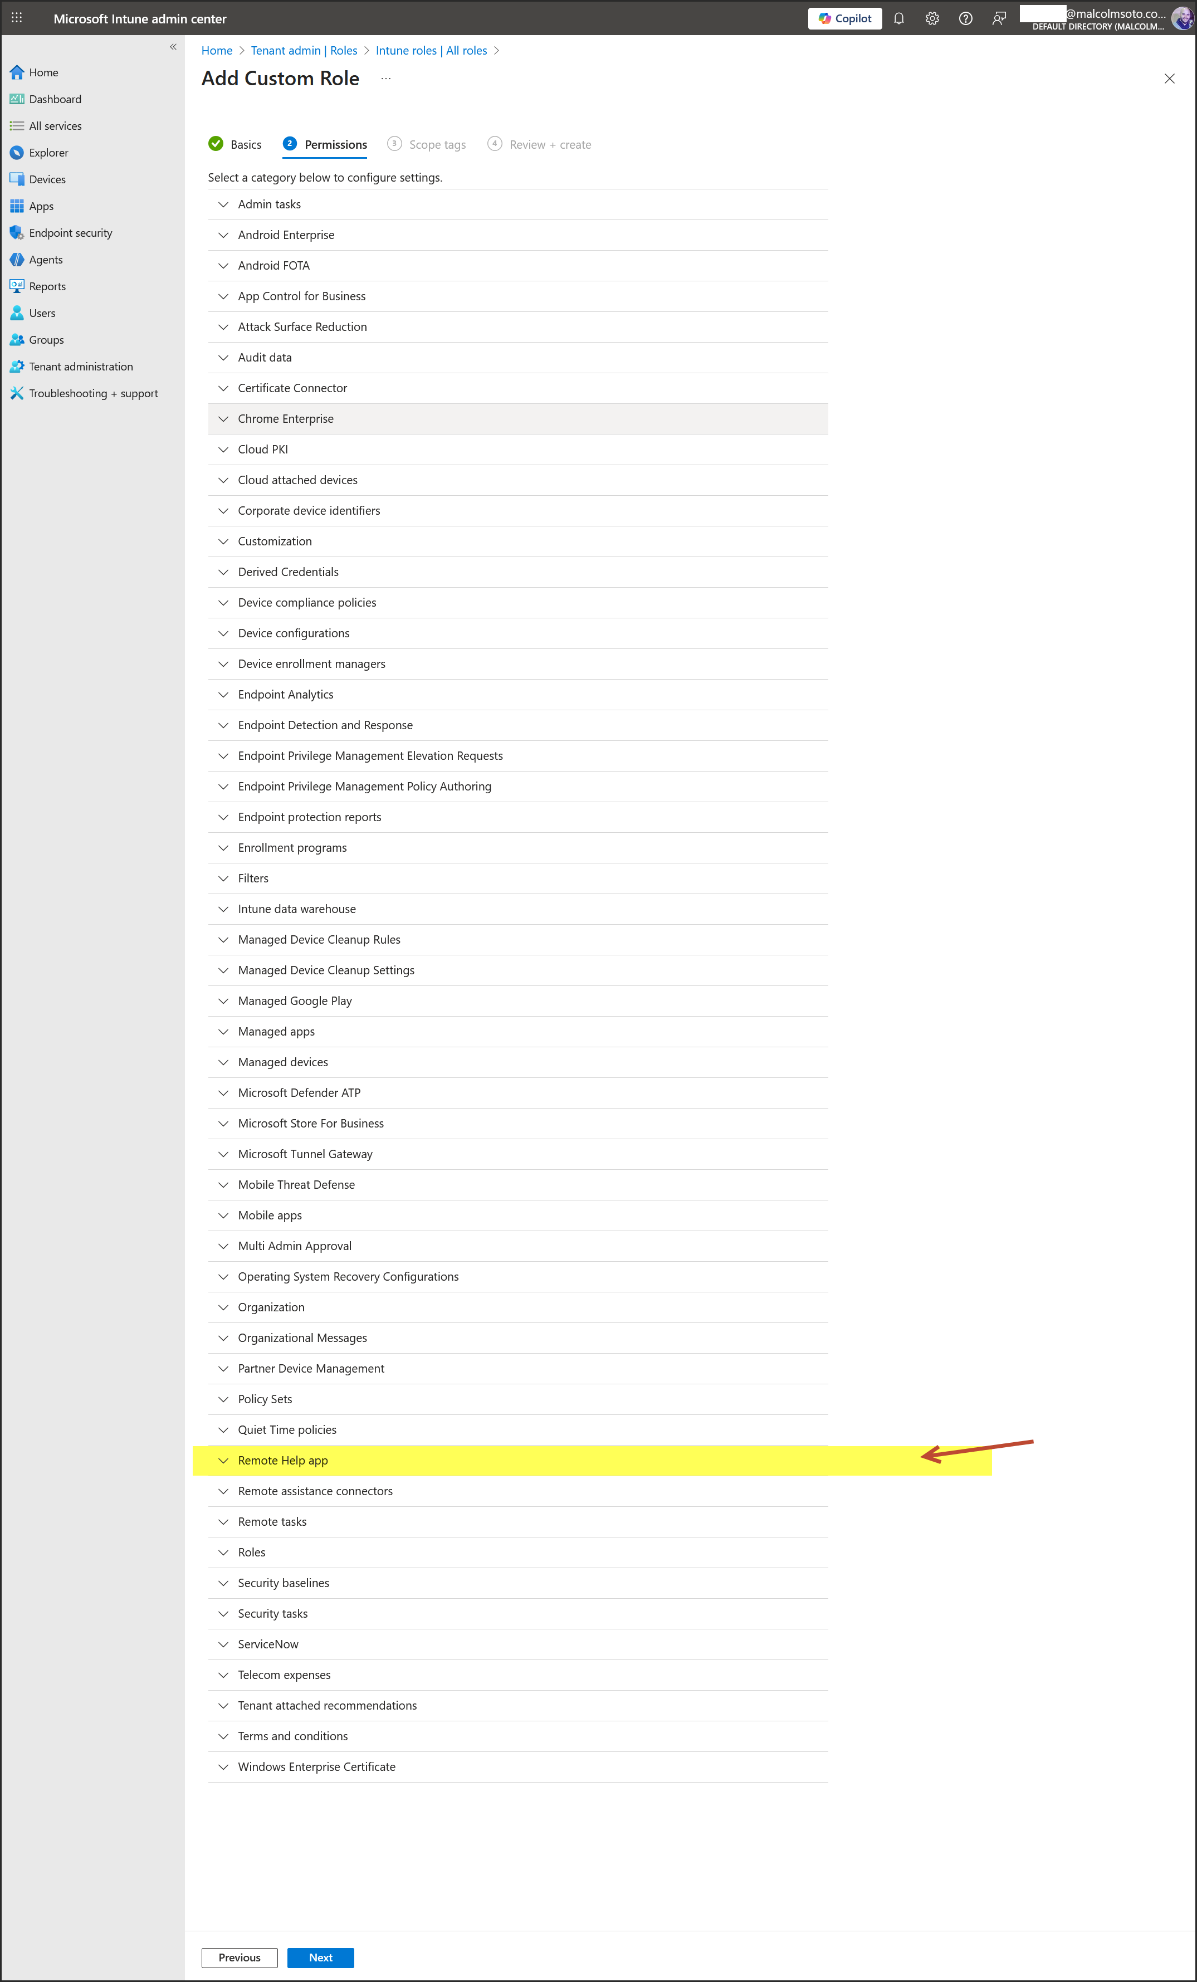
- Here we can setparameters and define the actions helpdesk associates can take during a Remote Help session, based on their roles.
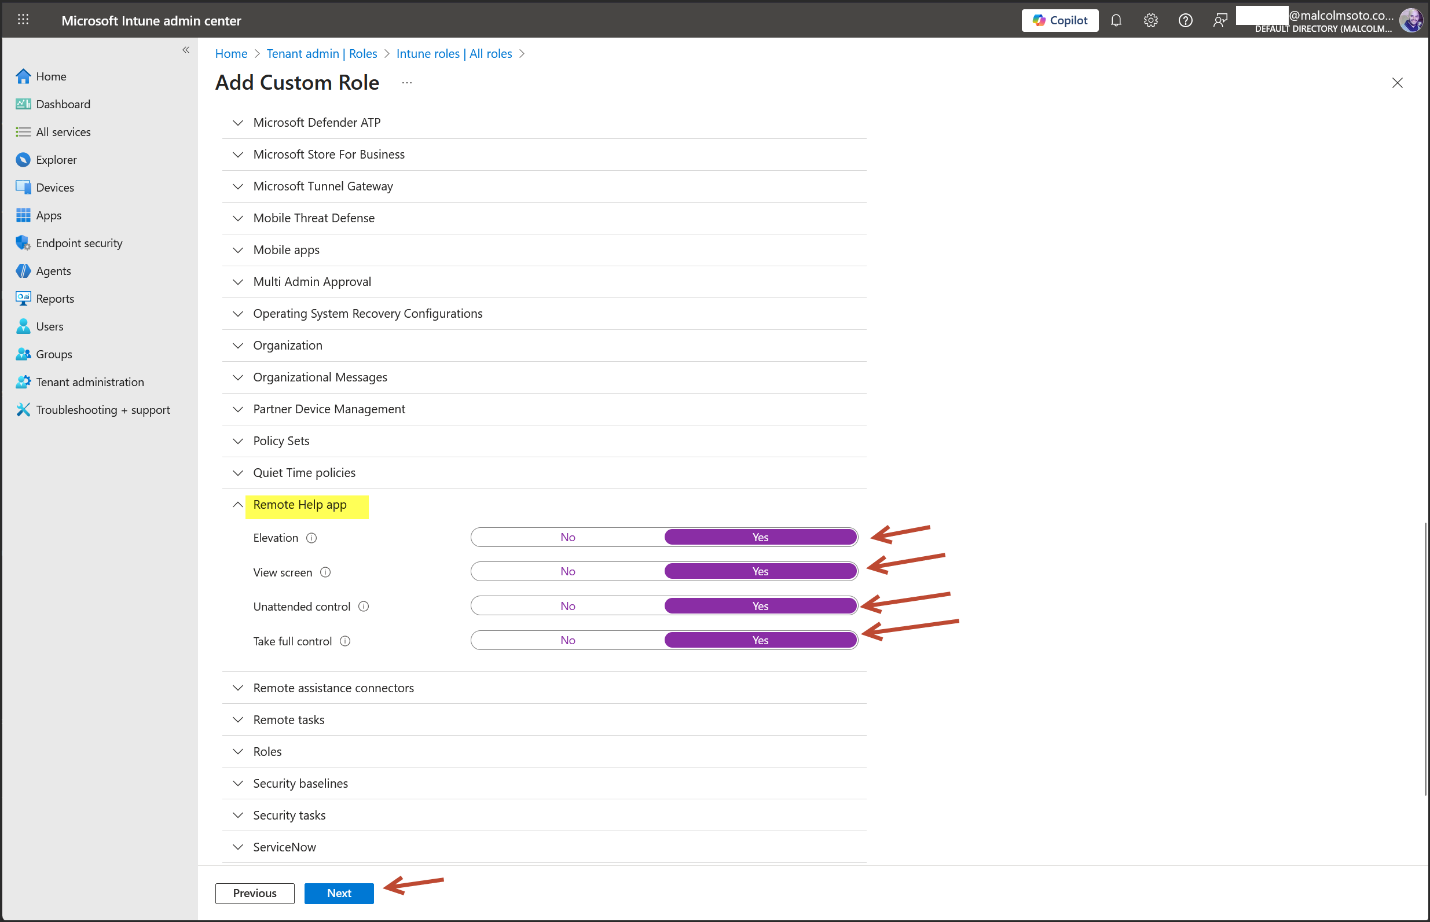
- Set the Elevation toggle to Yes.
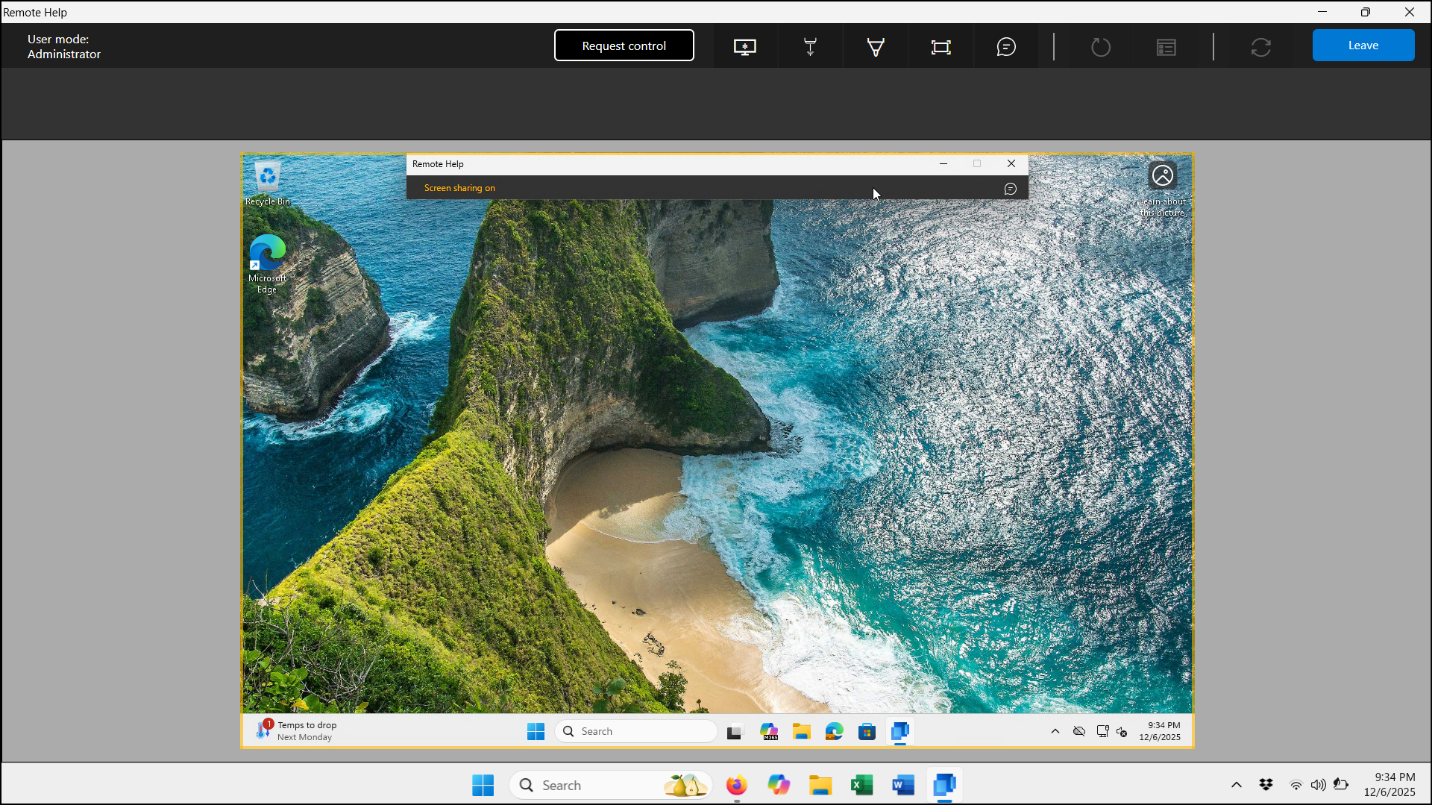
- Setting the Elevation toggle to Yes enables the helper to input UAC credentials when prompted on the sharer's windows devices during a Remote Help session.Additionally, enabling elevation grants the helper the ability to view and control the sharer's device, provided the sharer has given access.
- Set the View screen toggle to Yes.
- View screen toggle to Yes grants the helper access to view the sharer's device when Remote Help is active across all supported platforms.
- Set the Unattended control toggle to Yes.
- Setting the Unattended control toggle to Yes allows Remote Help to start automatically on Android devices as soon as the helper initiates a new session, eliminating the need for the sharer to grant access.
- Set the Take full control toggle to Yes.
- Setting the Take full control toggle to Yes allows the helper to view and control the sharer's device when Remote Help is activated on all platforms supported by Microsoft Remote Help.
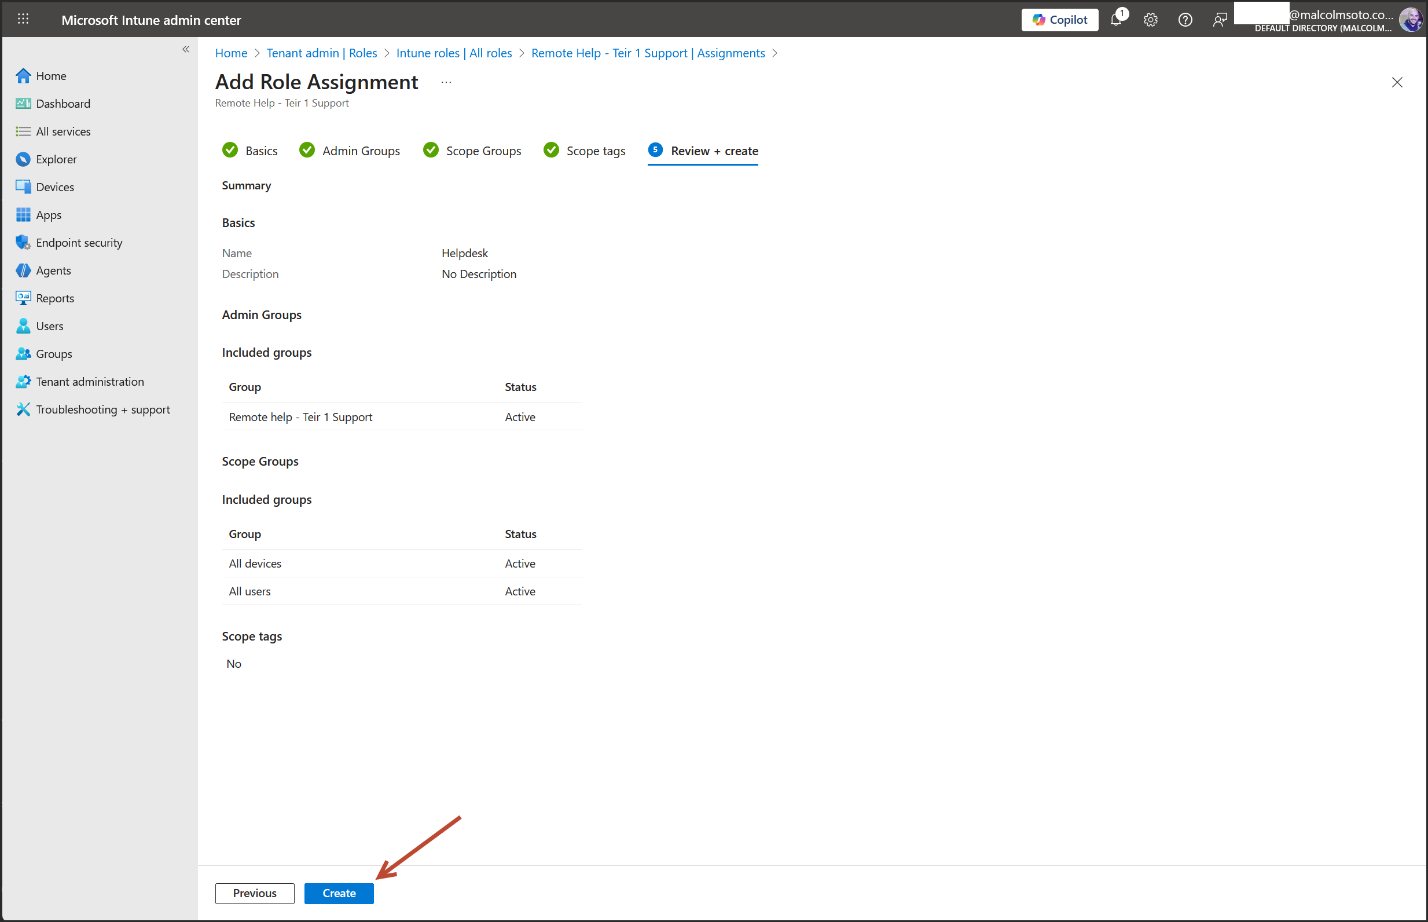
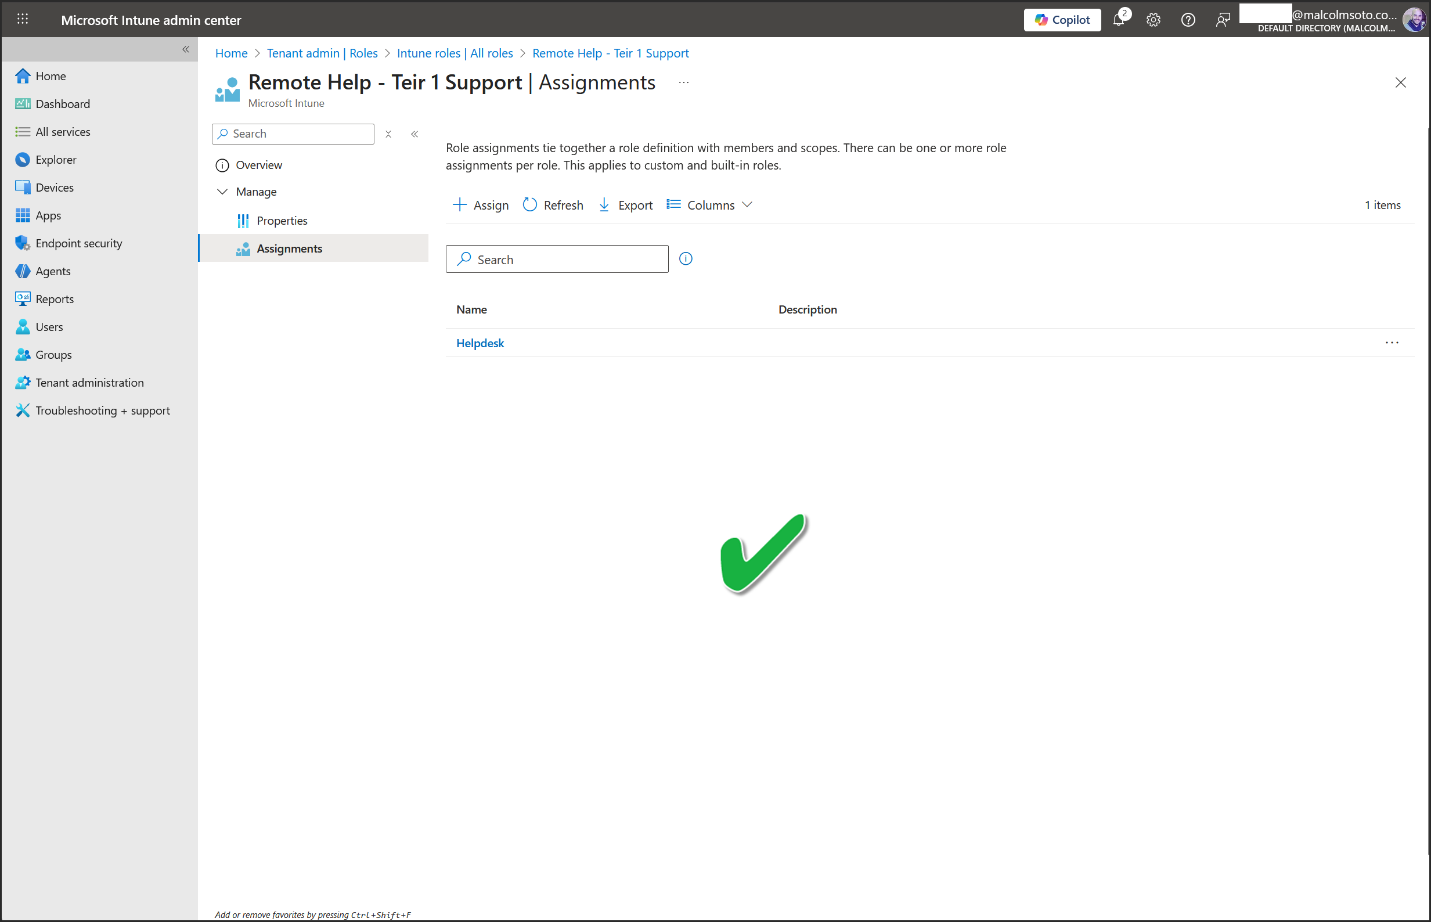
- Click on the Custom Intune role we created
- Click Assignments > Assign
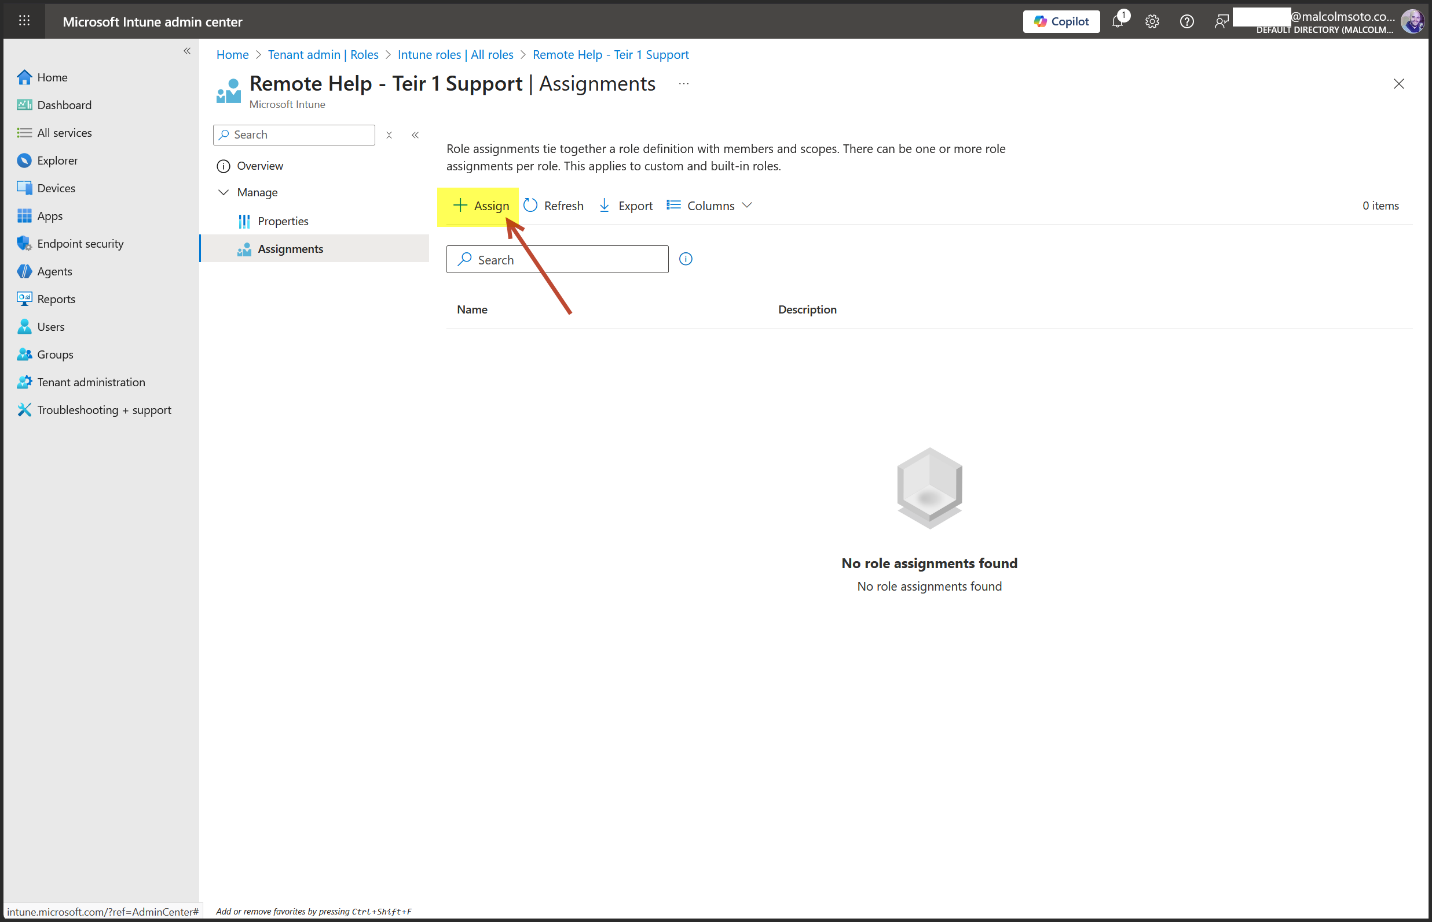
- Give it a name, then Next
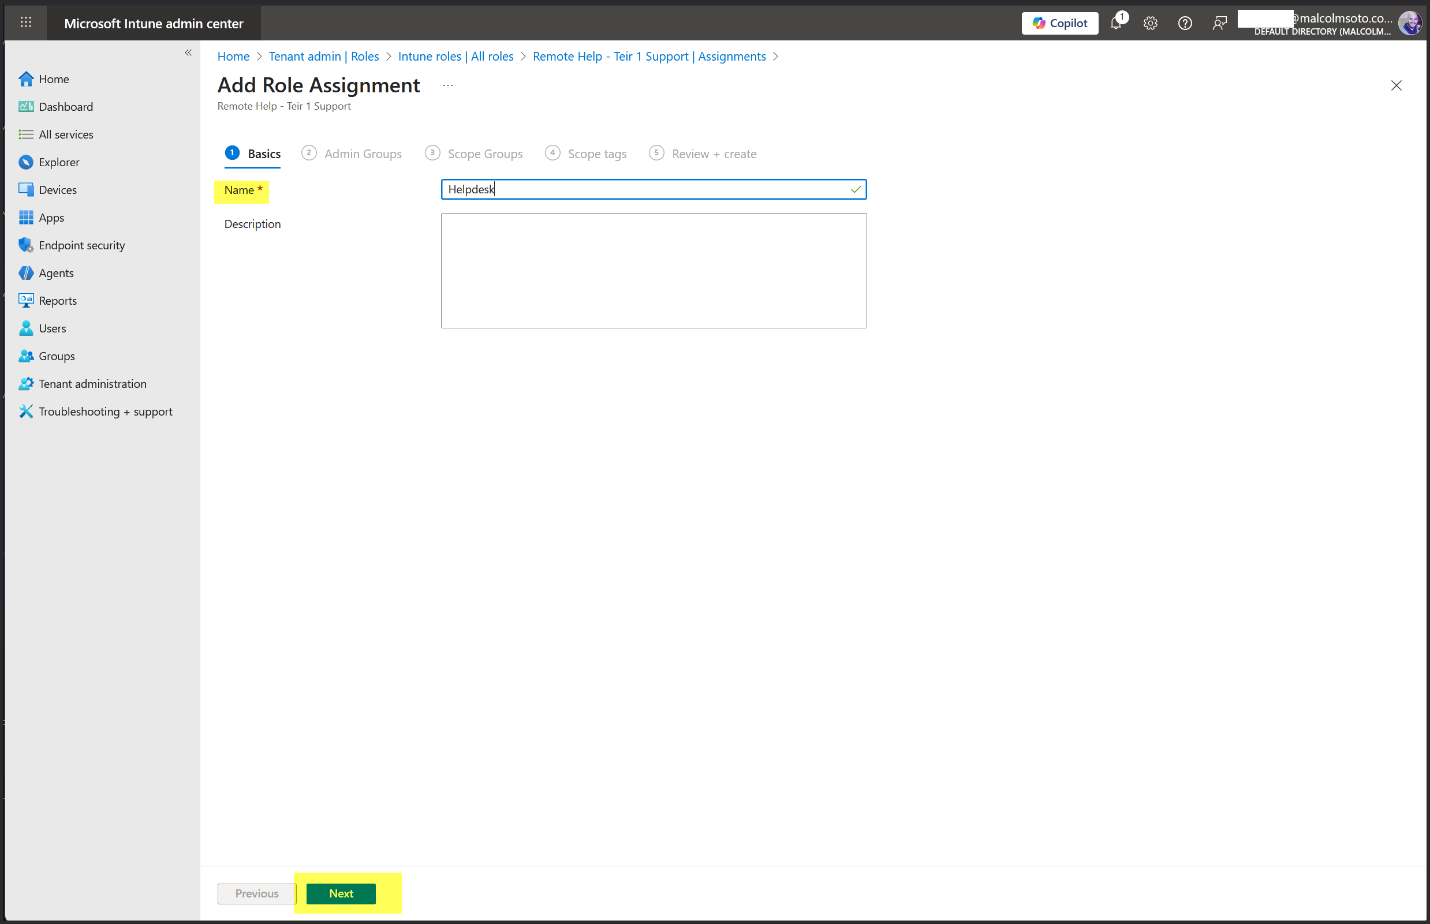
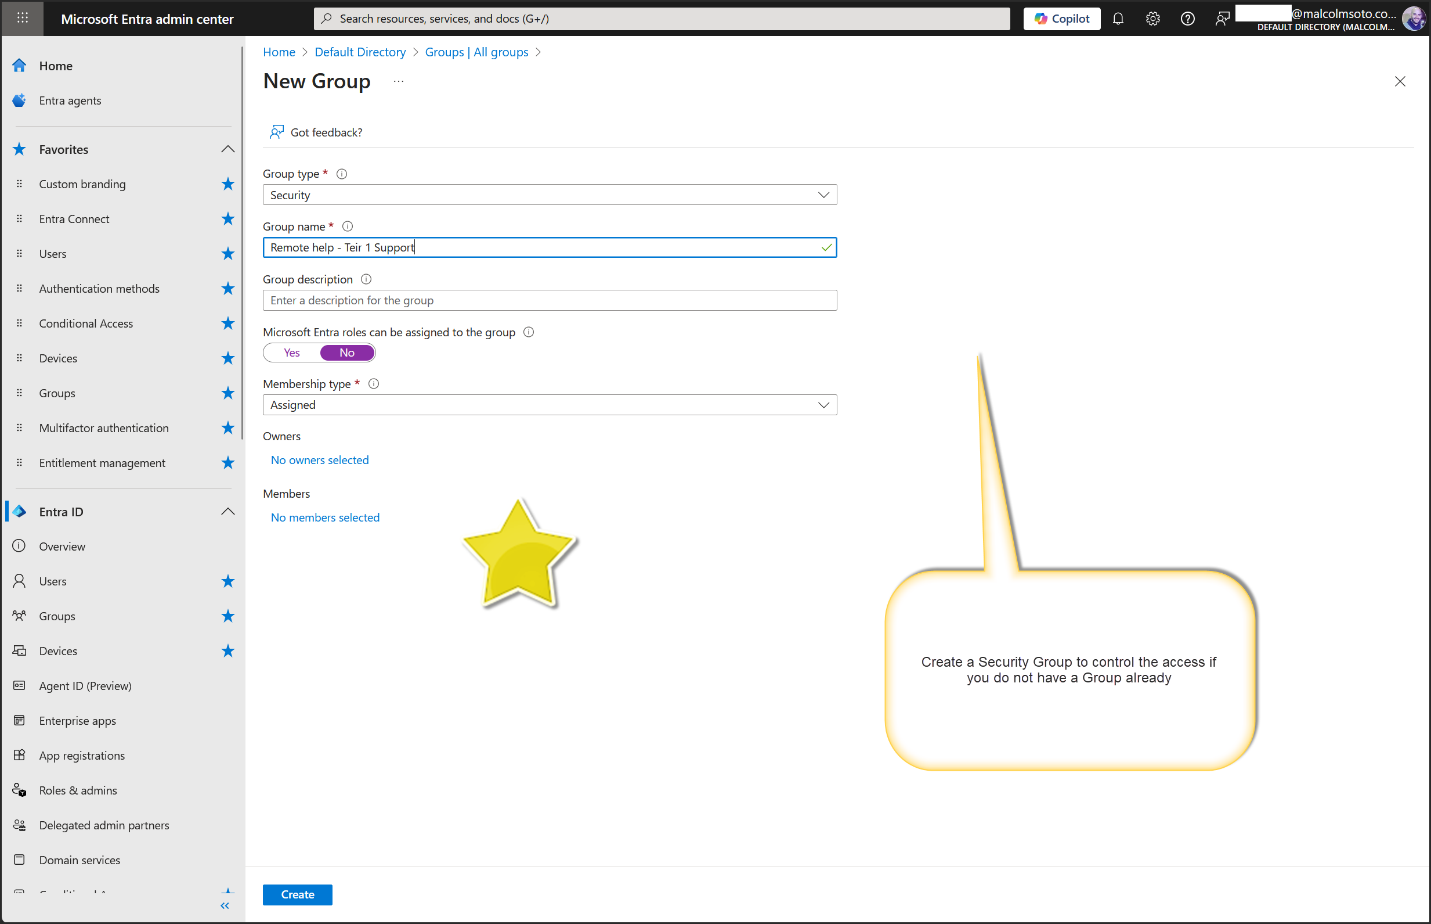
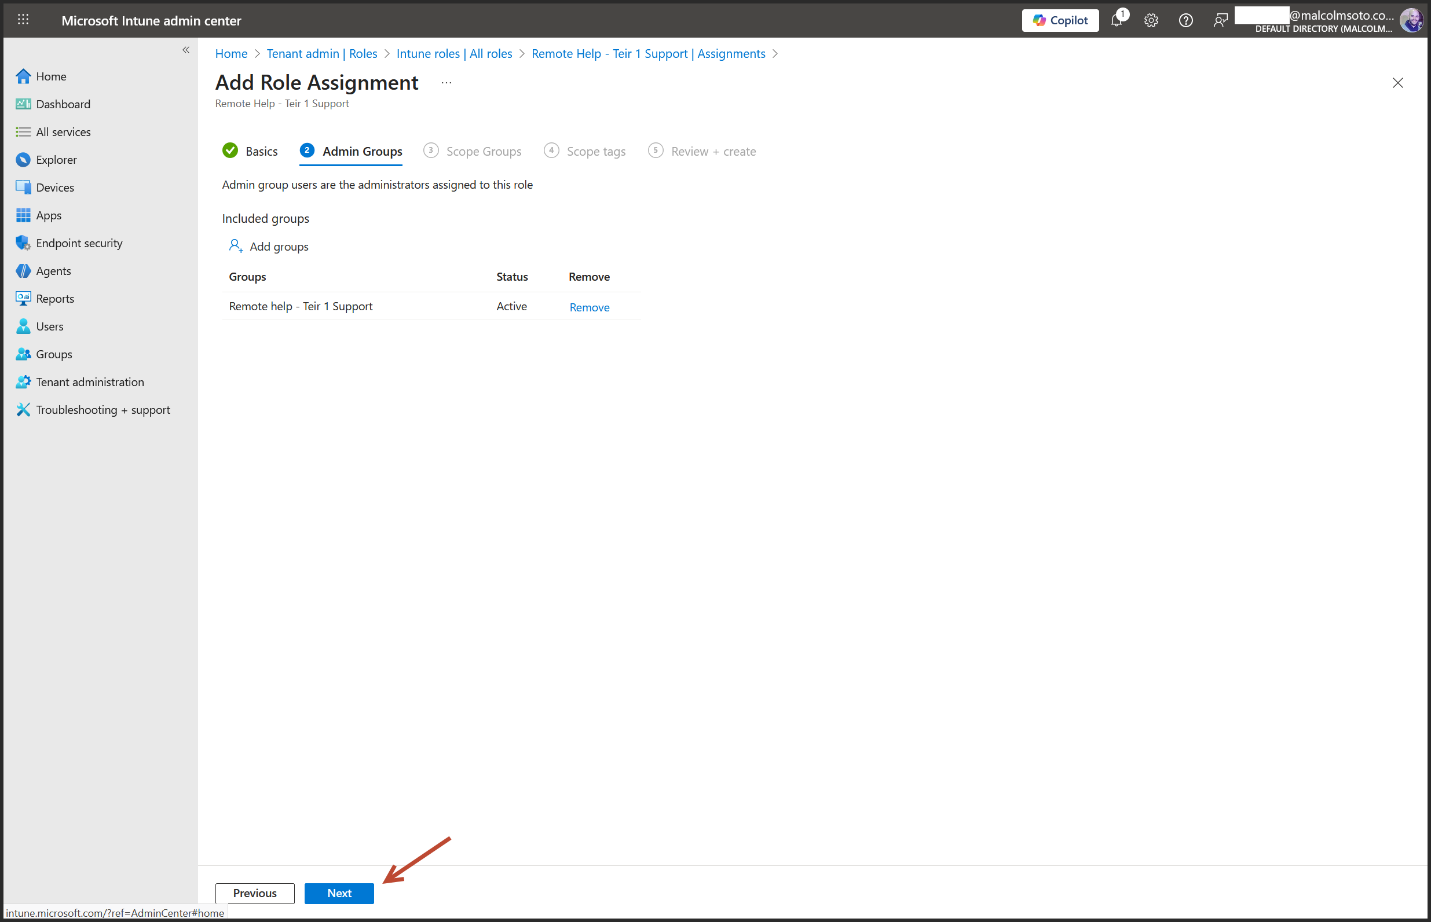
- Select Add groups. Admin Group users act as helpers and have access to the permissions defined for this role.

- Click Next
- In this setup, I am adding all users and devices, but for enterprise environments we would use groups to target the help desk scope.

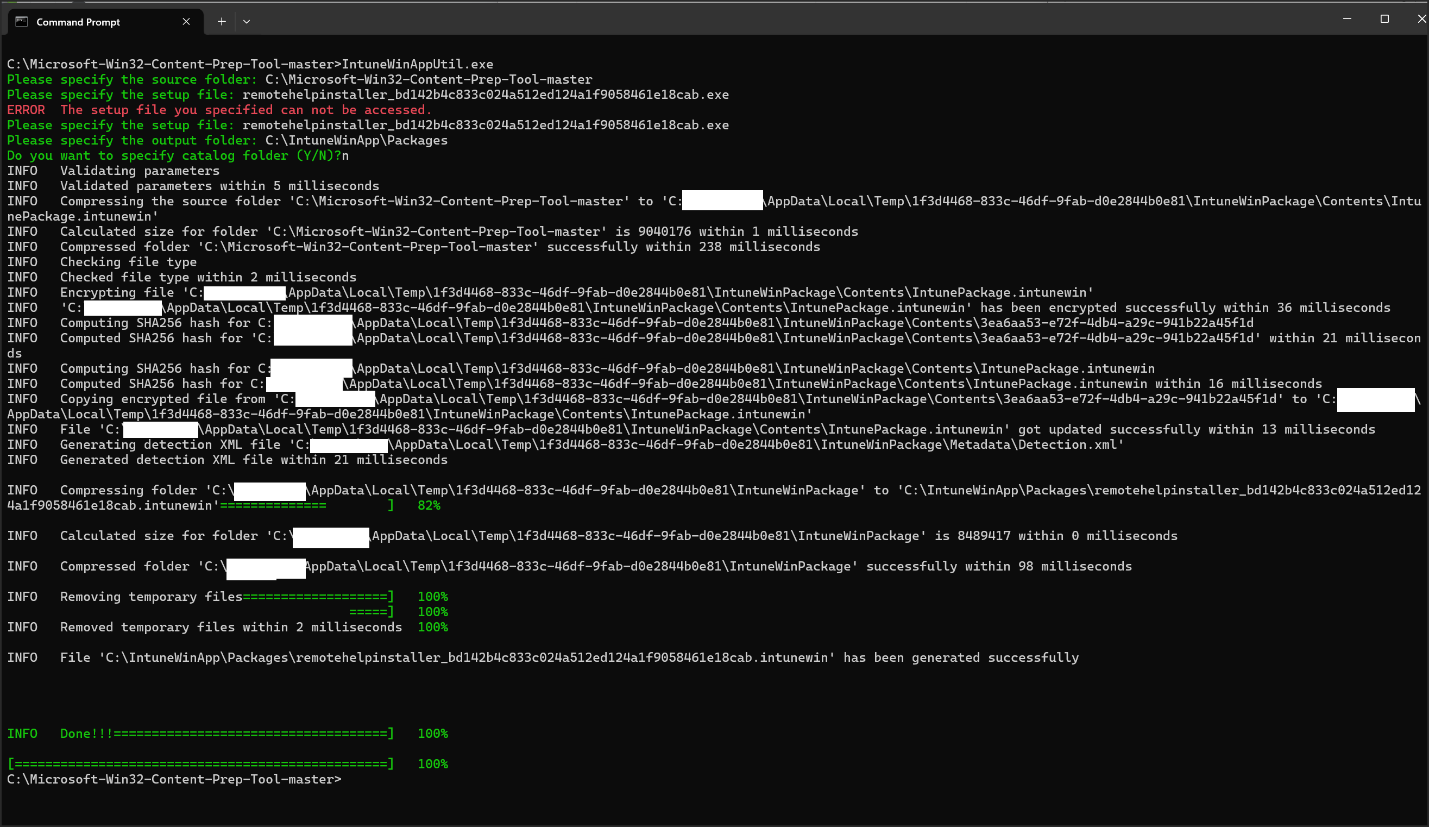
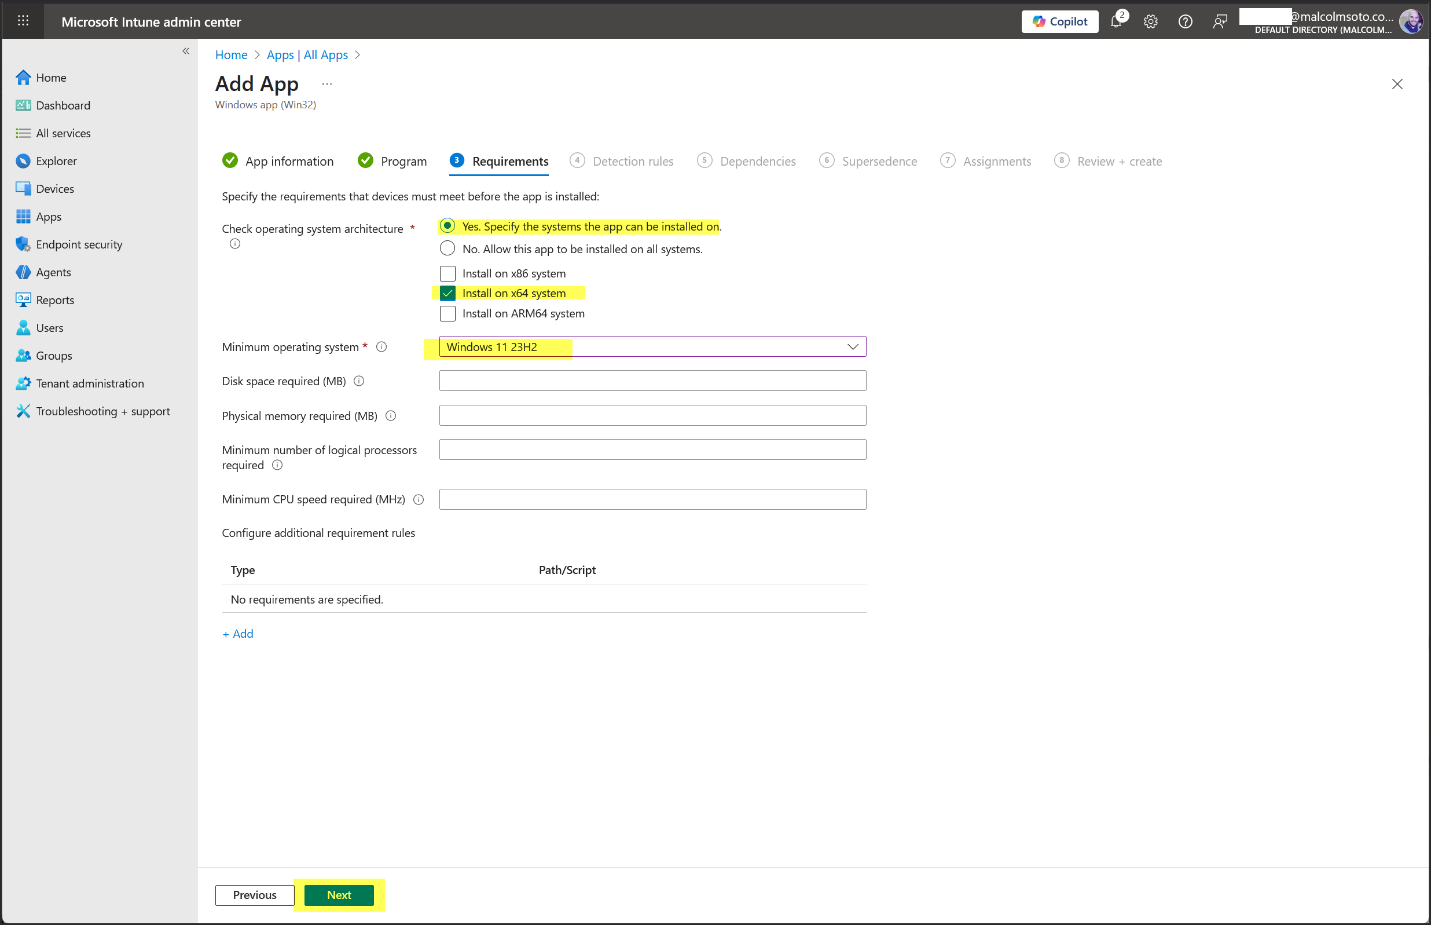
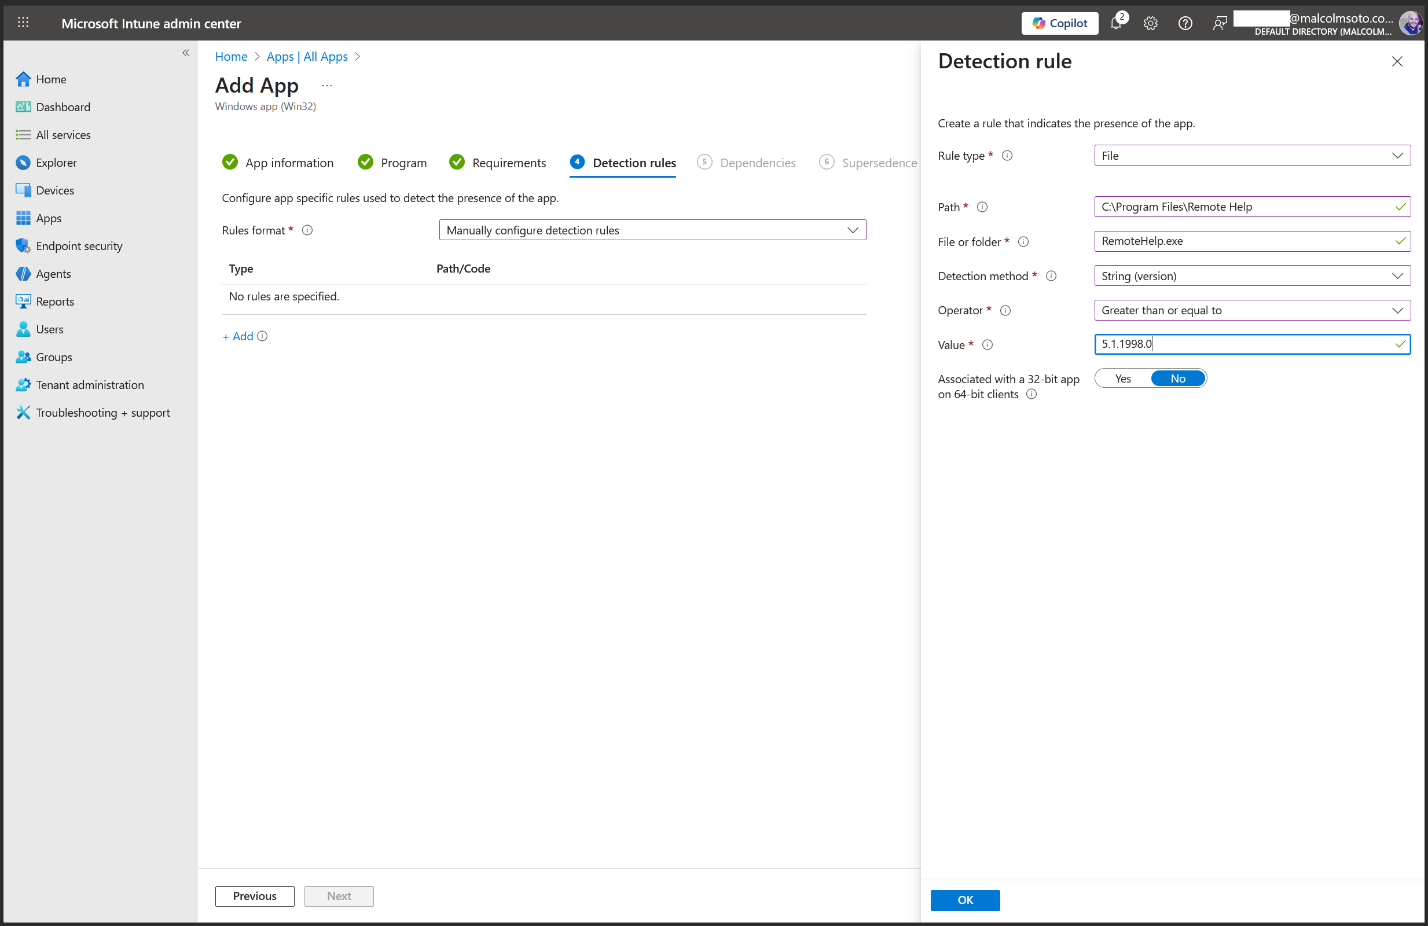
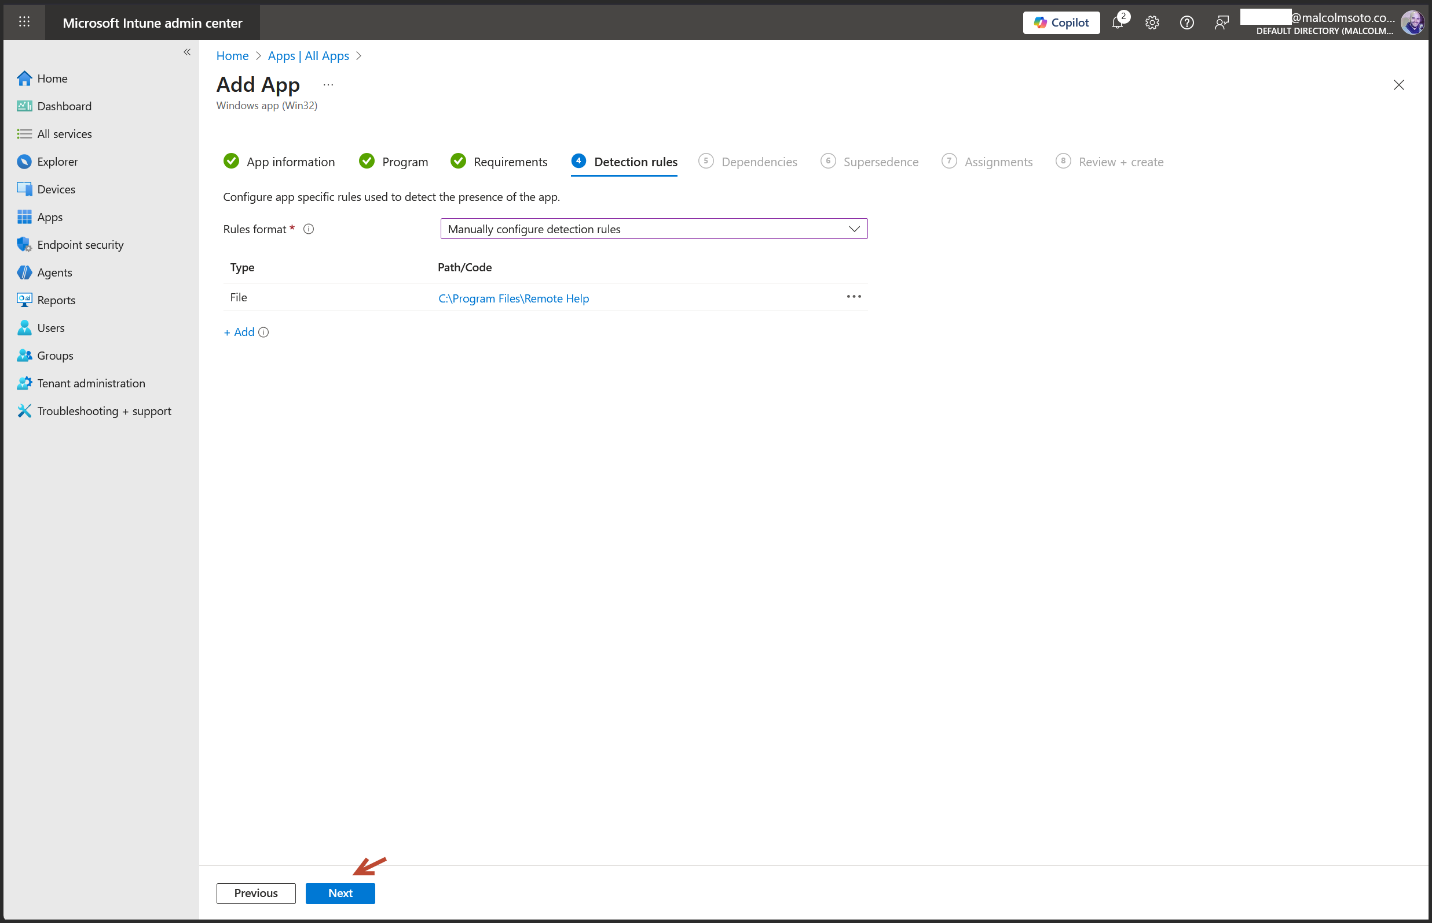
2. Configure the Remote Help app
- Download Remote Help from the link below:
- Download Remote Help apps (Microsoft Learn)
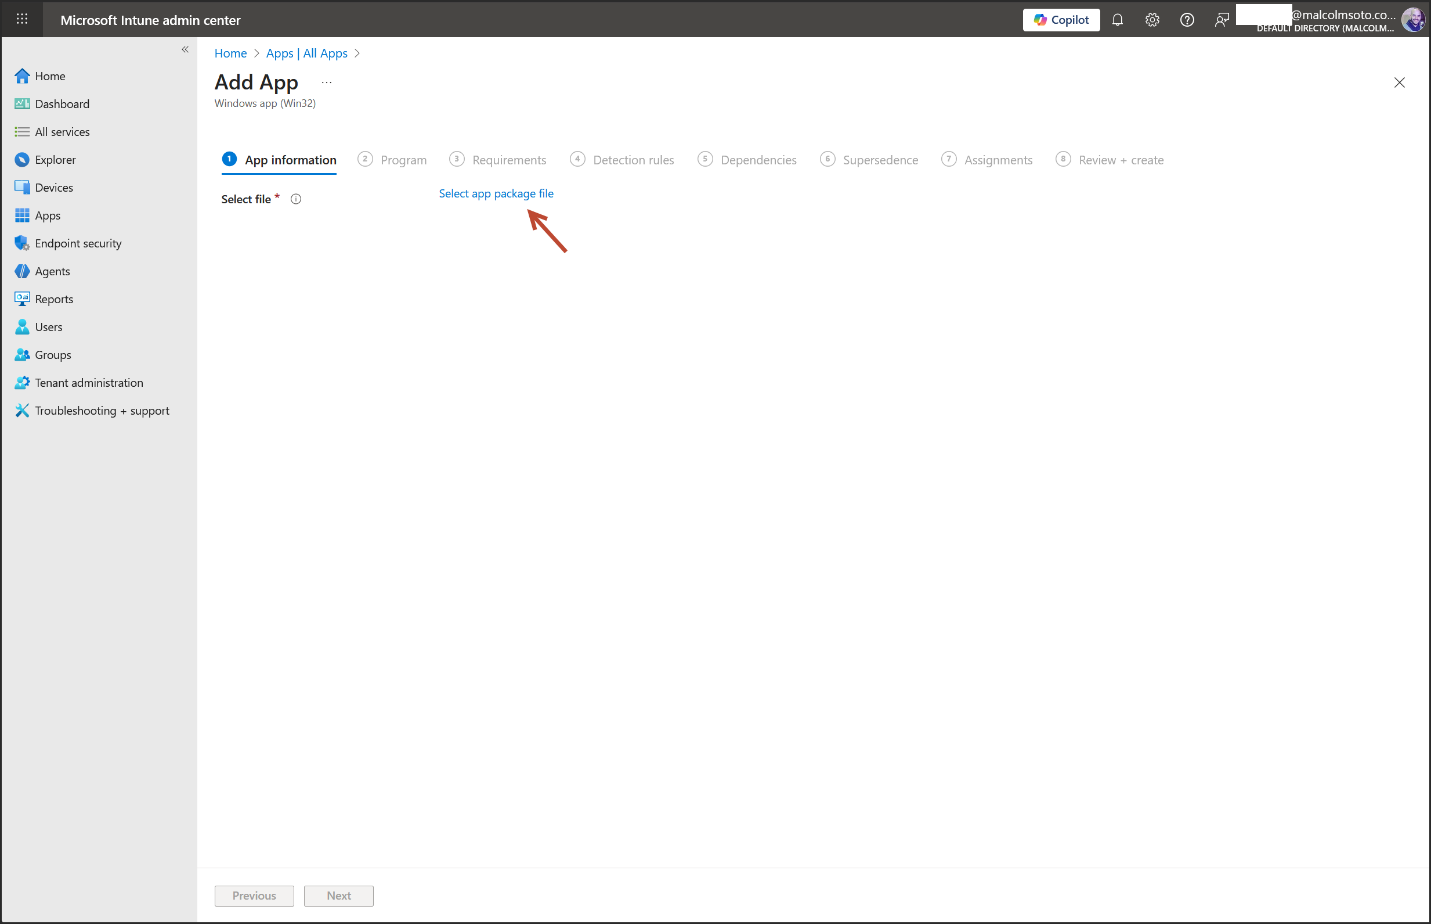
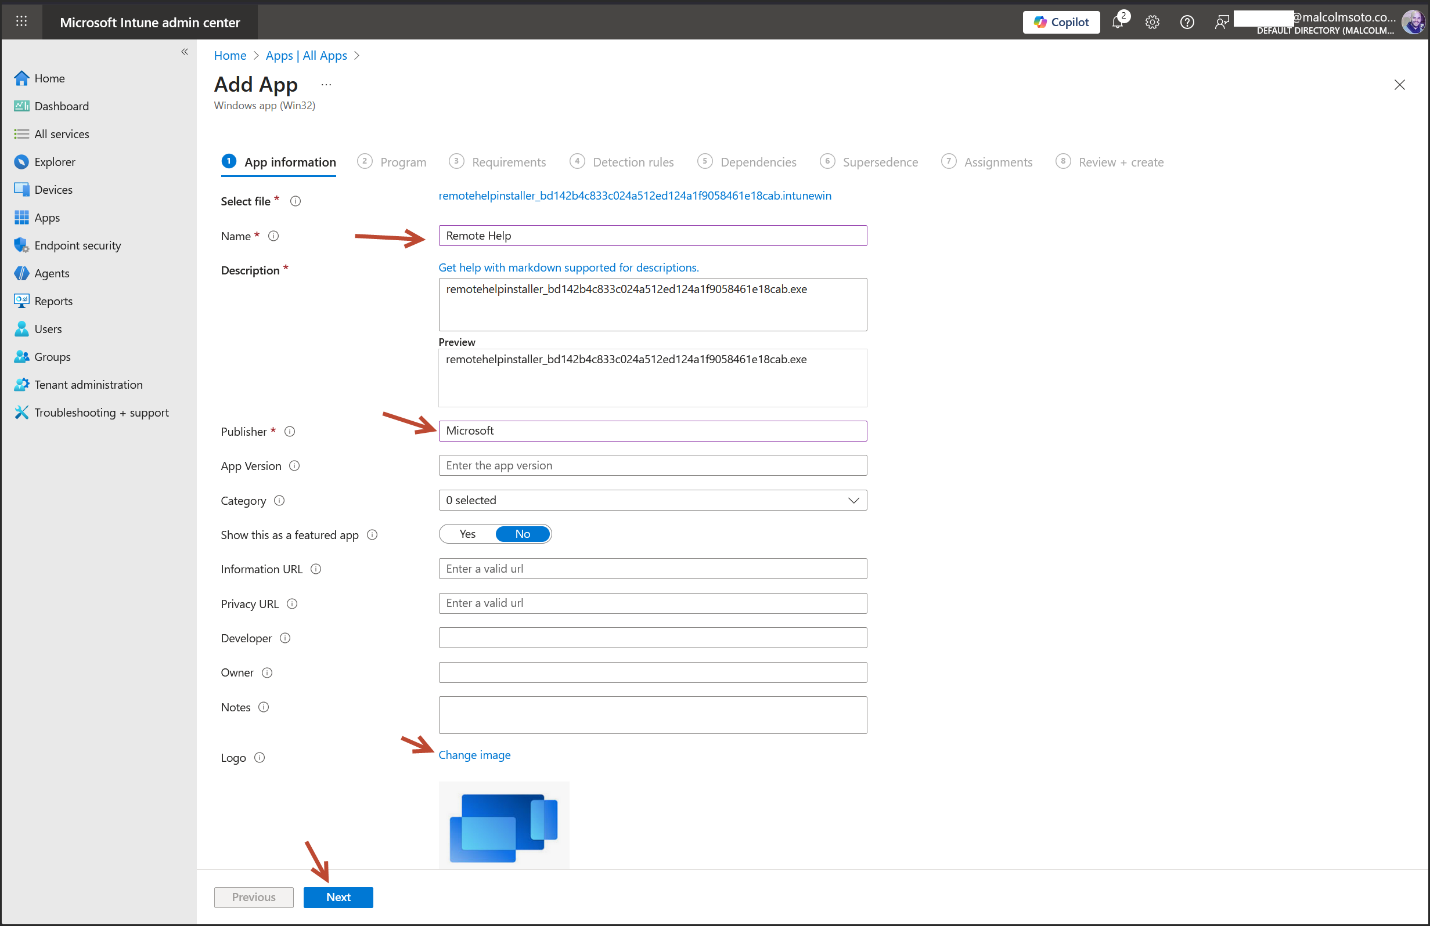
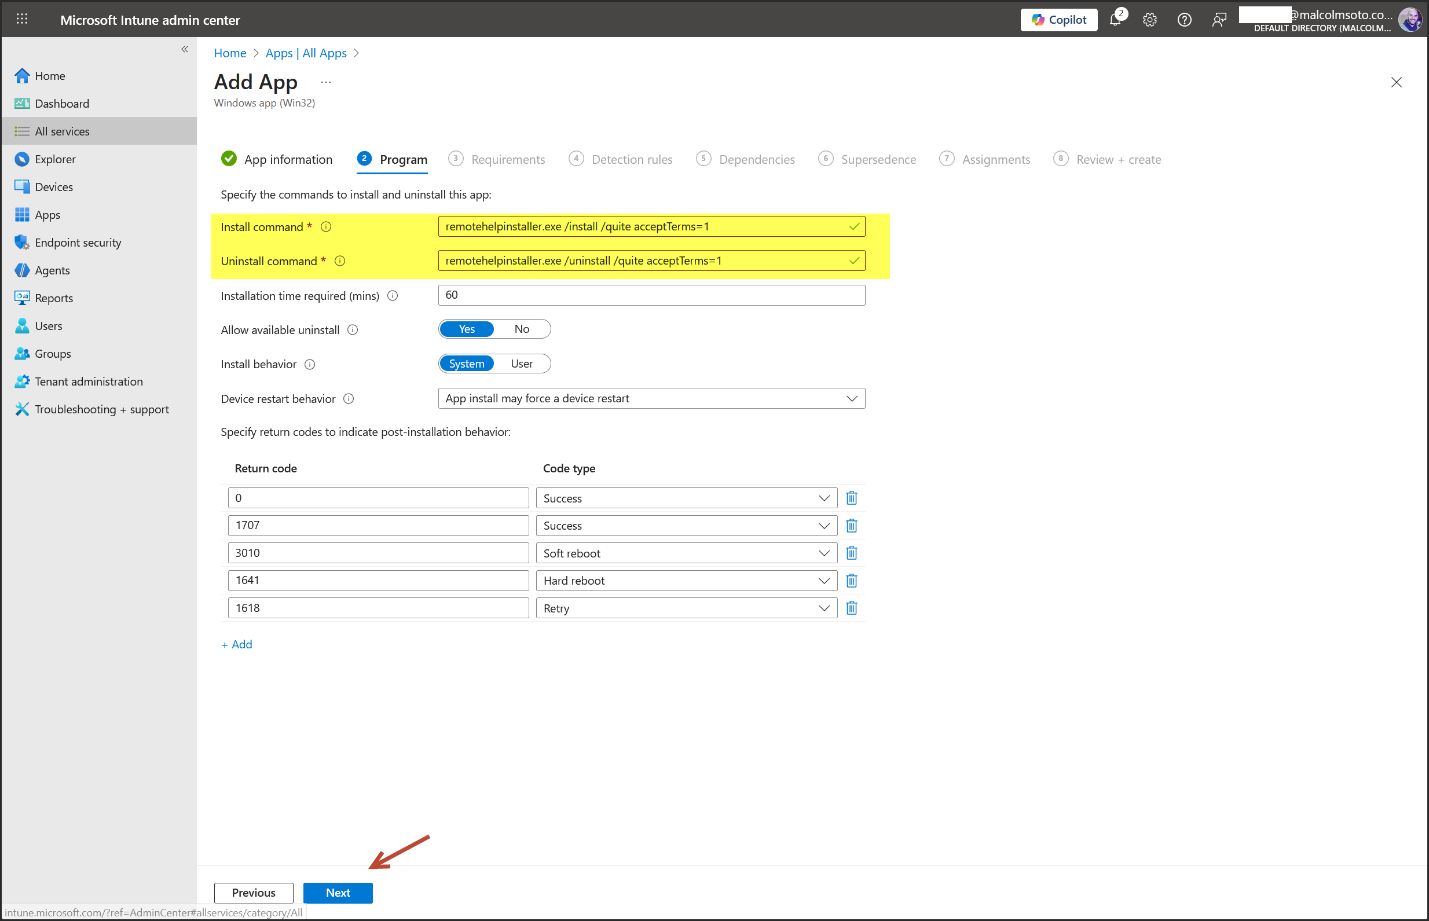
- Package it for Intune
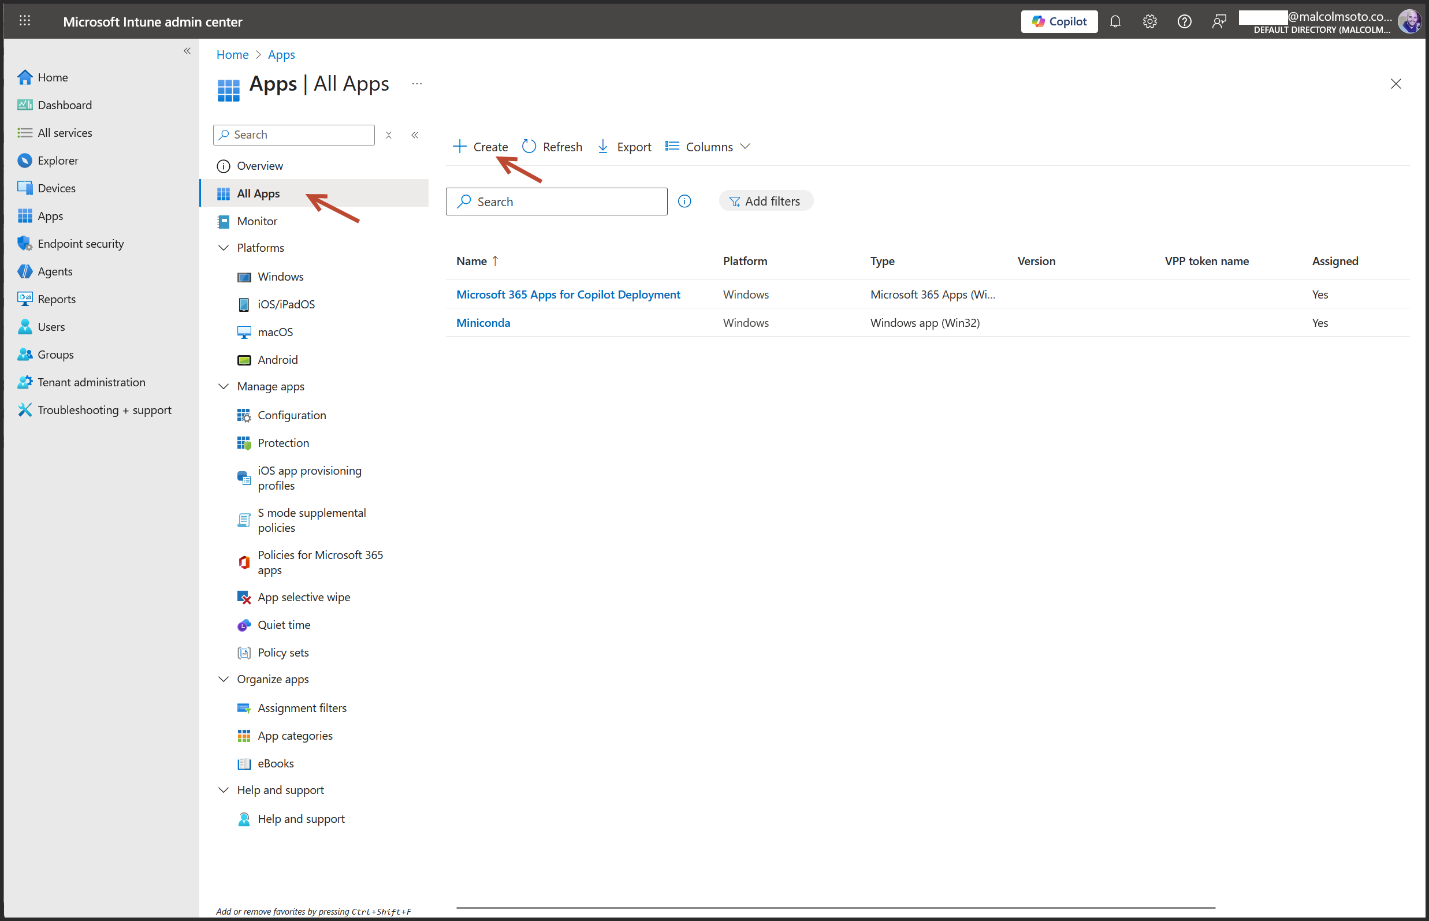
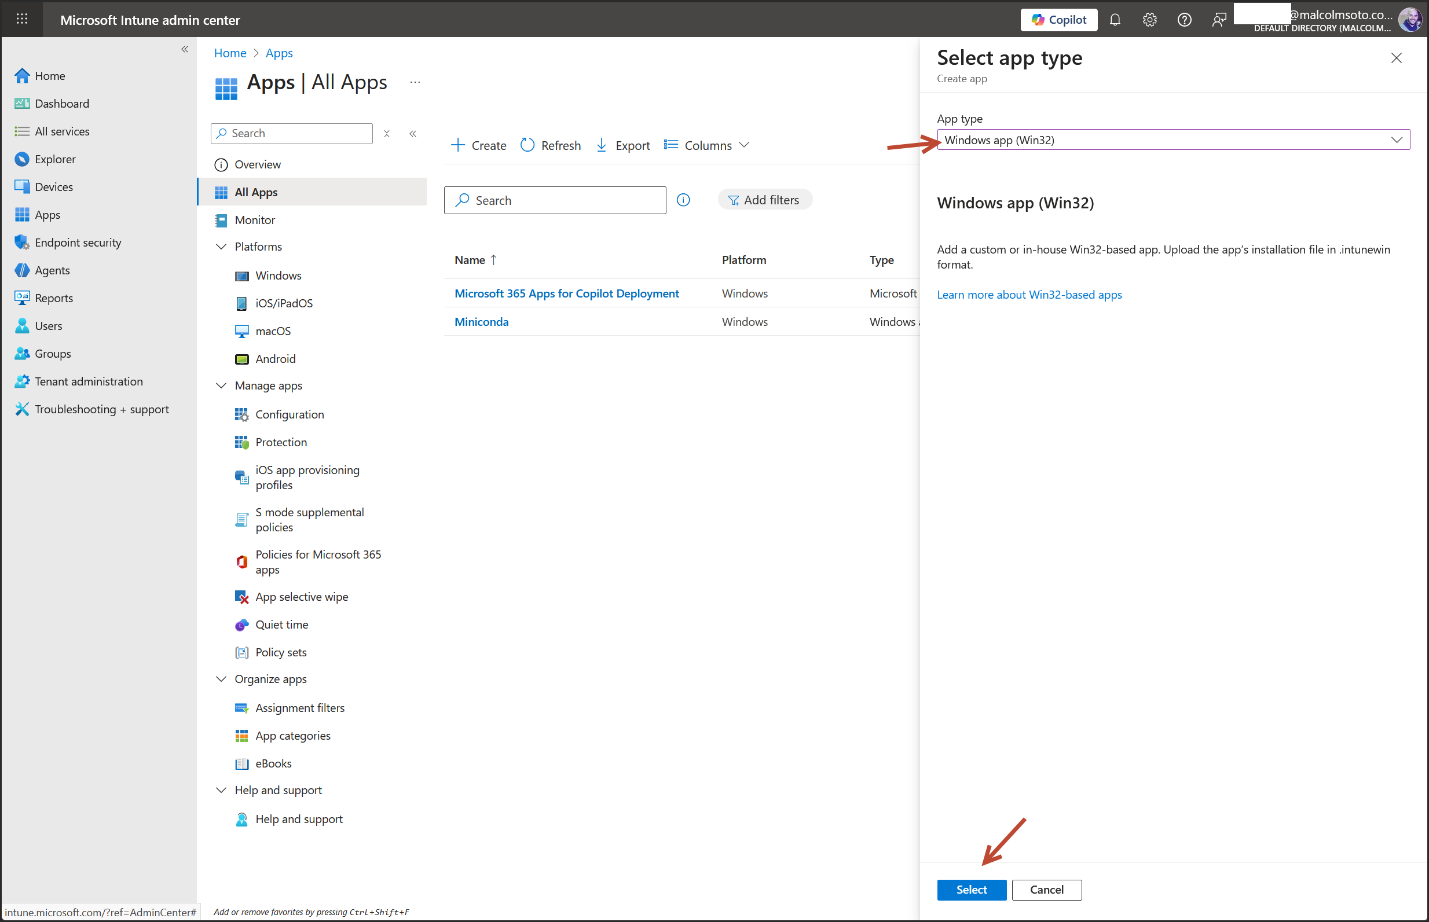
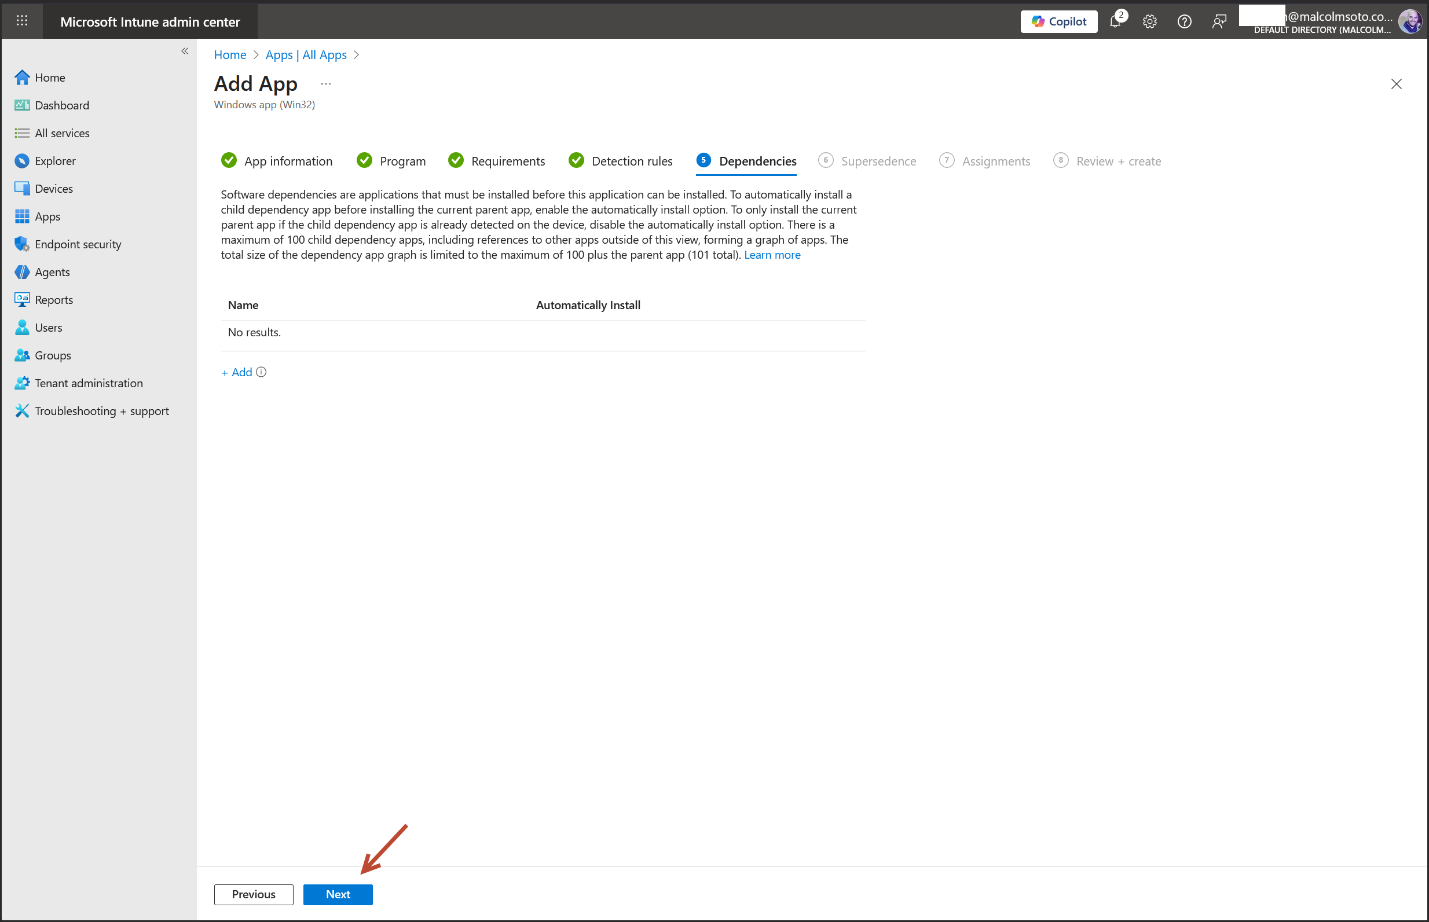
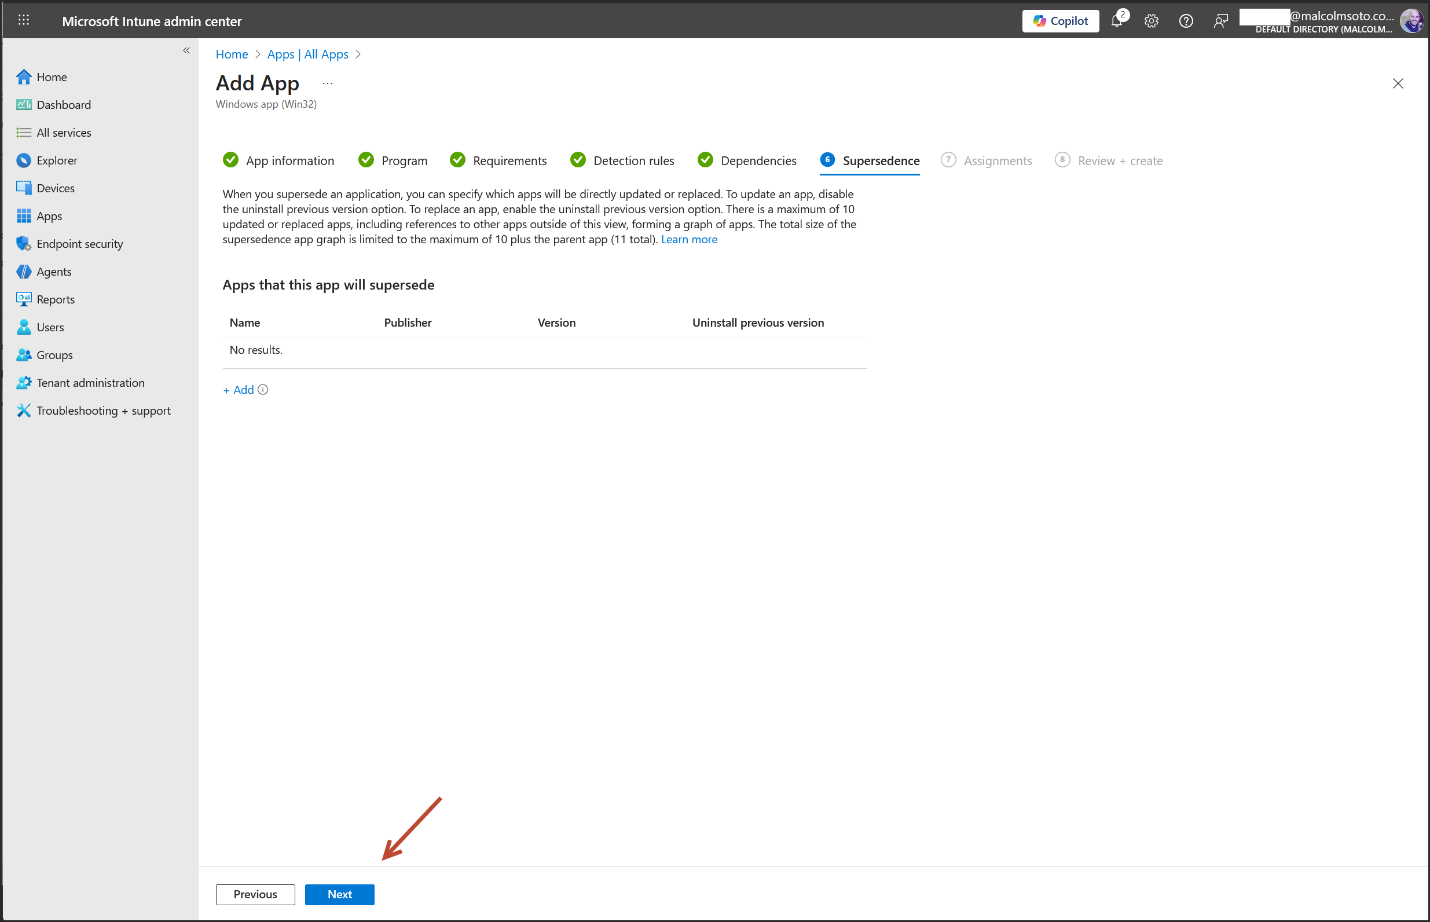
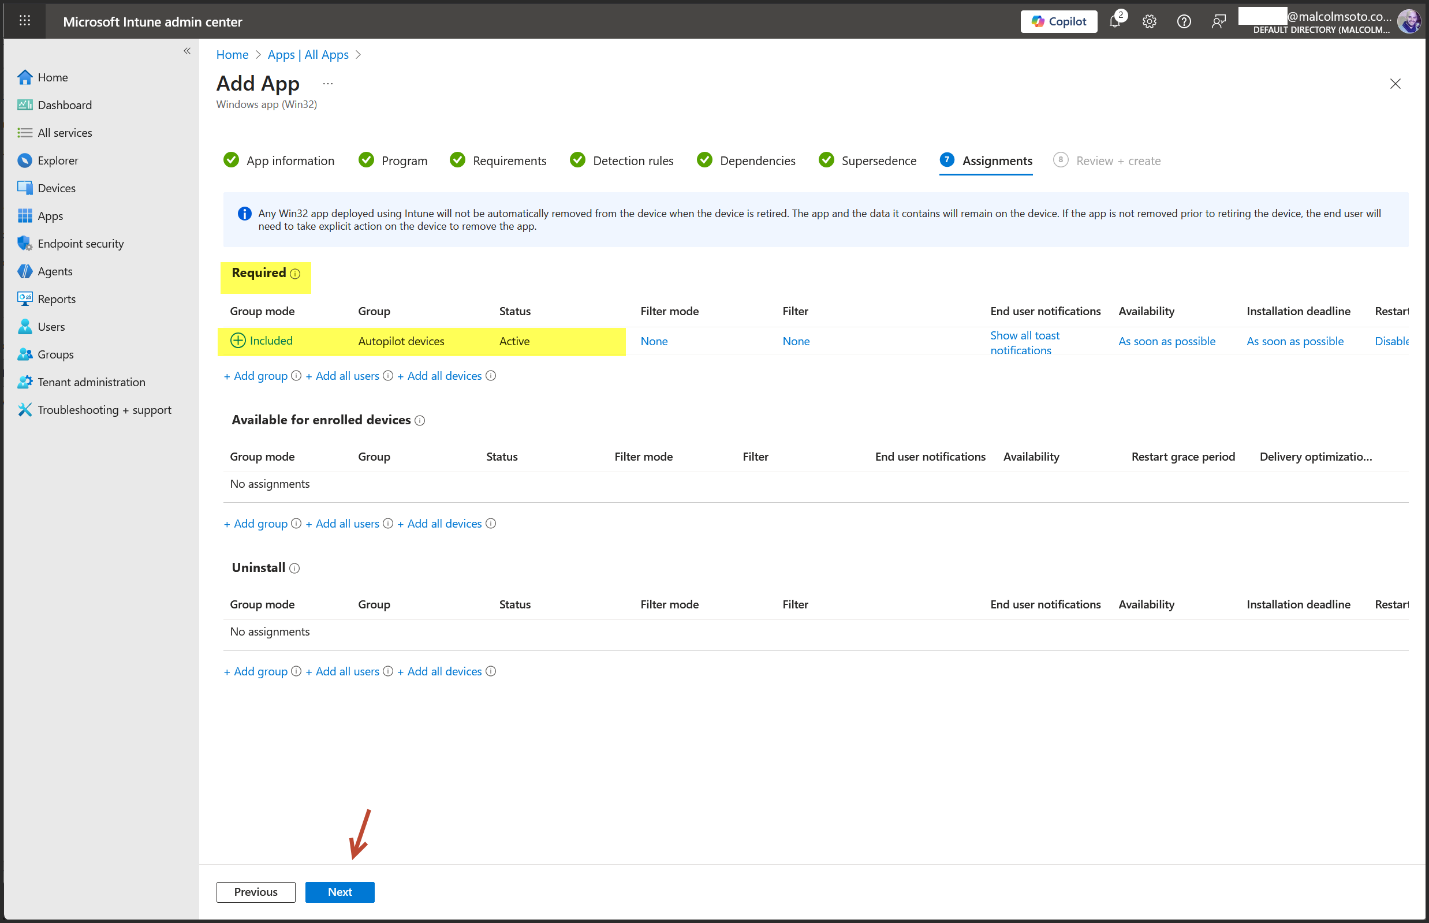
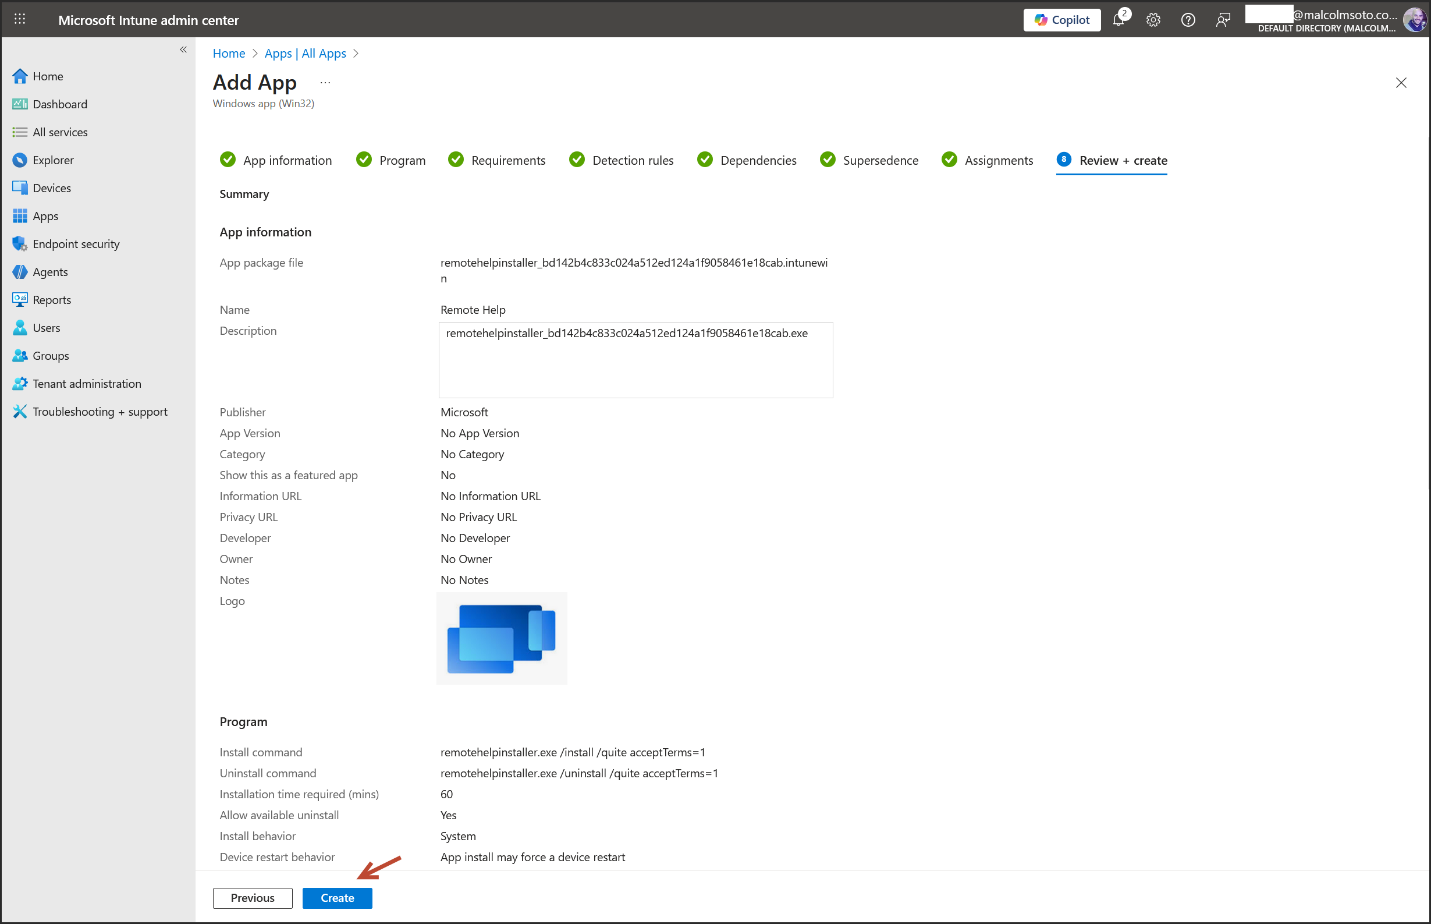
3. Deploy the Remote Help app
- Go to Intune > Apps > All Apps > Create
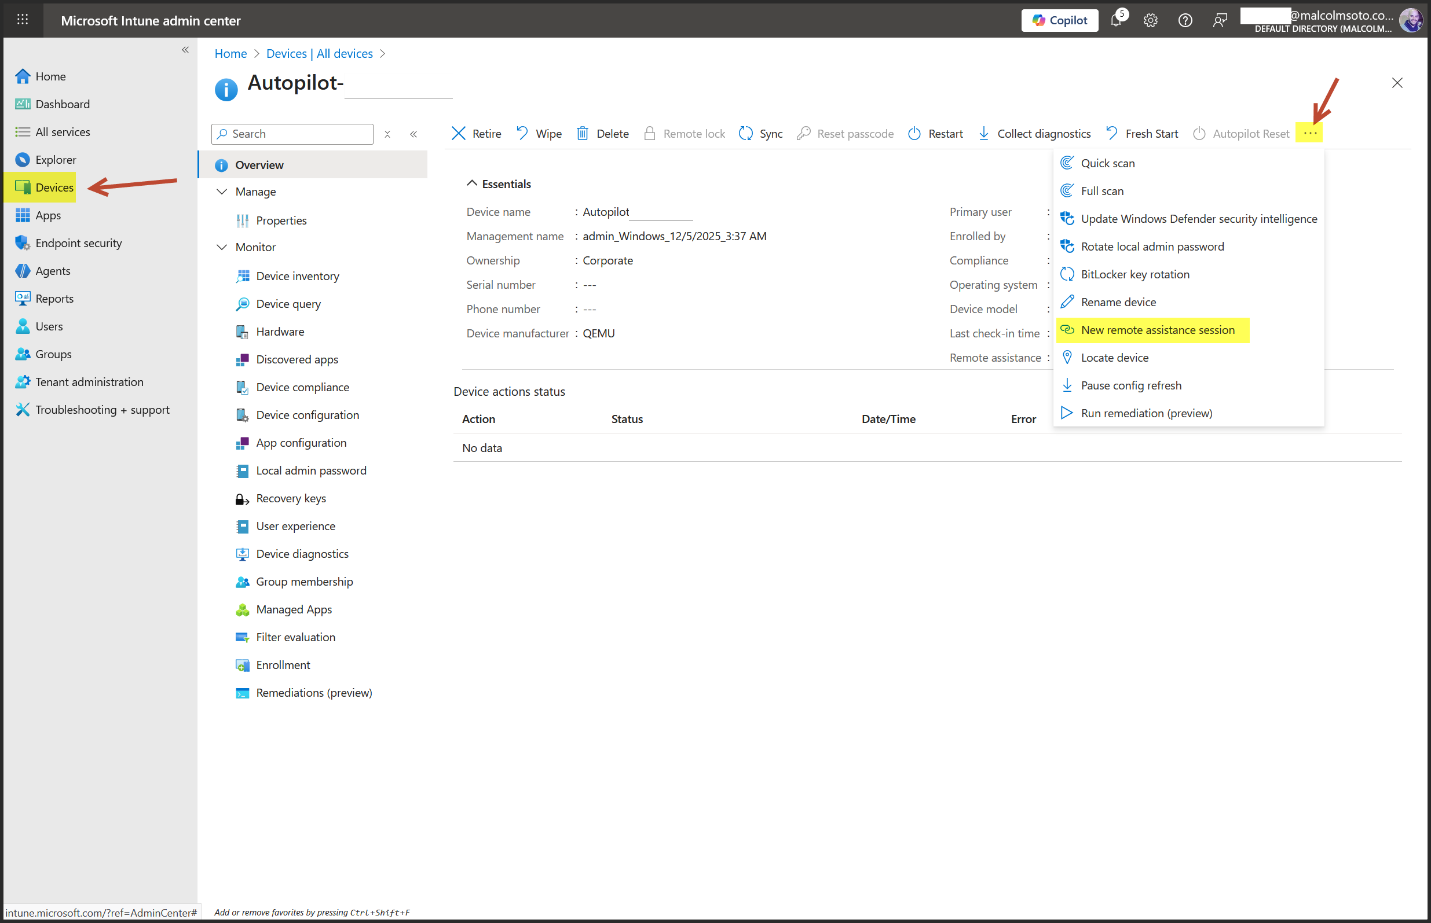
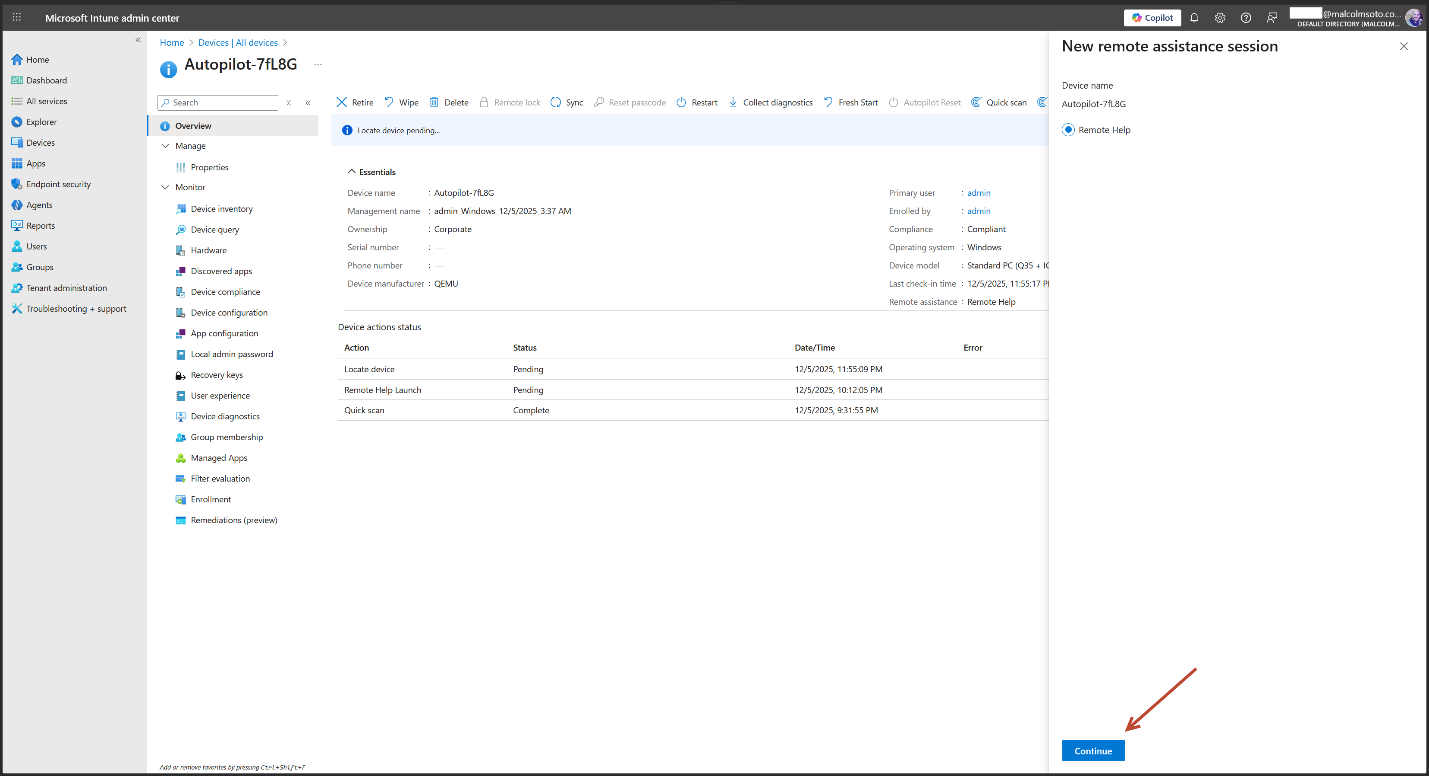
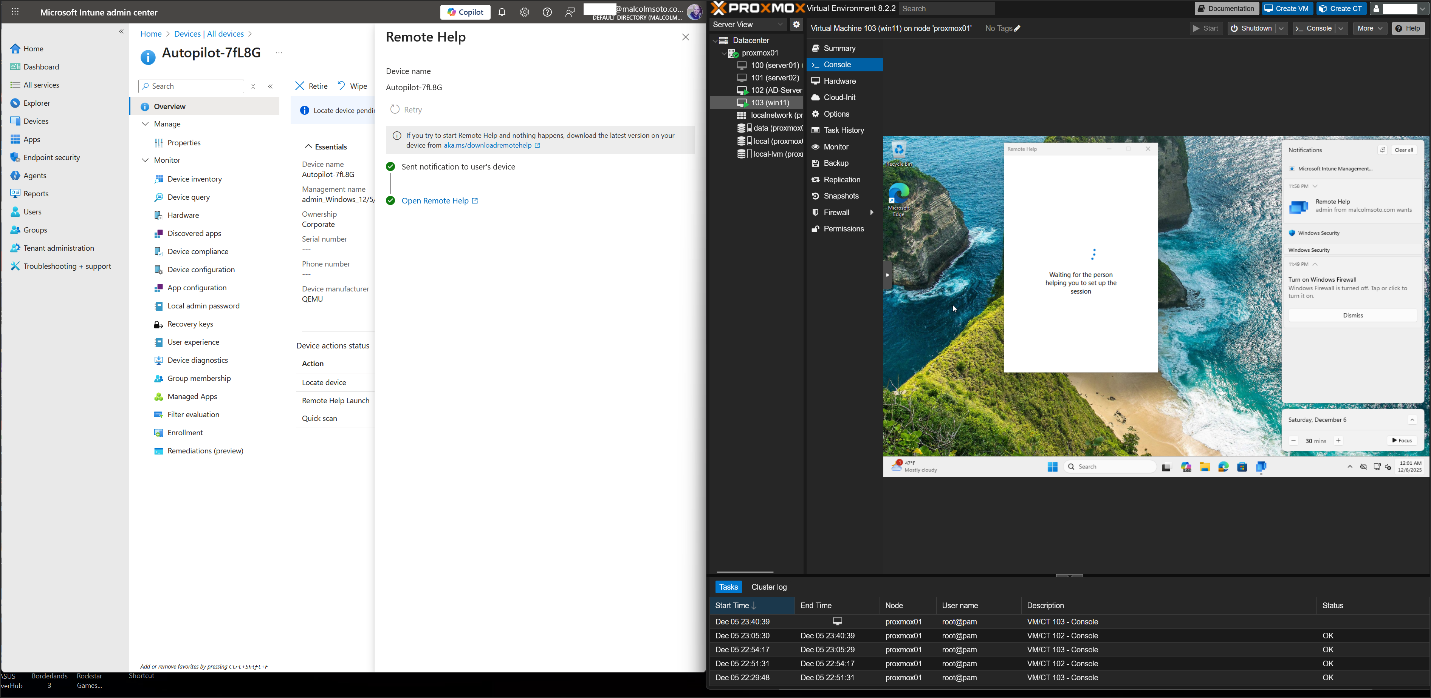
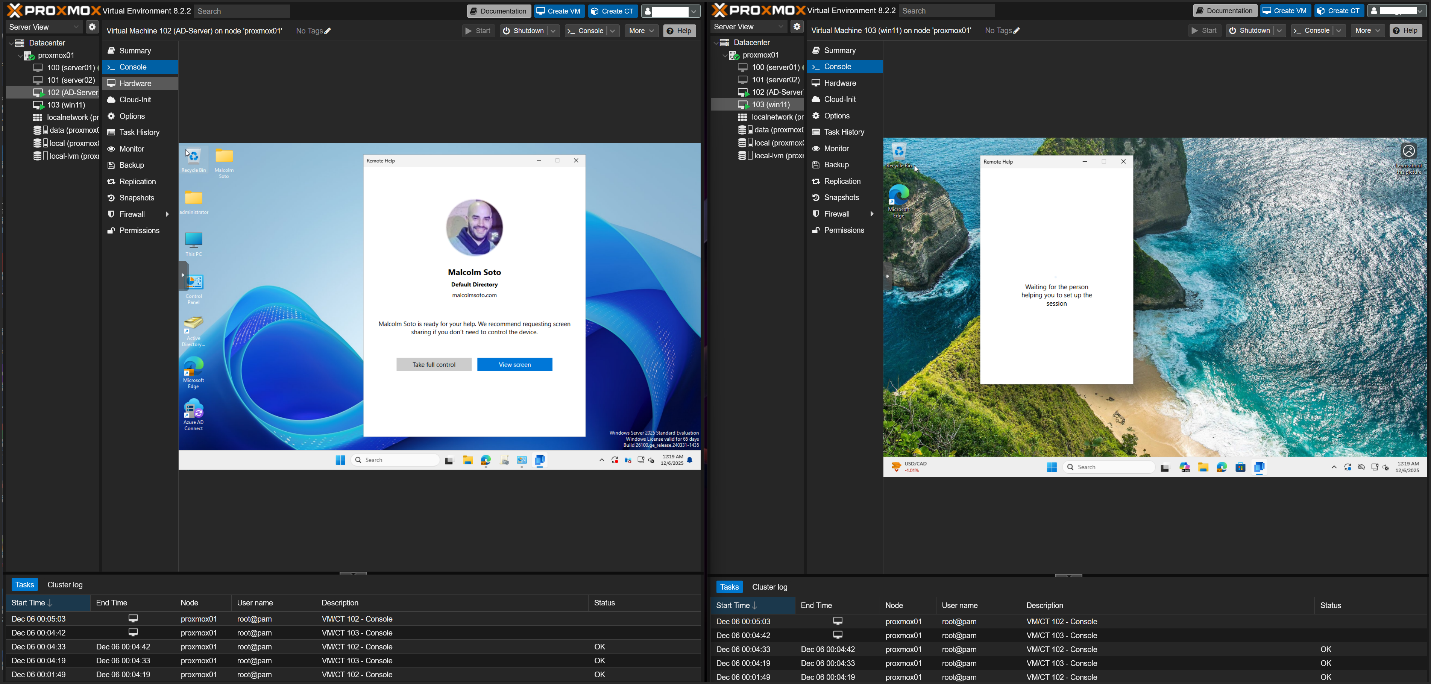
4. Start Remote Help
Complete the Setup
Remote Help empowers both small businesses and enterprises to provide secure, scalable remote support. Once the setup is complete, your team can assist users efficiently across devices and locations, ensuring productivity and confidence at scale.